Antomi - Multipurpose Shopify Theme
Multipurpose Shopify Theme
Introduction
Antomi - Multipurpose Shopify Theme
Thank you very much for choosing our theme. We truly appreciate and really hope that you'll enjoy our theme!If you like this theme, Please support us by rating us 5 stars..
Antomi – Multipurpose Shopify Theme is a robust theme adorned with numerous useful features for the authors and visitors. Setting Antomi – Multipurpose Shopify Theme as your website you can sell almost all kinds of products and service online. You can display Furniture Store and Men and Women Fashion, Readymade Garments, Kids Fashion, Ornaments, Cosmetics, Herbal Products Sports Products, Shoes and everything in the best way in Antomi Shopify theme. Antomi has lots of variations and creativity for the users. Antomi has 20+ Home Variations, 3 Header Variations, 3 Slider Variations, Shop list & Grid View, Variable & Countdown products, Multiple Blog Pages and FAQ page as well. We have worked best on the user’s convenience in this theme. This quick install theme has Shopify Builder, Theme Colors, Newsletter Popup, Notification Bar, Ajax Pop Cart, Ajax Wishlist, Quick View, RTL Support and Multiple Currency. In addition, to engage your visitors more into your business we have put options like Disqus comment, Facebook comment, Product review, Product Video, Testimonial options etc. On the other hand, Antomi Shopify theme is fully Responsive and Cross- Browser Compatible website demo. Furthermore, you will get Google Analytics, Google Font, A persuasive Documentation and easy customization in this Shopify theme. Install Antomi Multipurpose theme and enjoy the best experience of eCommerce business.
- By: HasThemes
- URL: https://hasthemes.com/
- HelpDesk: https://hasthemes.com/contact-us/
Theme features
- 20+ Home Version
- 3 + slider Version
- 30+ Drag & Drop Section
- 2+ Header Variation
- Footer Variatio
- Dropdown Menu
- Slick slider
- Featured Product
- Tab With Product
- 3 + Banner Style
- 3+ Category Banner
- Brand Logo
- Video Banner
- Services
- Latest Blog
- Ajax Popup Cart
- Ajax Sipnner Cart
- Redirect Add To Cart
- QuickView
- Newsletter Popup
- Notification Bar
- Multiple Currency
- Breadcrumb banner
- Shop Grid View
- Shop List View
- Collection Sorting
- Facebook comment
- Disqus Comment
- Custom Tab
- Related product
- Quick Install
- Shopify Builder
- Theme Colors
- Newsletter Popup
- Notification Bar
- Ajax Popup Cart
- Ajax Wishlist
- QuickView
- Newsletter
- FAQ
- Disqus comment
- Facebook comment
- Product review
- Product Video
- Custom Tab
- Shortcodes
- Coming Soon page
- 15+ Preloader
- Coming Soon Page
- Fully Responsive
- Cross Browser Optimization
- Well Documentation
Photo Credit
Need Support?
- If you have any questions regarding to theme issues, please submit a ticket at https://hasthemes.com/contact-us/
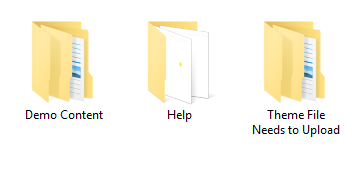
Files Included
- Demo Content - (Presets, Demo Products)
- Help - (Documentation, theme-install.wmv, import-demo.wmv)
- Theme File Needs to Upload - (Antomi-v-1.0.0.zip)
Theme Installation
Extract your download file and upload Theme file (theme-name-vx-x-x.zip)
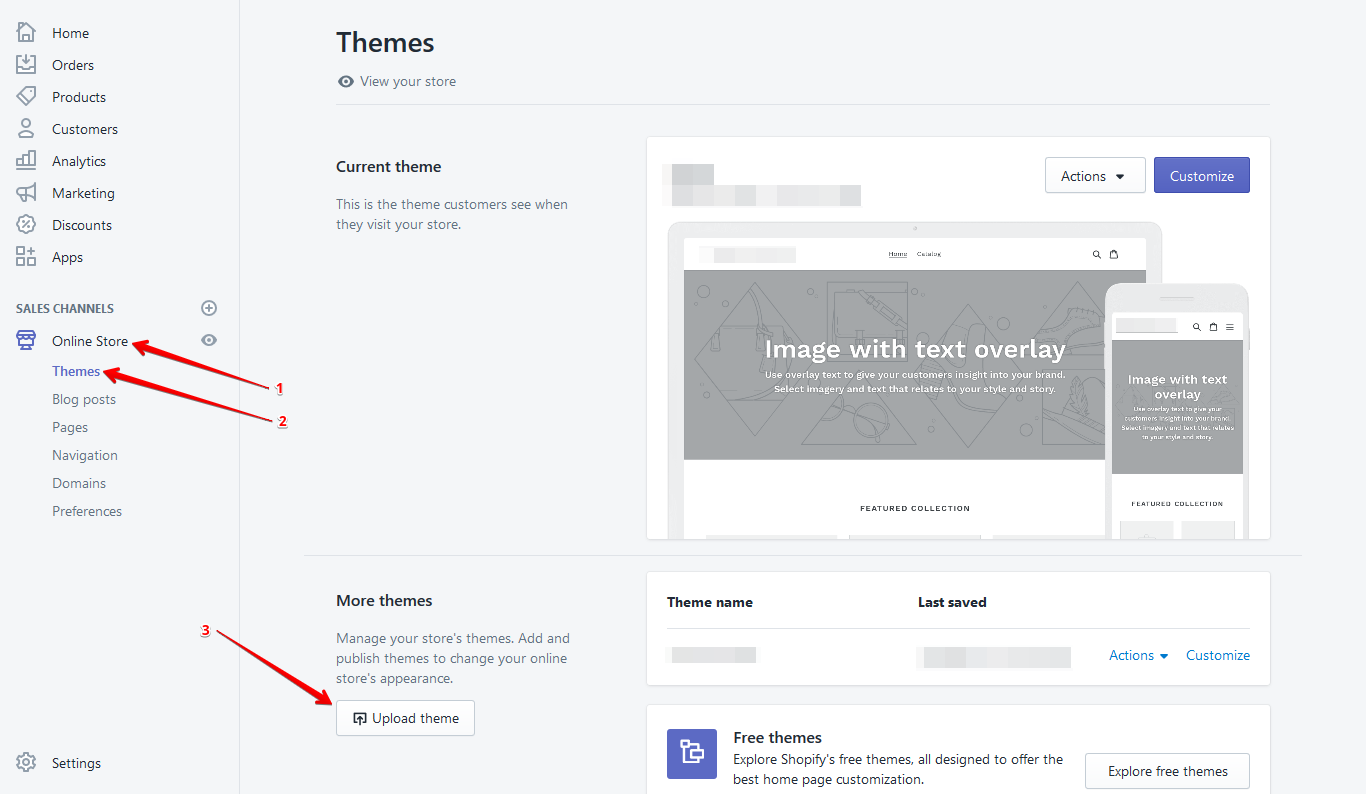
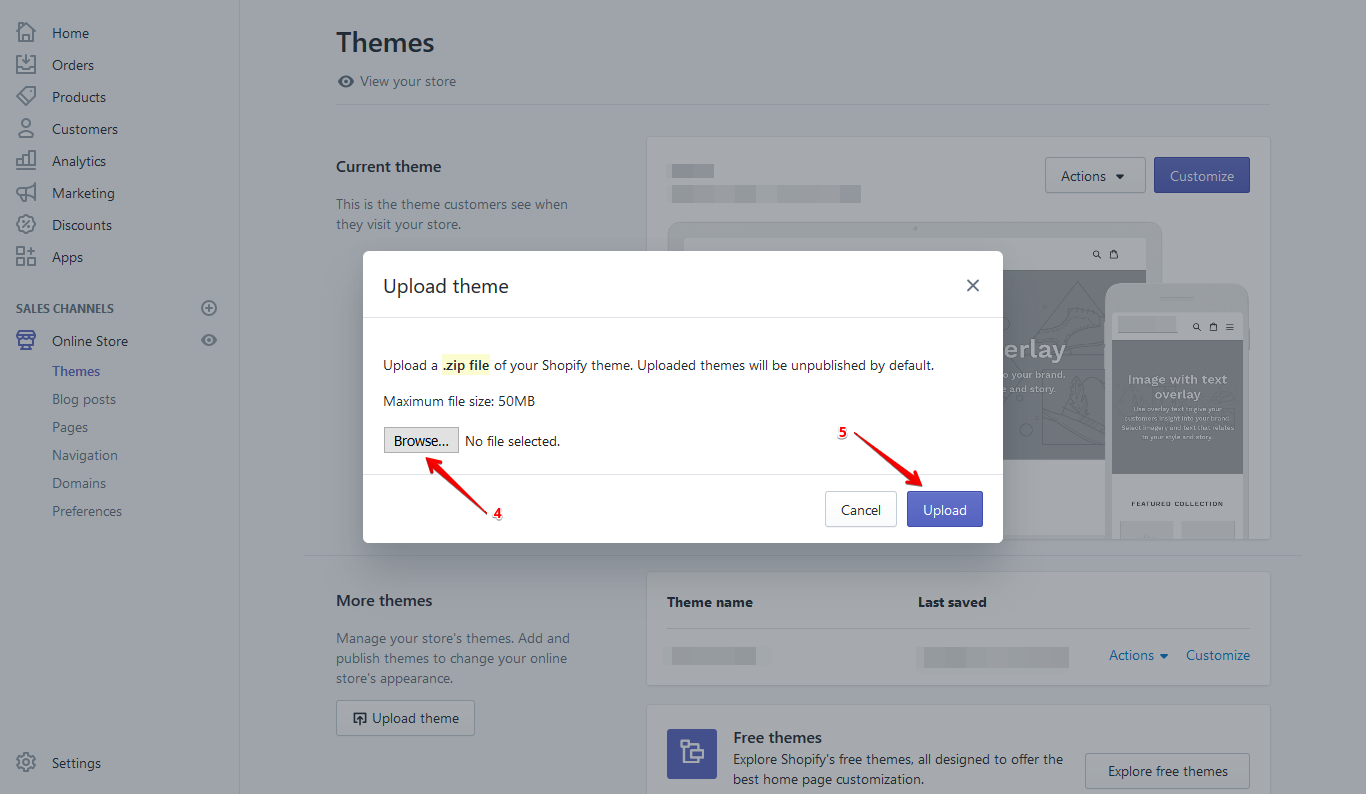
Install theme via Shopify Dashboard
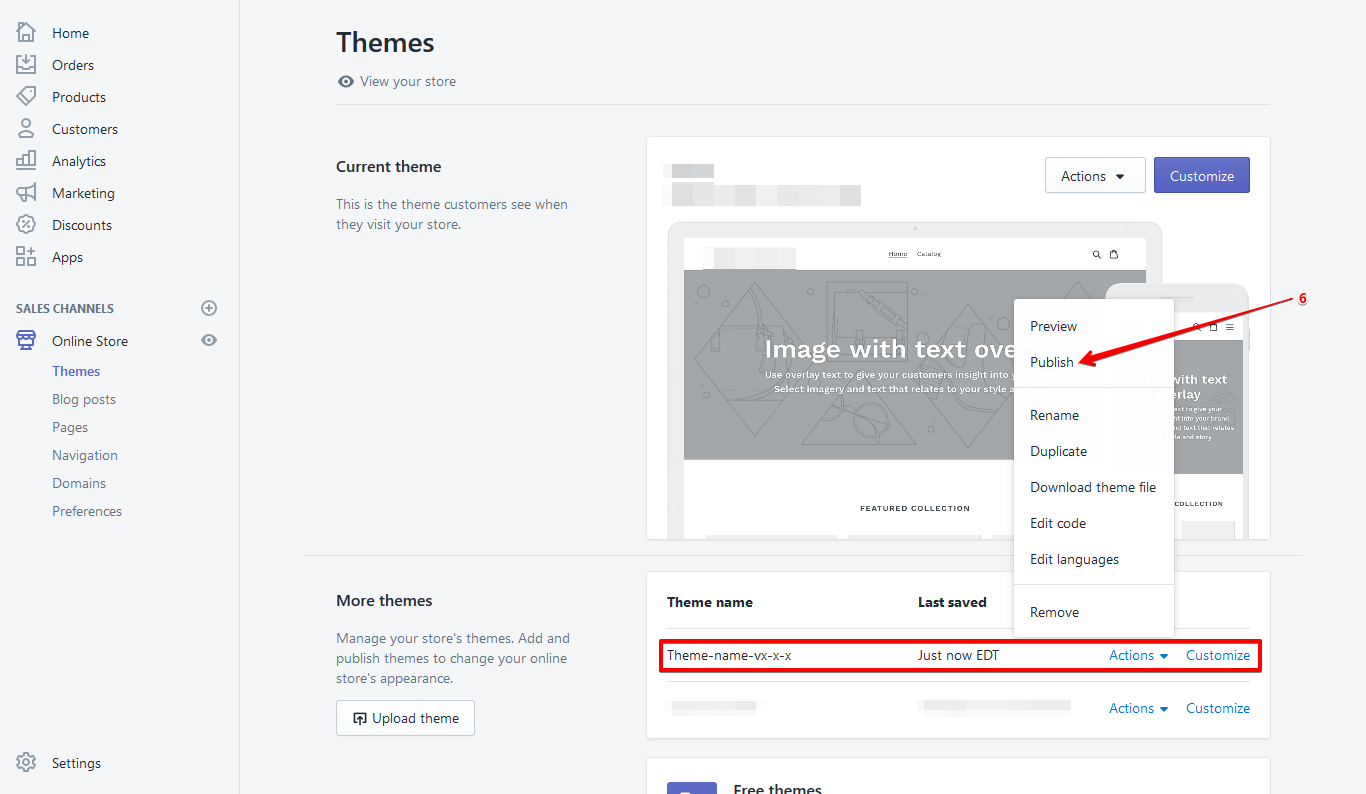
- Login the Shopify backend and click "Online Store"
- Upload the zip file that contains the theme file
- Finally Publish it
Video Example
Import Demo Content
If you want to design your store like our demo/preview site
- Demo content files are included in the downloadable file (that you have downloaded from our market place)
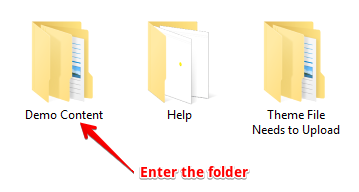
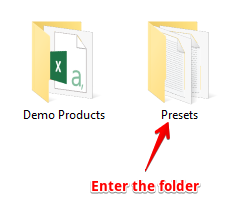
- Go to "Demo Content" folder and open "Presets" folder
- Choose any preset file, open it using any text editor (e.g. notepad, notepad++) and copy all the code.
- Now go to your online Shopify store backend Click "Online Store"
- Click on “Actions” button then click "Edit Code"
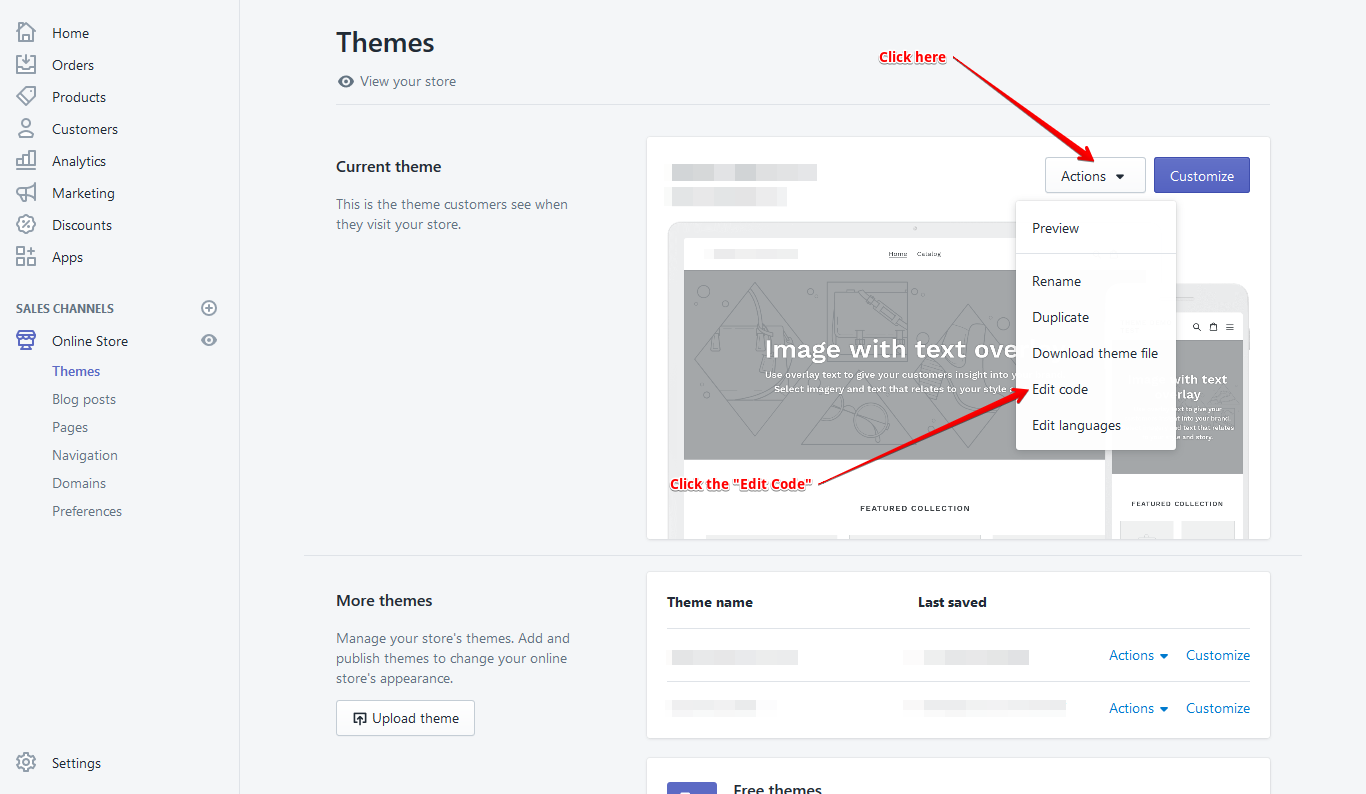
- Open "settings_data.json" file and paste the copied code here
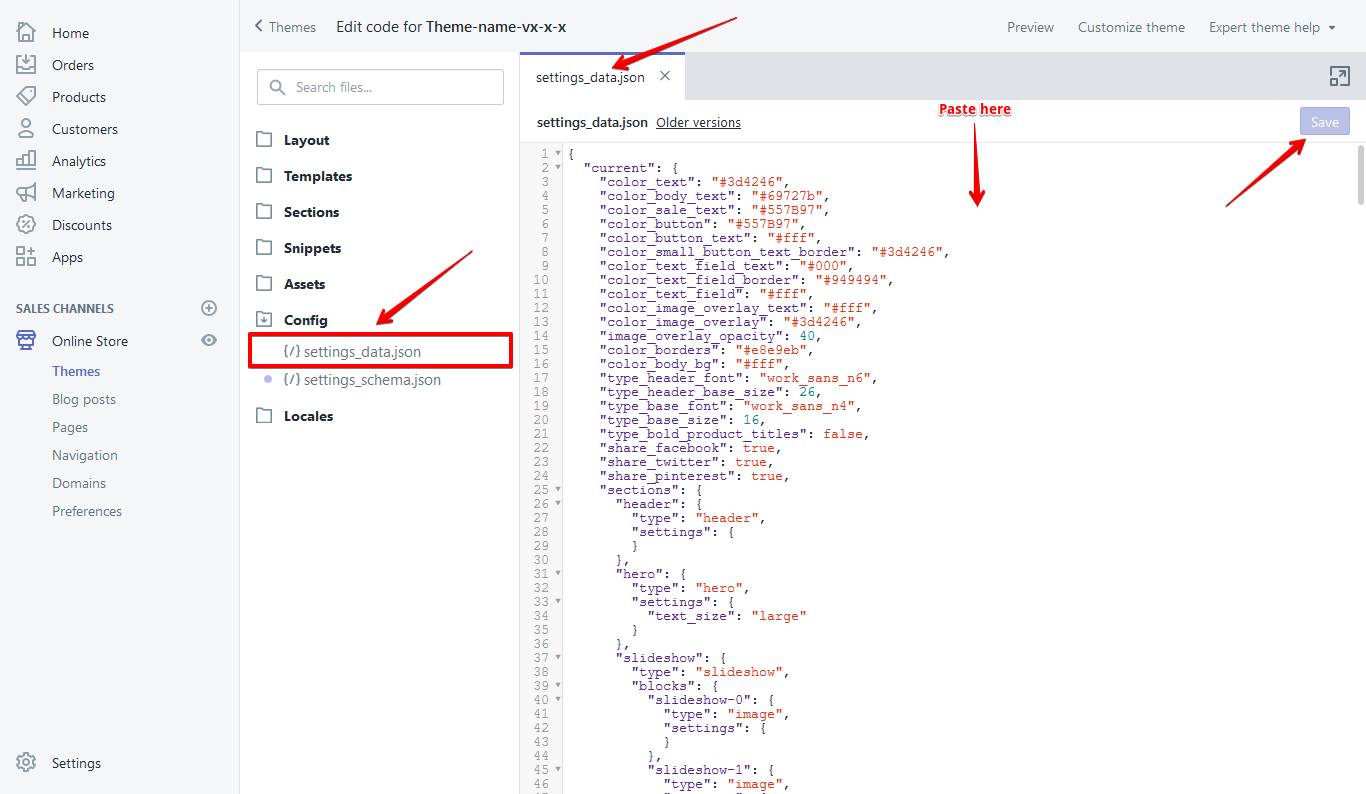
Now save it and you're done
Video Example
General (Currency)
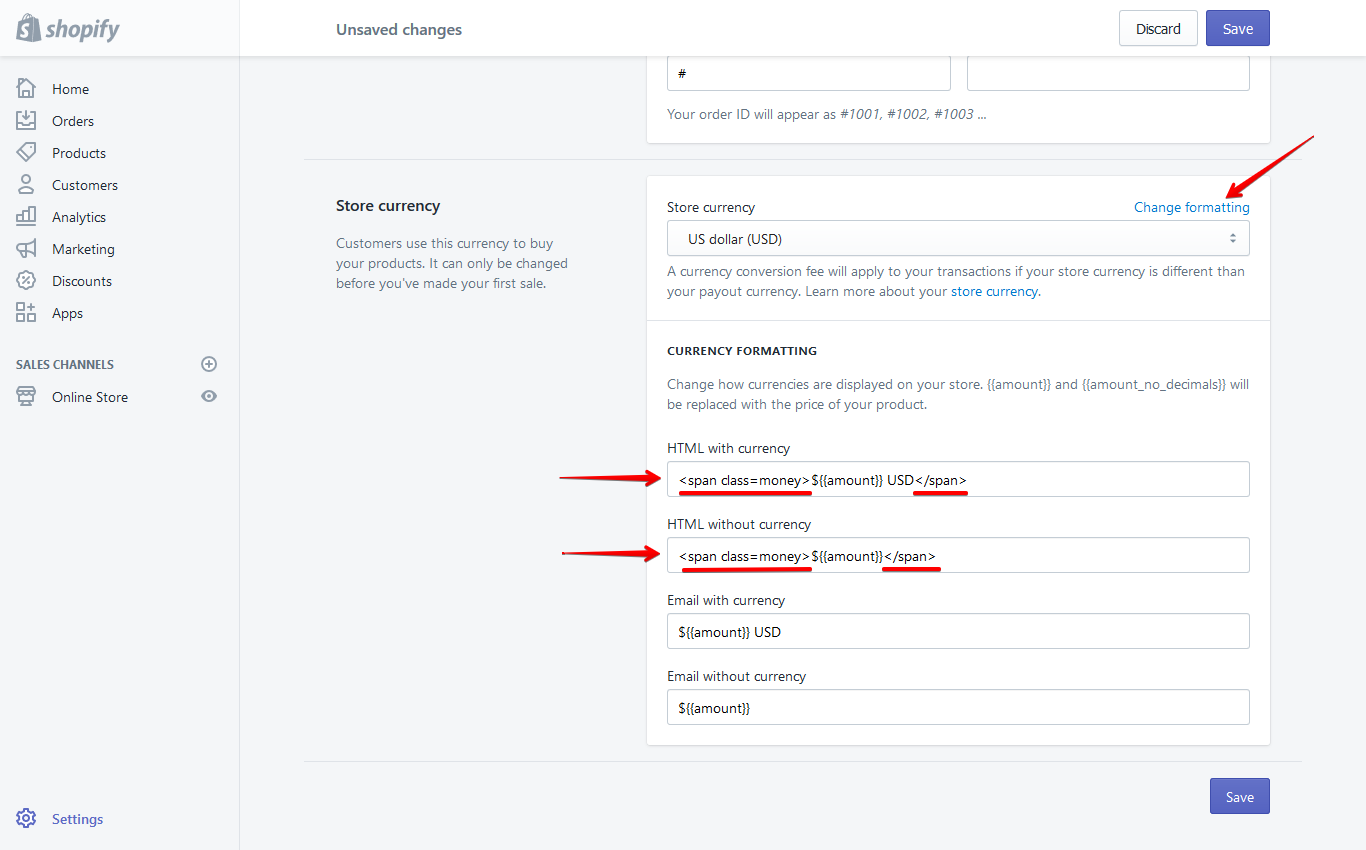
Editing the HTML for currency formatting
- From your shop admin, go to the Settings / General
- Scroll down and then you will see a "Standards & formats" block. Find the "Currency" there
- Select your currency
- Click "Change formatting"
- Replace selected text and click Save
Read More
Payment
- From your shop admin, go to the Settings / Payments
- Choose a payment gateway to accept payments for orders. Than checkout page is work
Checkout
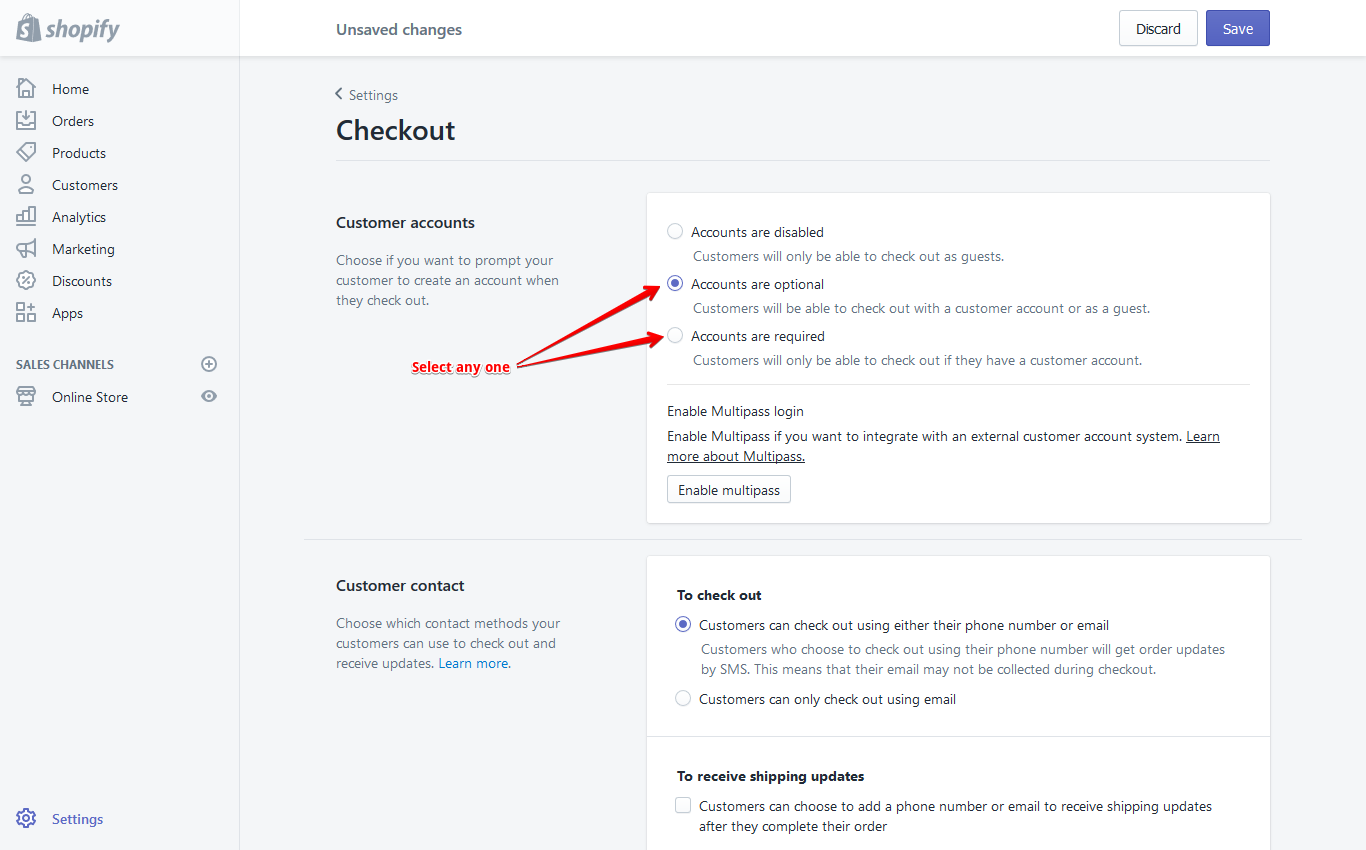
- From your shop admin, go to the Settings / Checkout
- Select Accounts are optional
Read More
Shipping
- From your shop admin, go to the Settings / Shipping
- To enable shipping calculator, please configure your shipping rates. Set up shipping rates
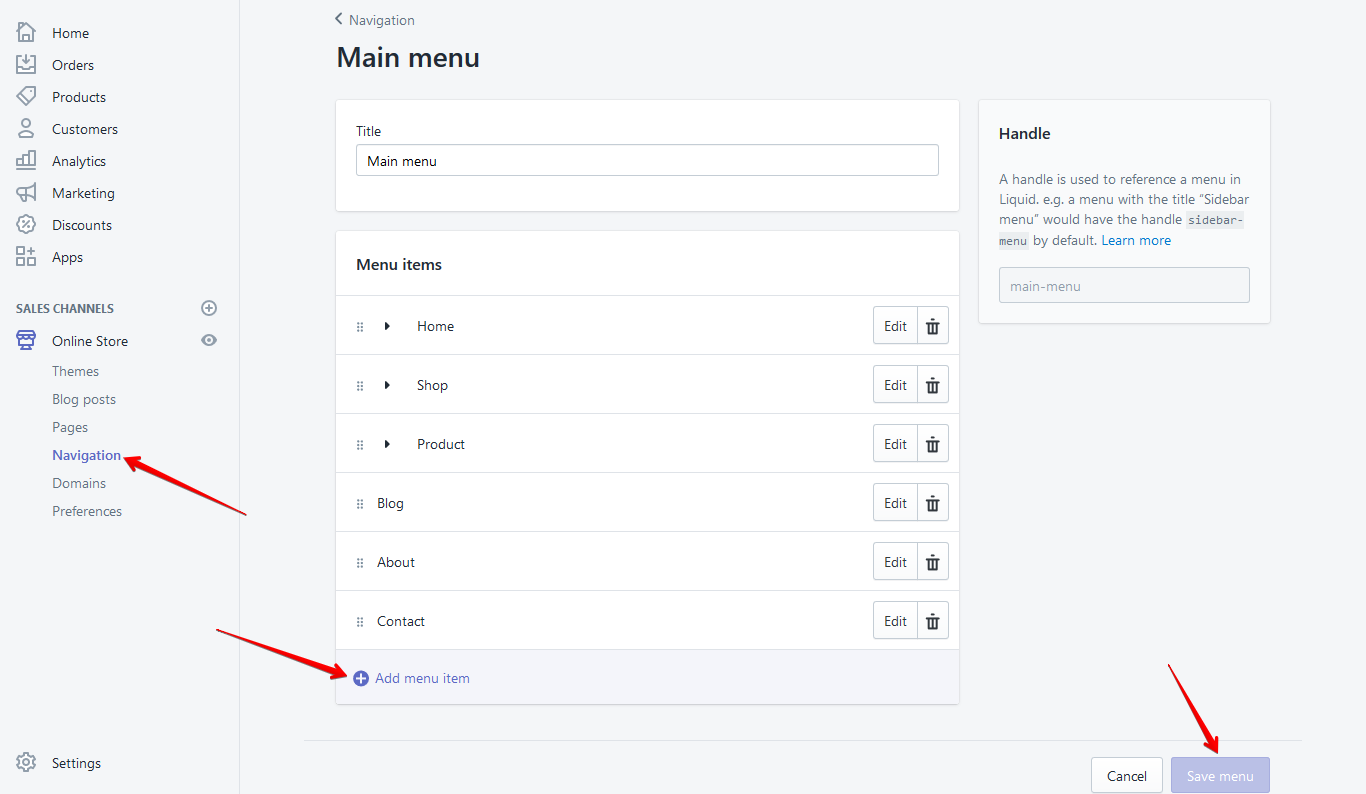
Create Main Menu
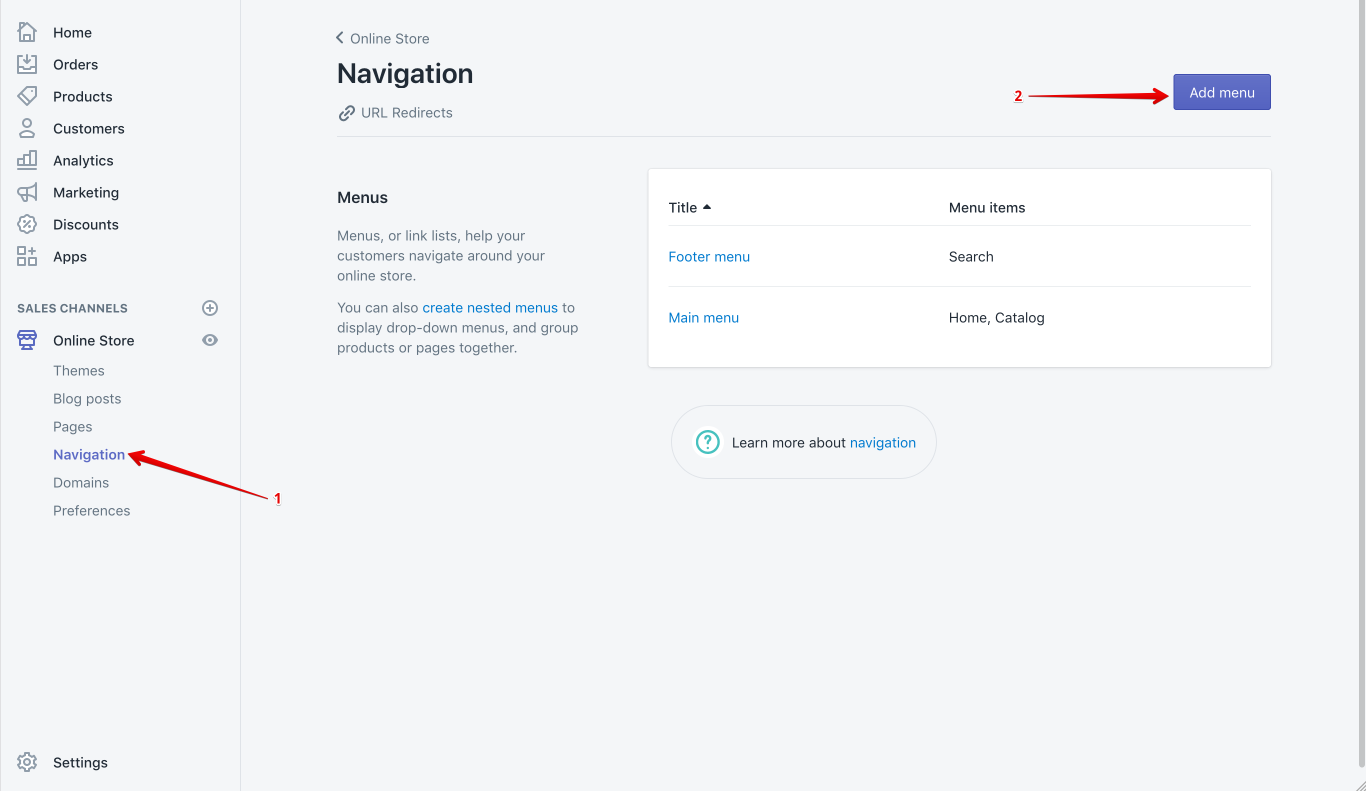
- From your store admin, go to the Online Store / Navigation
- You will see a " Add menu " button ( Click here )
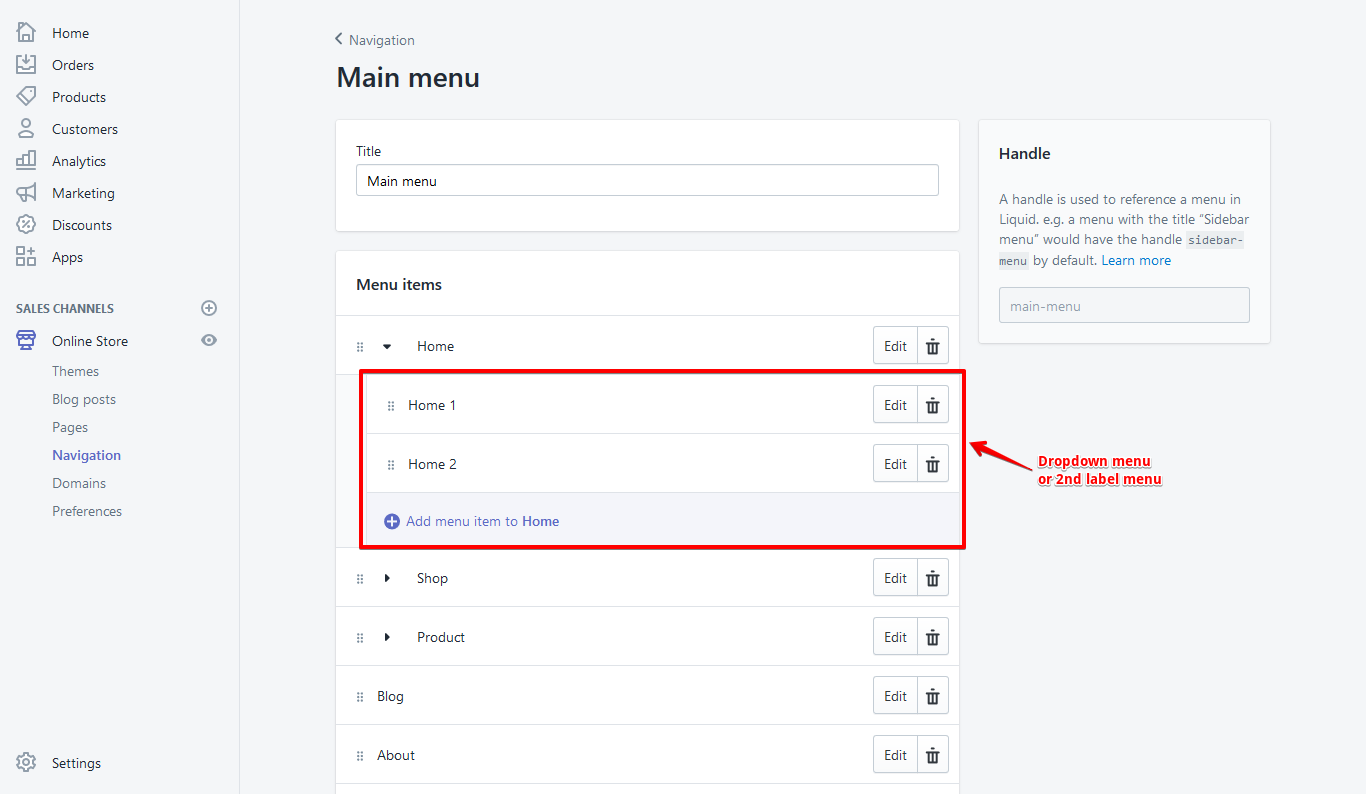
Create MegaMenu
- You must have a single menu. Then create a drop-down menu and create again menu under the drop-down menu.
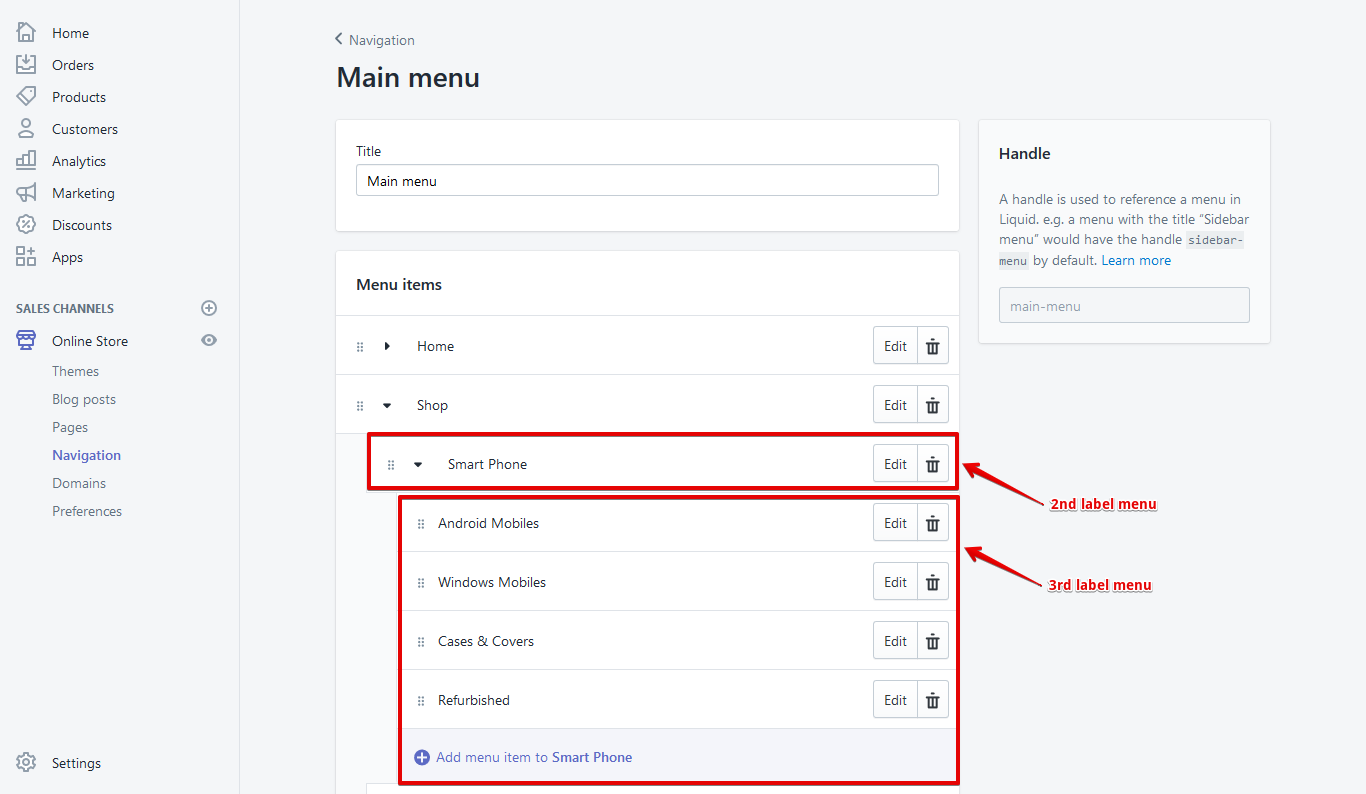
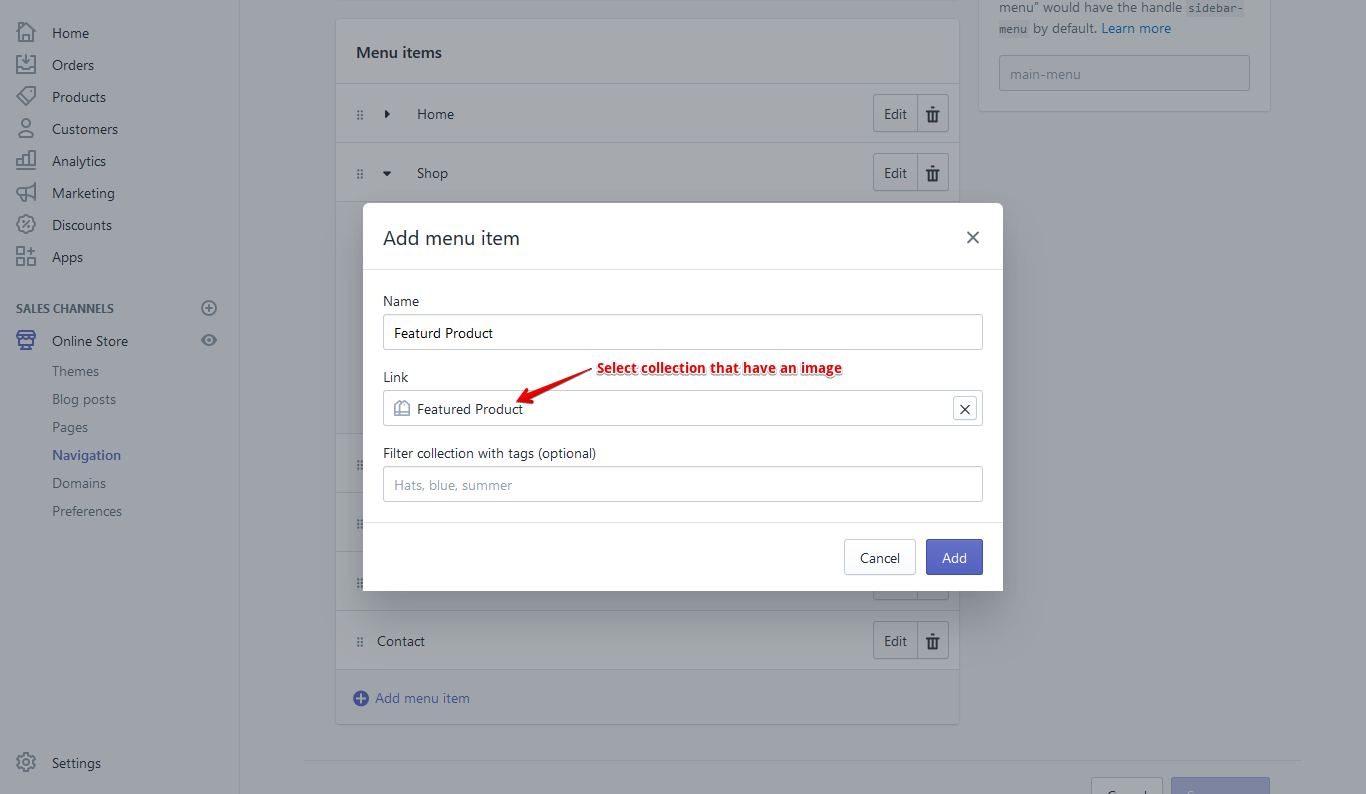
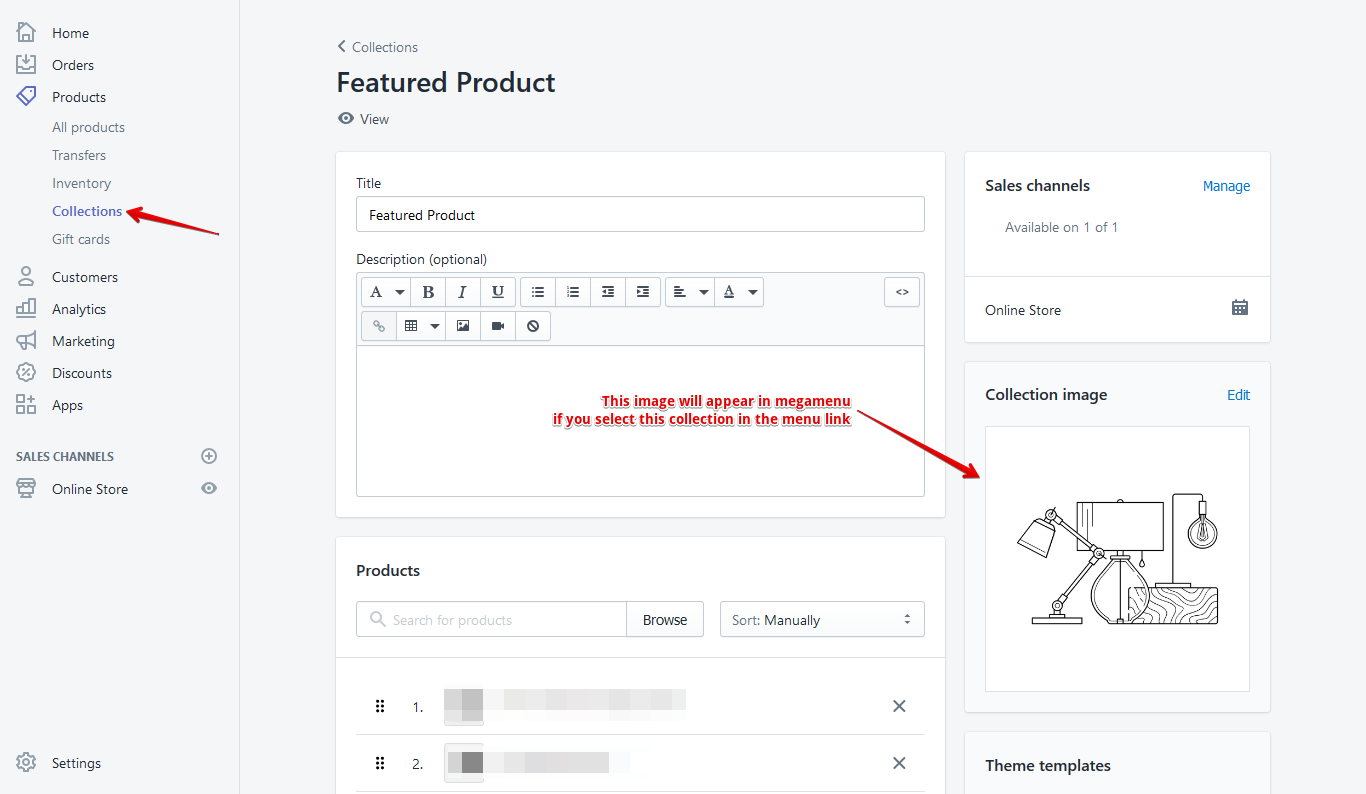
MegaMenu Image
- When creating a drop-down menu then menu link select collection. If the collection has an image then this image show in the menu.
Video Example
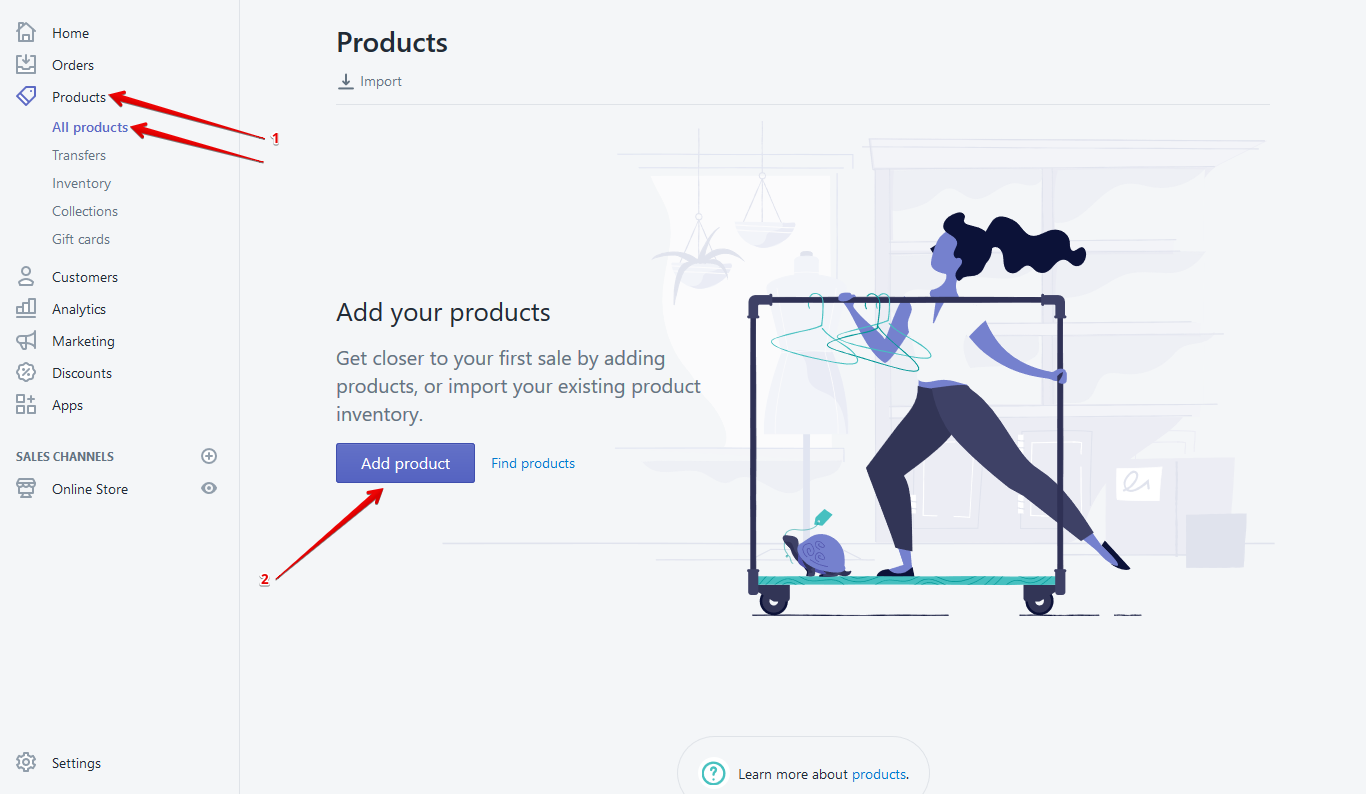
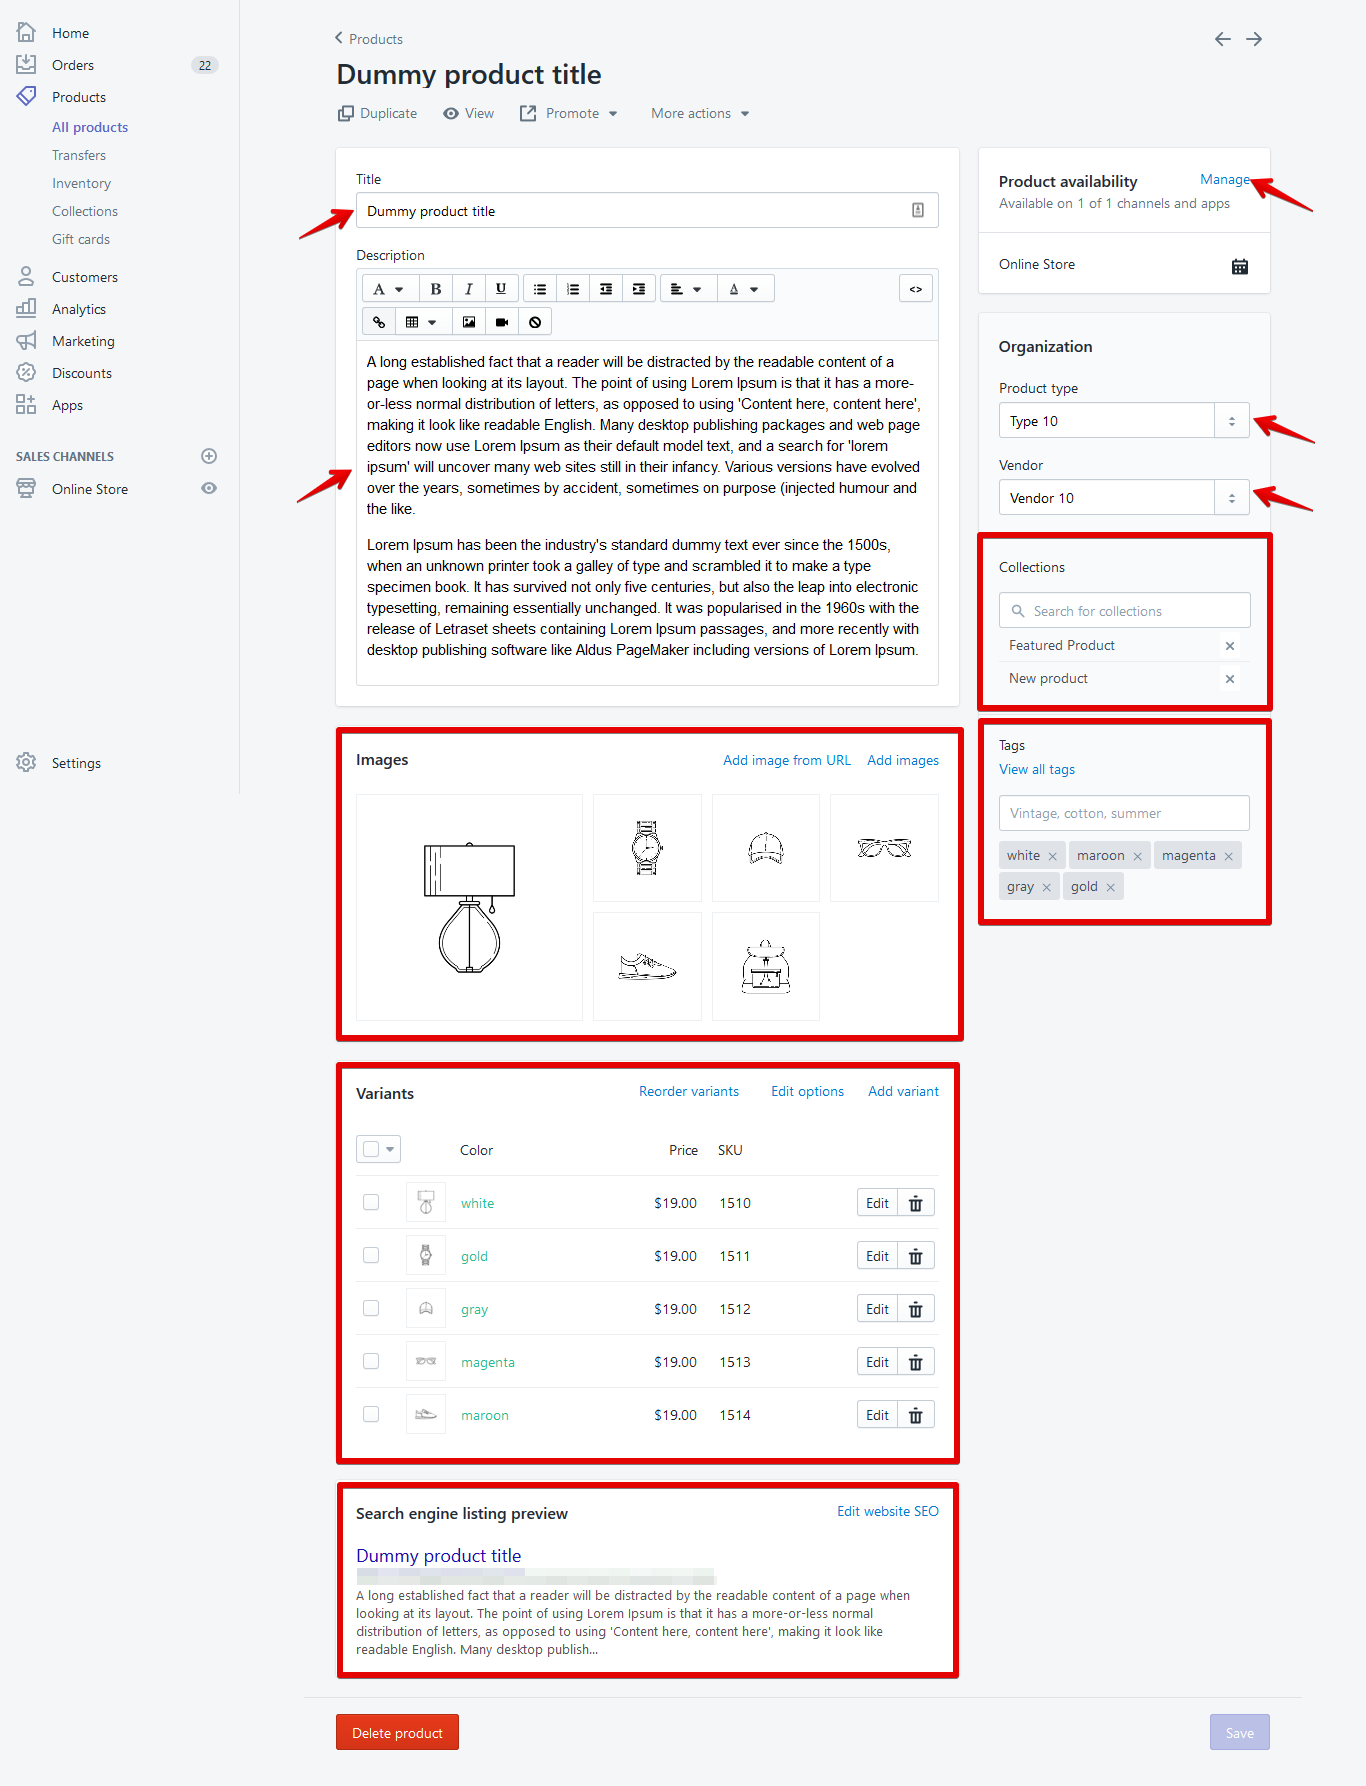
Create Product
- From your Shopify admin, go to Products.
- Click the "Add product" button
- Product image recommended Size: 800 x 800px
Read More
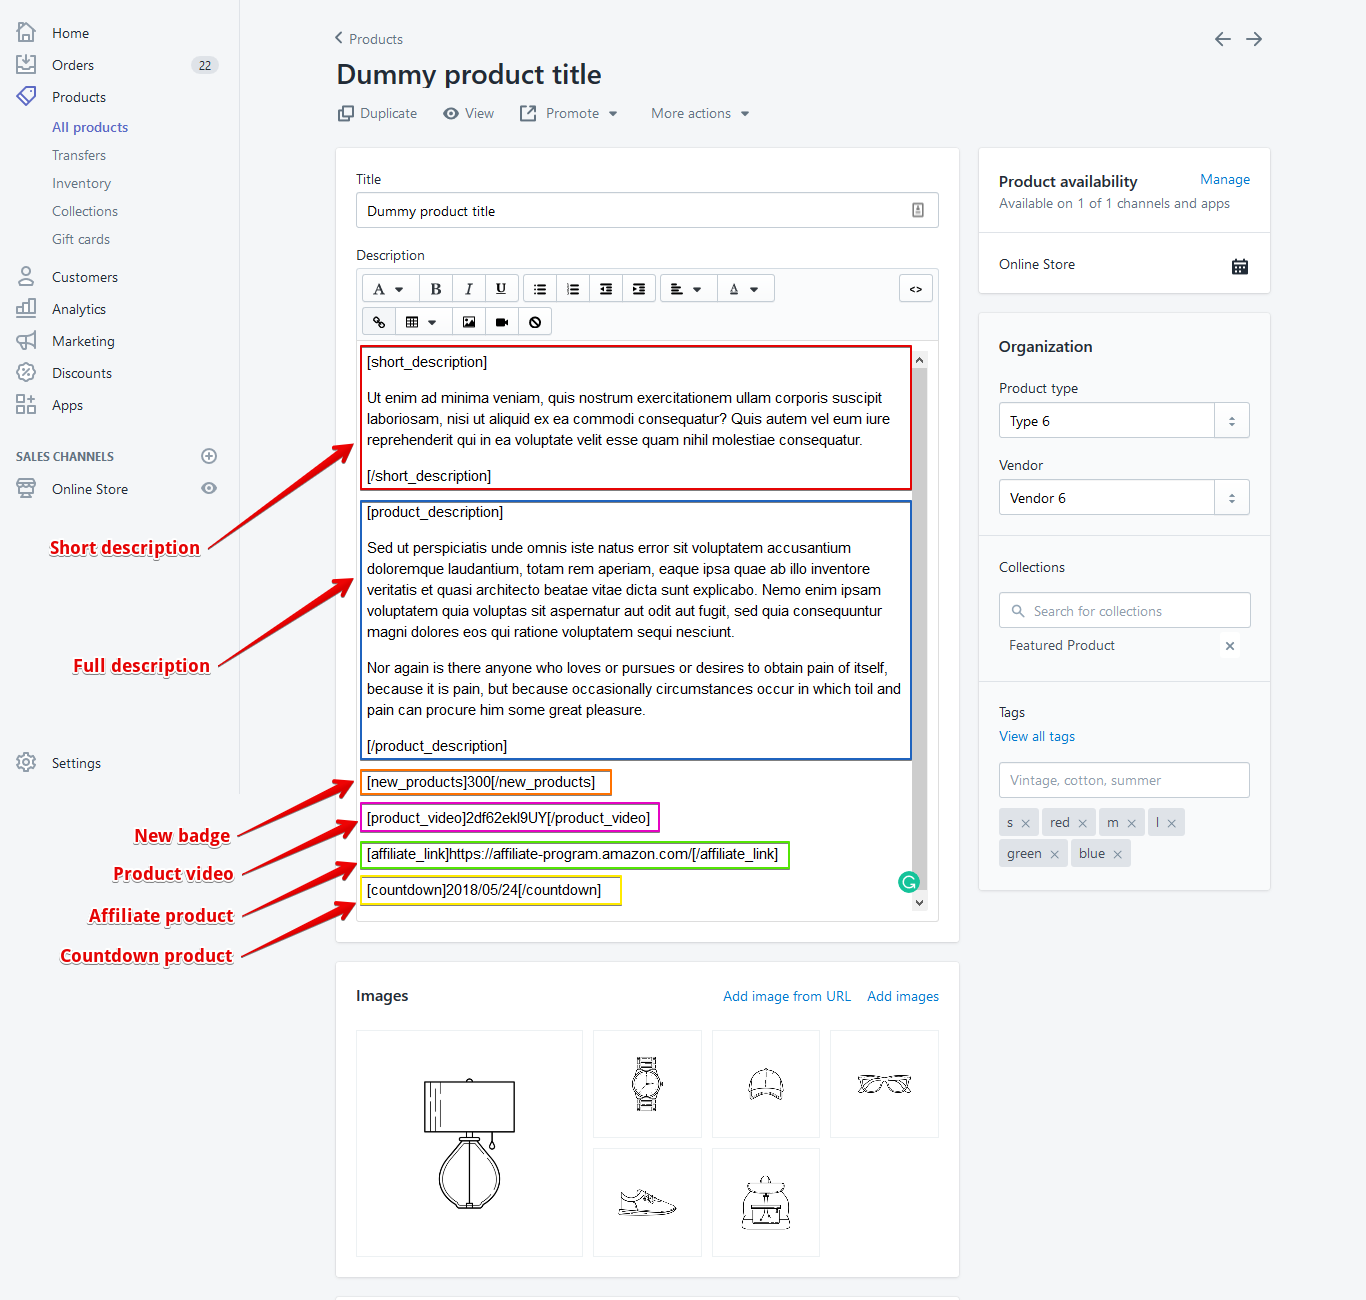
Shortcodes for Product Description
You have 6 shortcodes.
You could use Editor mode or Show HTML mode
Product short description shortcode (Optional)
Product description shortcode in Product description tab (Optional)
Product New Badge shortcode. Put day limit, how many days show the new badge in your product.
Affiliate link product short code in "Add to cart icon"
Product video shortcode in Product video tab
Product unique tab shortcode in Product tab
Product unique tab shortcode in Product tab
Product unique tab shortcode in Product tab
Product countdown shortcode.
- [short_description]Here add your product short description[/short_description] - work on Product page below the product condition area, List product list view page, Search page and quick view
- [product_description]Here add your product full description[/product_description] - work on Product page in product description tab
- [new_products]Here add your product New Badge day limit[/new_products] - work on Product Grid and List view
- [affiliate_link]Here add your affiliate link[/affiliate_link] - work on Product page in "Add to cart" action
- [product_video]YouTube Product Video ID[/product_video] - work on Product page in video tab
- [unique_description_1] Your content or text here [/unique_description_1] - work on Product page in Unique-tab-1
- [unique_description_2] Your content or text here [/unique_description_2] - work on Product page in Unique-tab-2
- [unique_description_2] Your content or text here [/unique_description_3] - work on Product page in Unique-tab-3
- [countdown]YYYY/MM/DD[/countdown] - Here's how long the countdown times you want to see
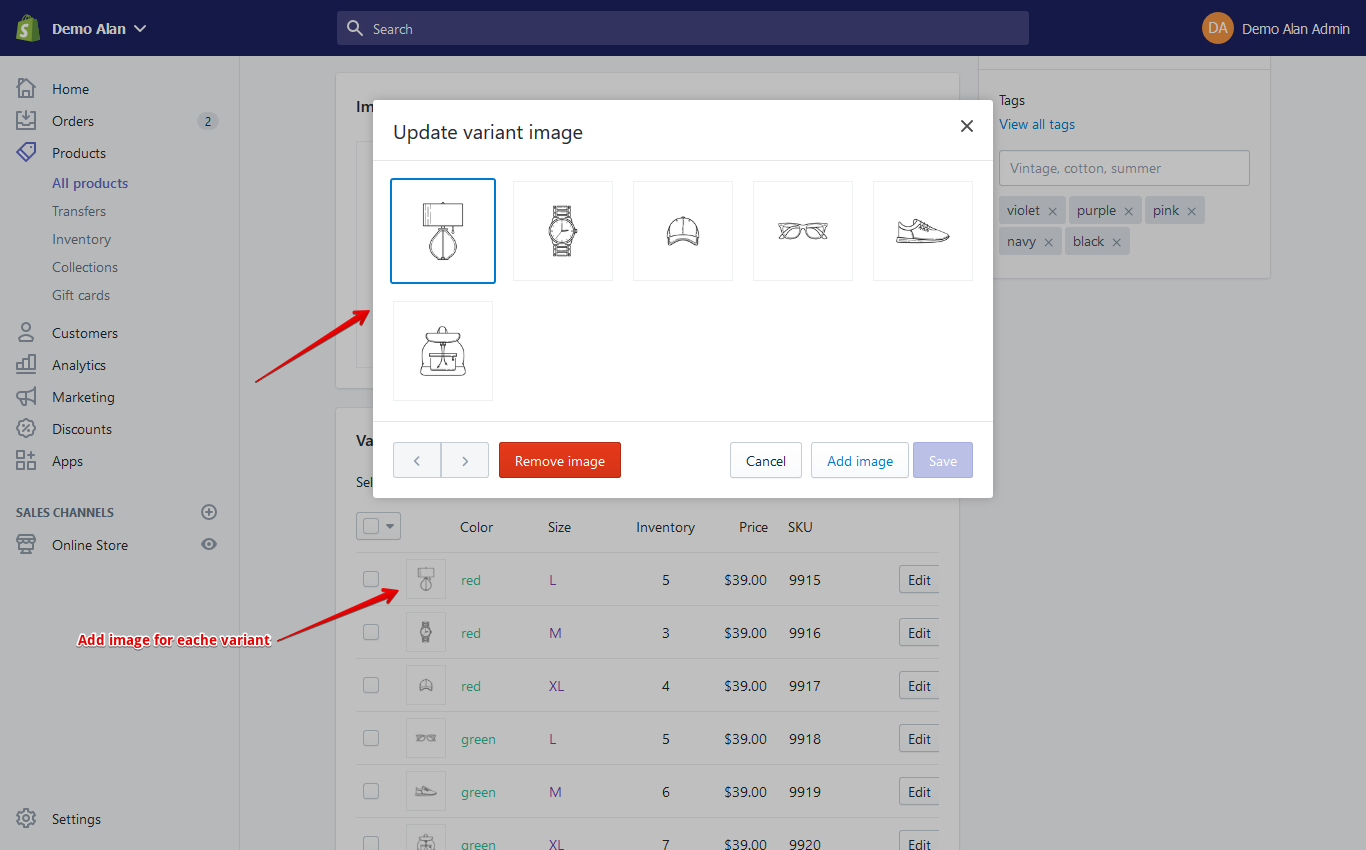
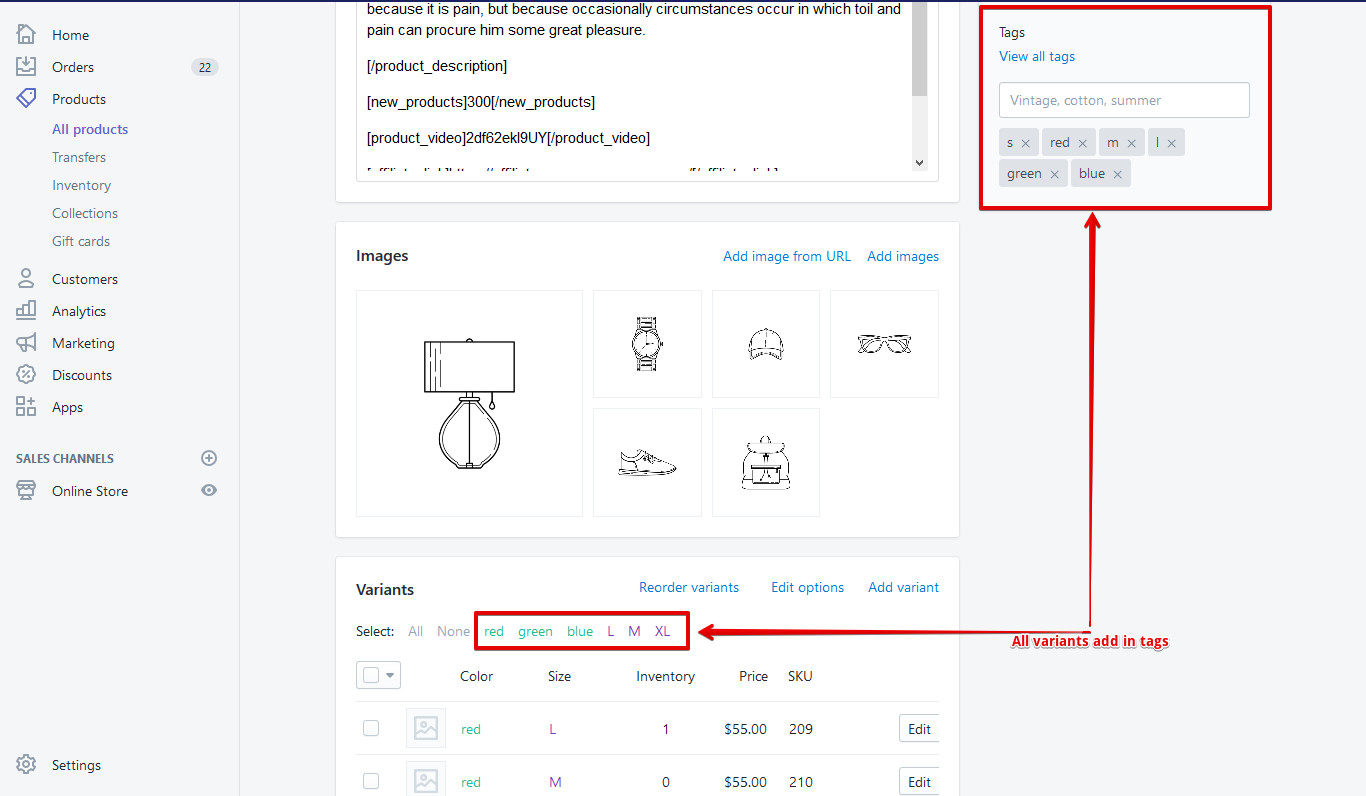
Product Variants
- When add product then add variant for this product.
- When add product then add variant for this product.

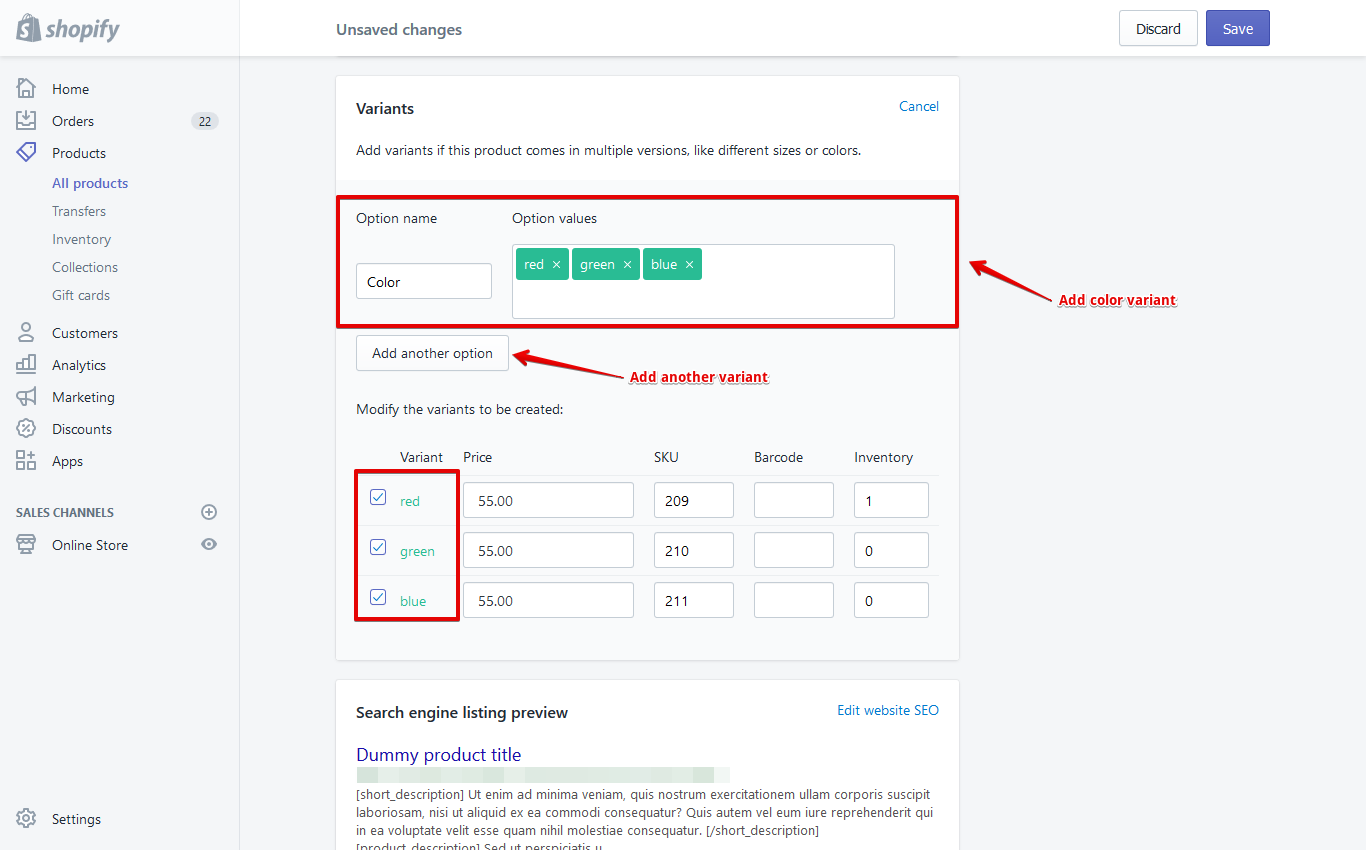
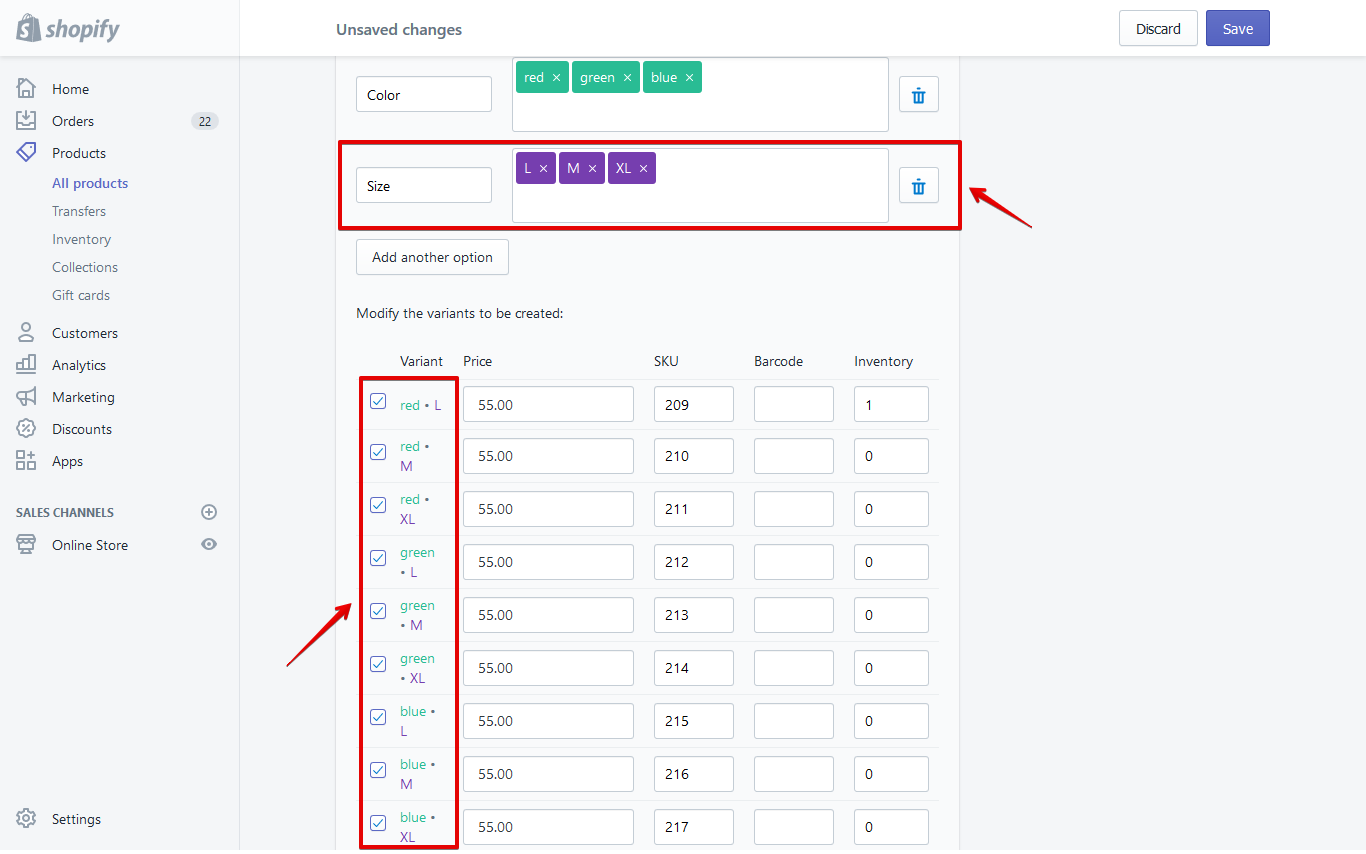
Read More
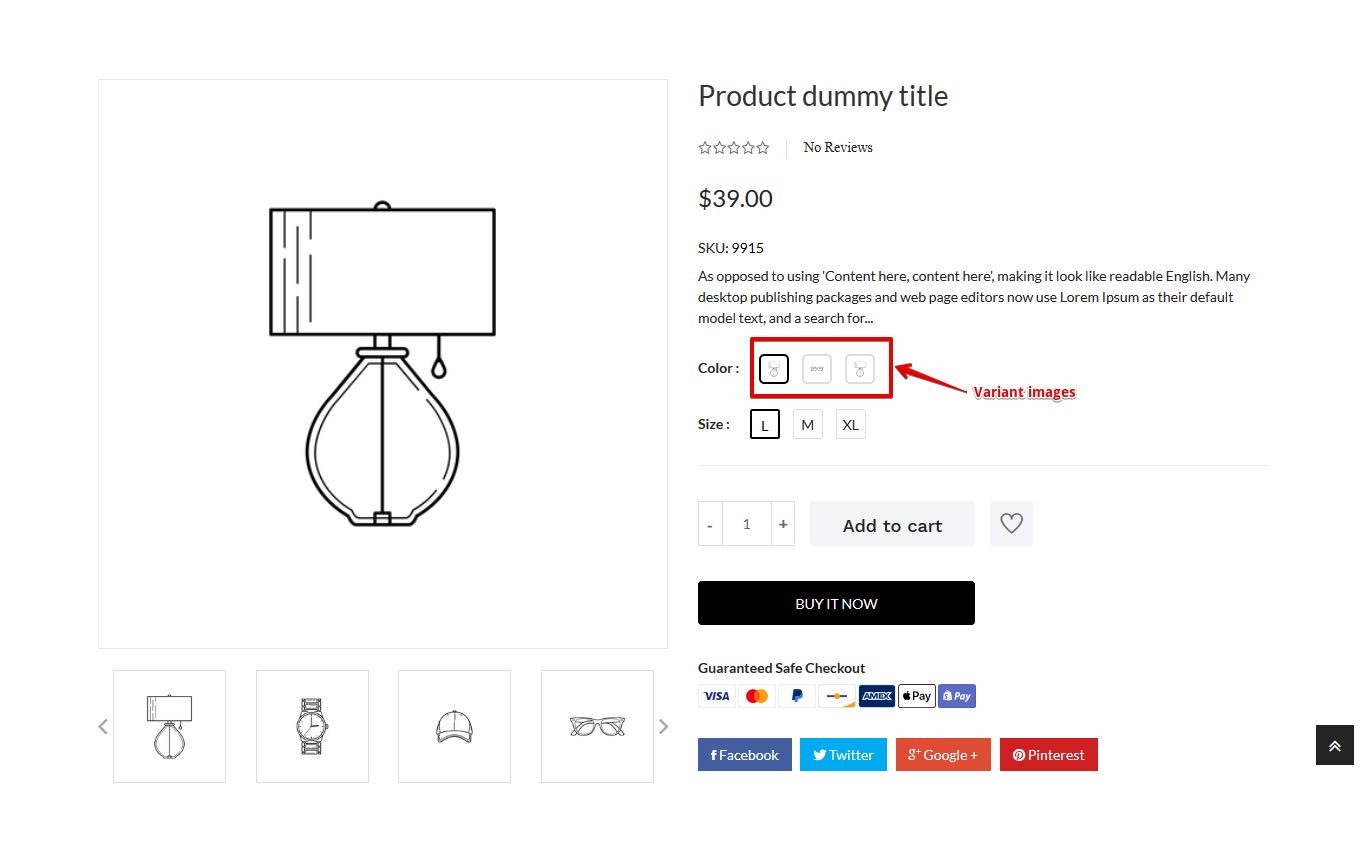
- This variant is displaying in product swatch option
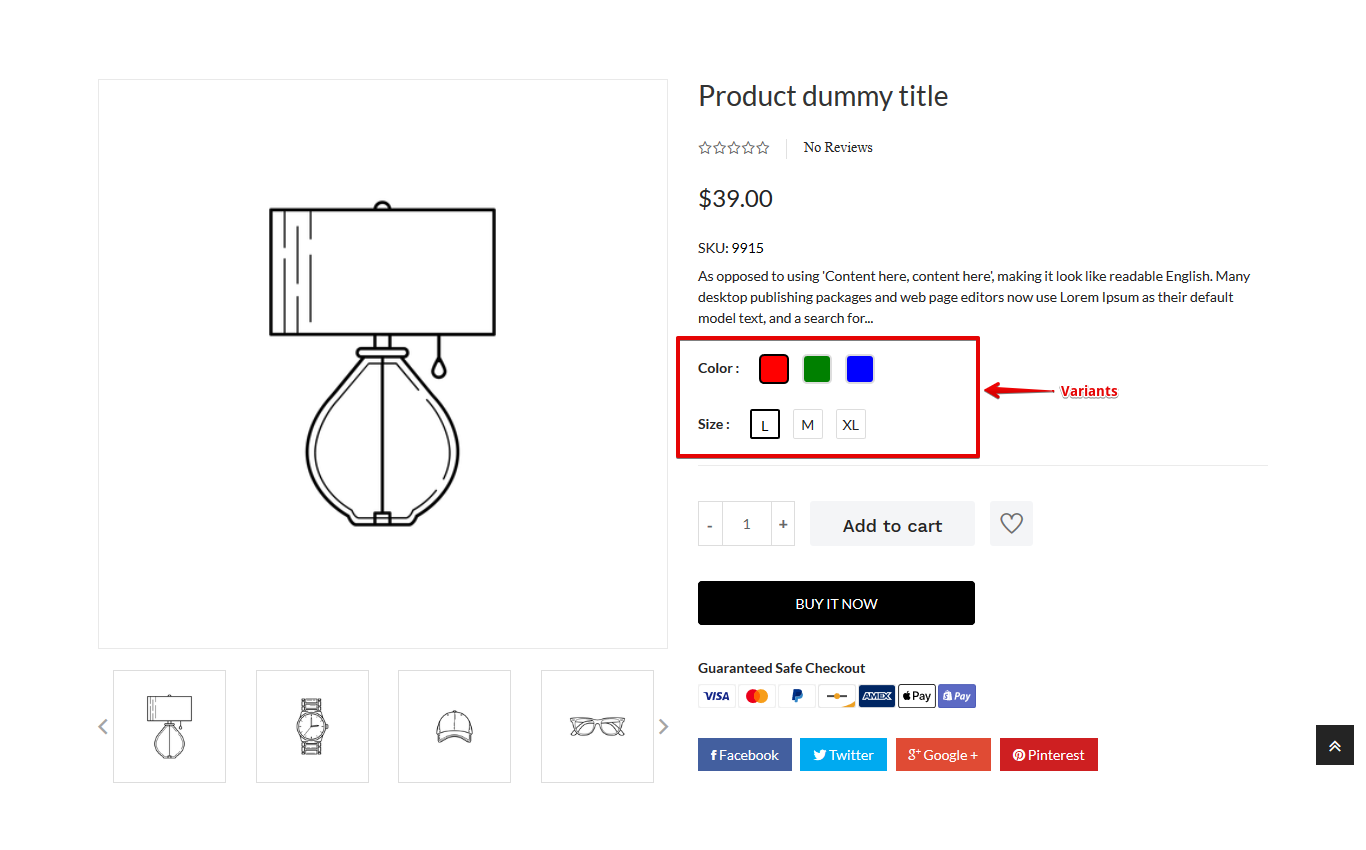
- If you add image for variant then this image will display in swatch color variant field
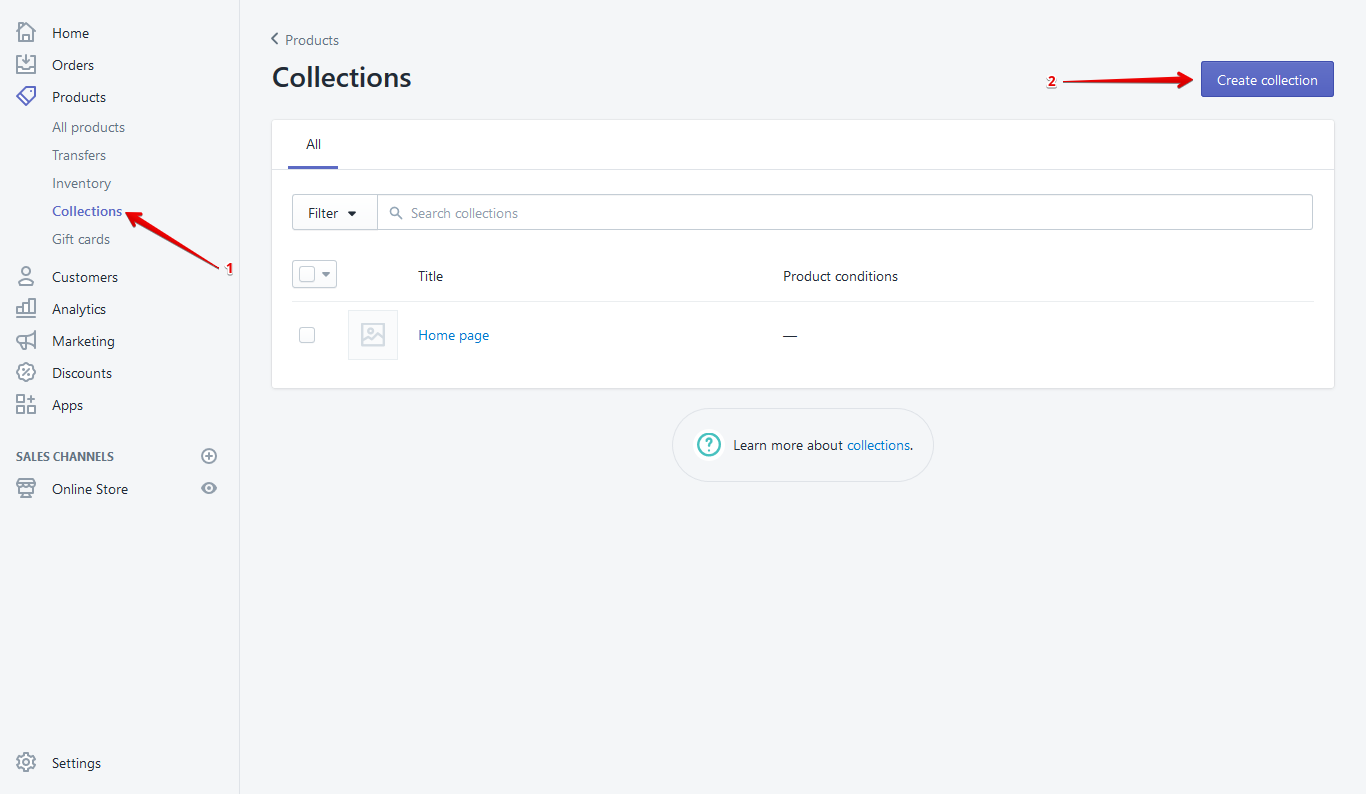
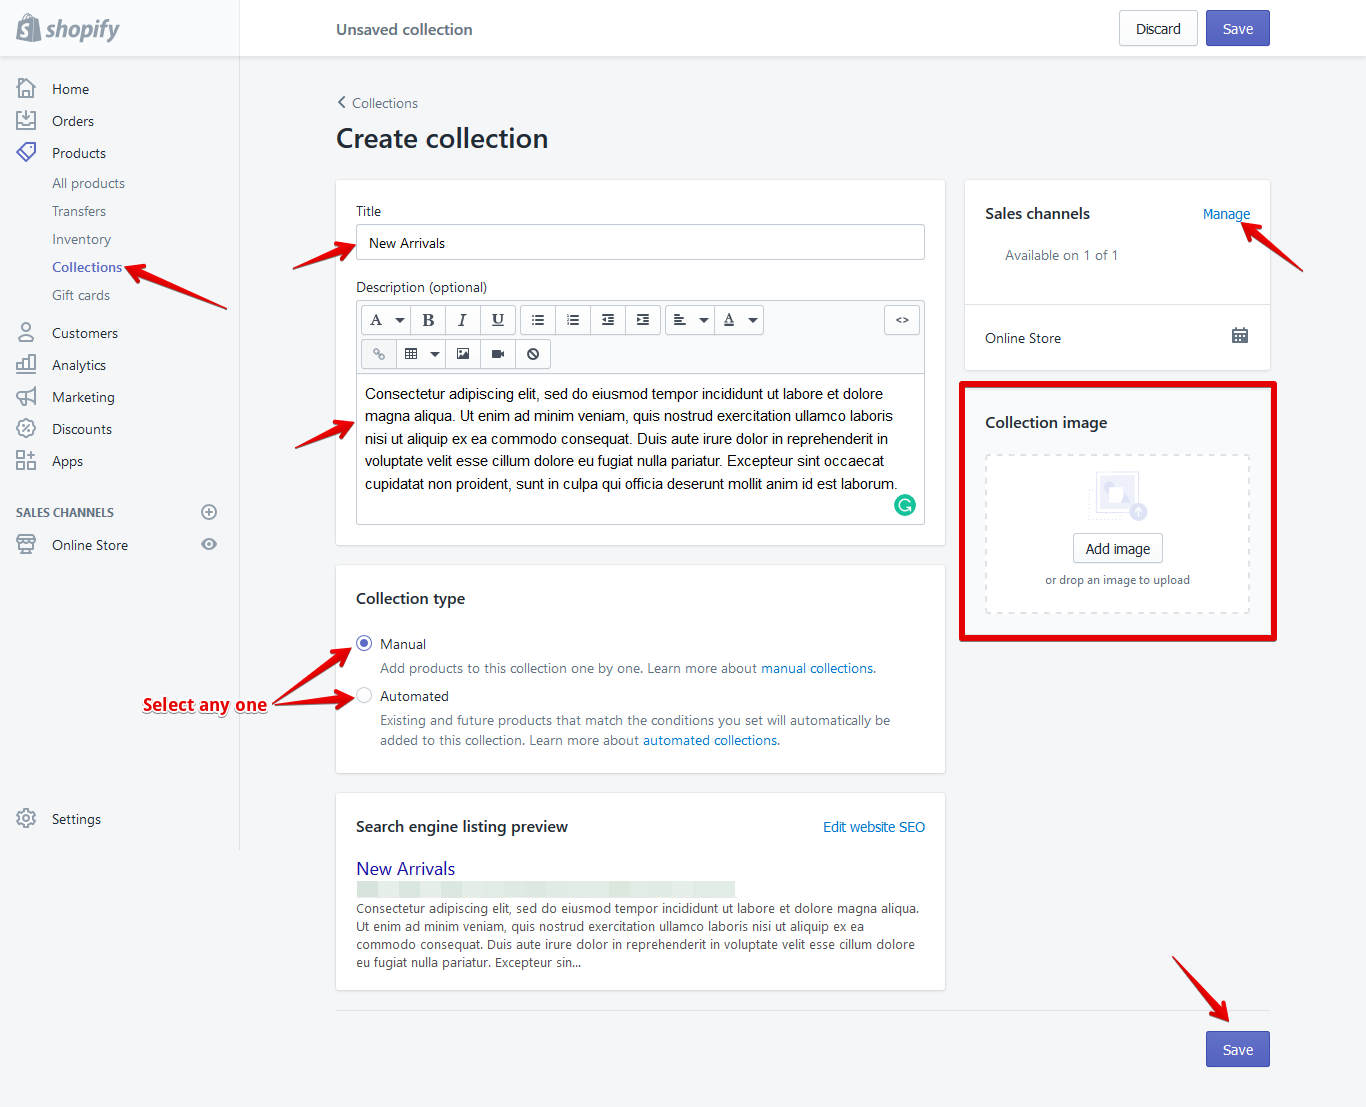

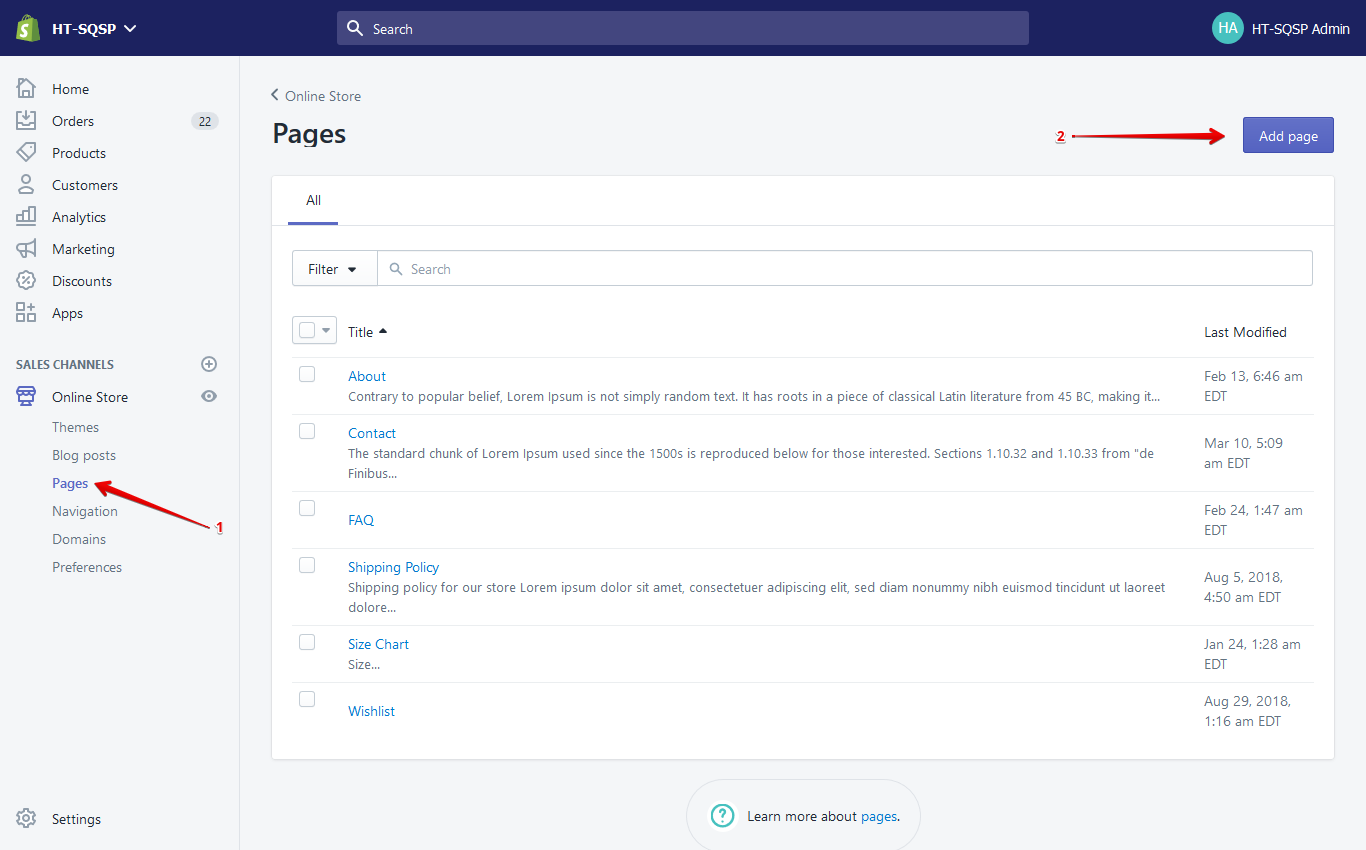
Create A Custom Page
- In a Online Store / Pages, find and click button "Add page"
- Write in Title field page name
- Select Template: page
- Select Visibility: Visible
- You could use code Editor or HTML write mode content
- Click save
Read More
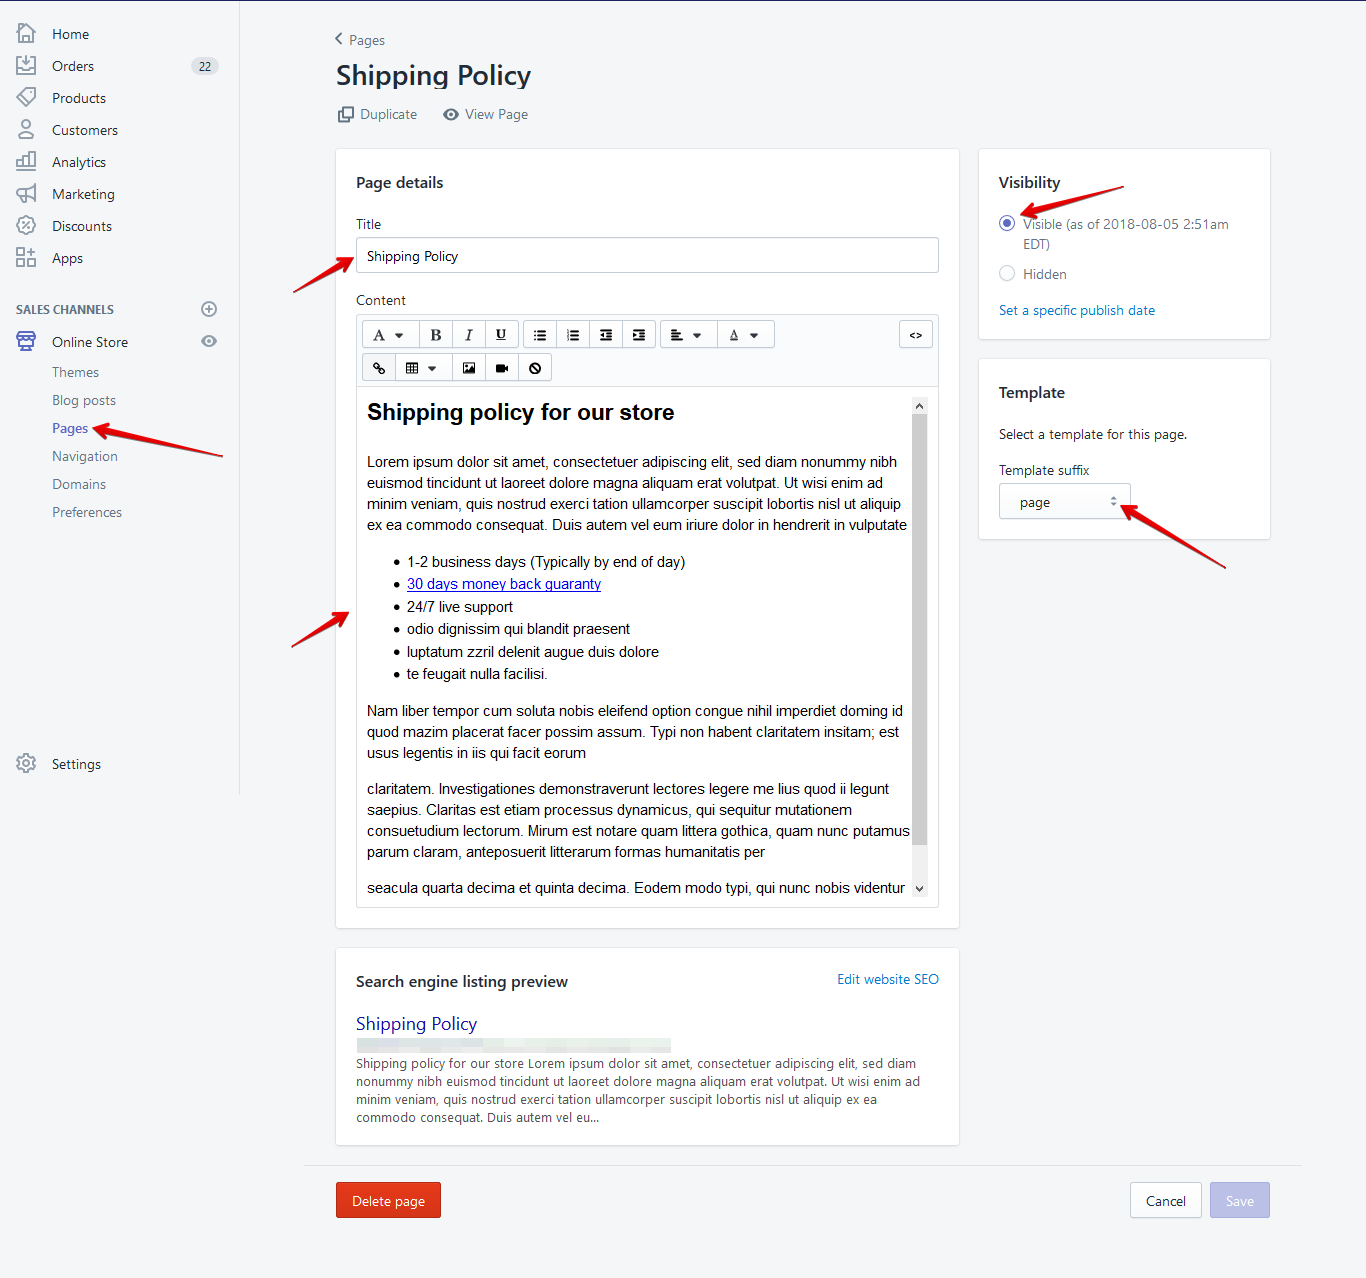
About Page
- In a Online Store / Pages, find and click button "Add page"
- Write in Title field page name
- Select Template: page.about
- Select Visibility: Visible
- You could use code Editor or HTML write mode content
- Click save
- After creating the page, go to the page from the customizer
Contact Page
- In a Online Store / Pages, find and click button "Add page"
- Write in Title field page name
- Select Template: page.contact
- Select Visibility: Visible
- You could use code Editor or HTML write mode content
- Click save
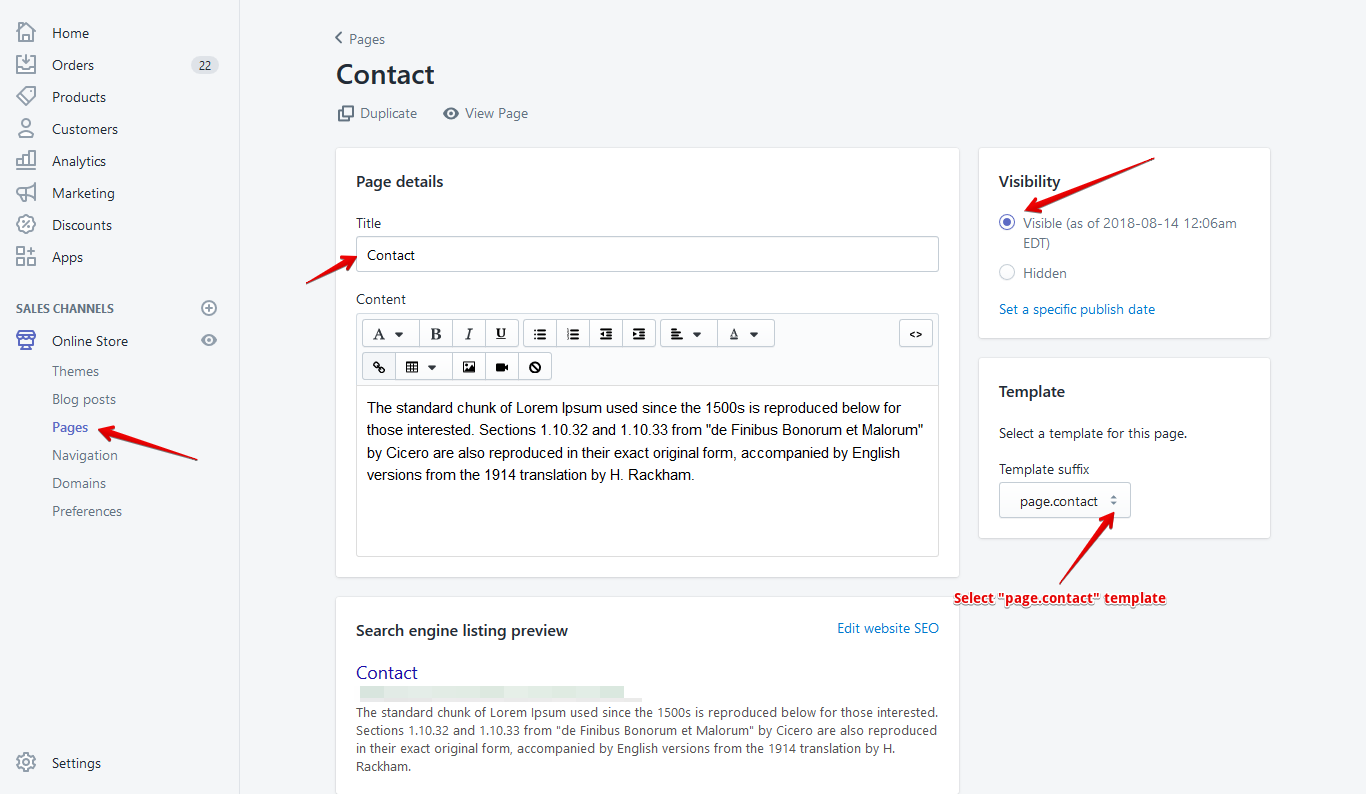
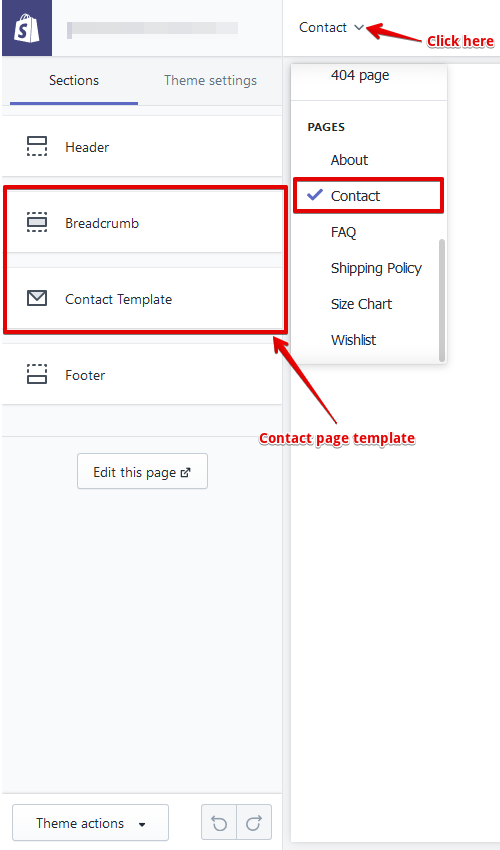
- After creating the page, go to the page from the customizer
FAQ Page
- In a Online Store / Pages, find and click button "Add page"
- Write in Title field page name
- Select Template: page.faq
- Select Visibility: Visible
- You could use code Editor or HTML write mode content
- Click save
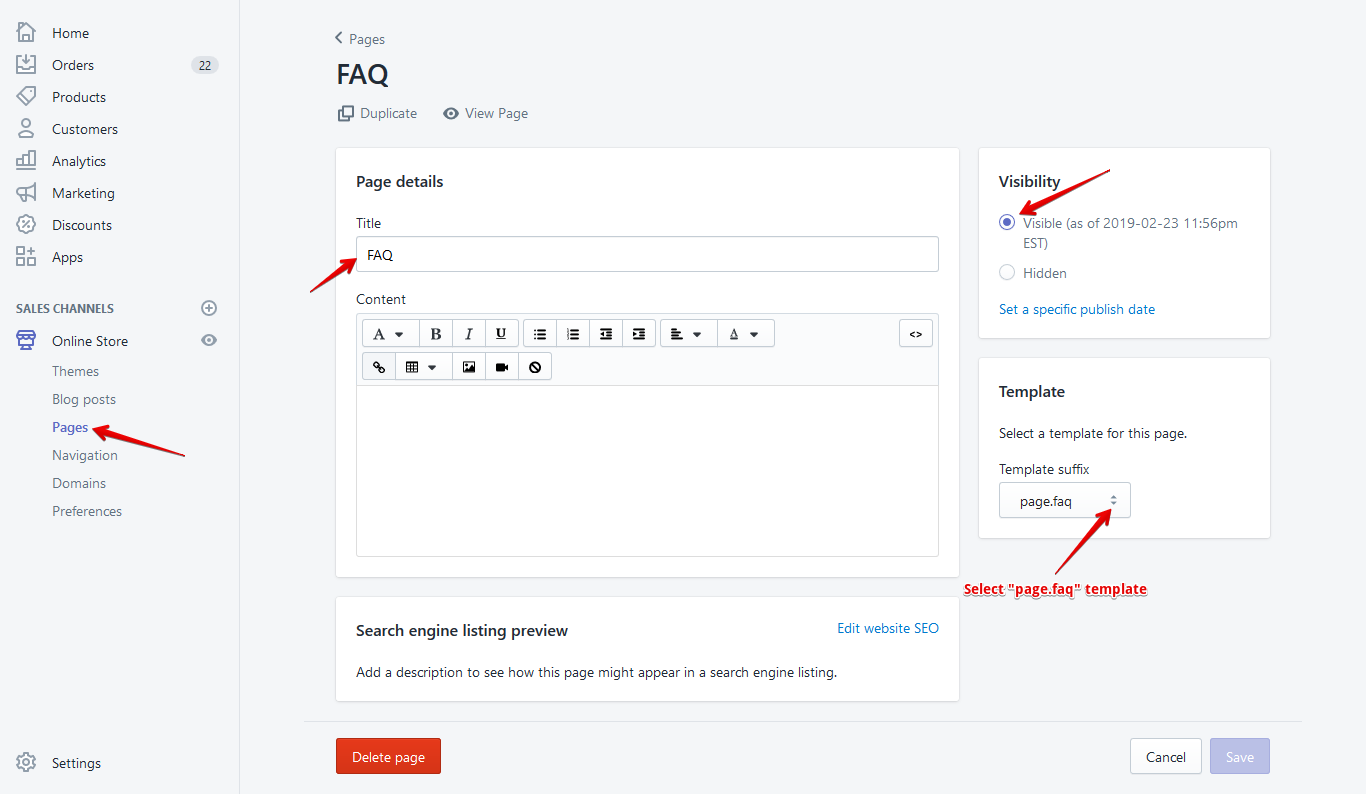
- After creating the page, go to the page from the customizer

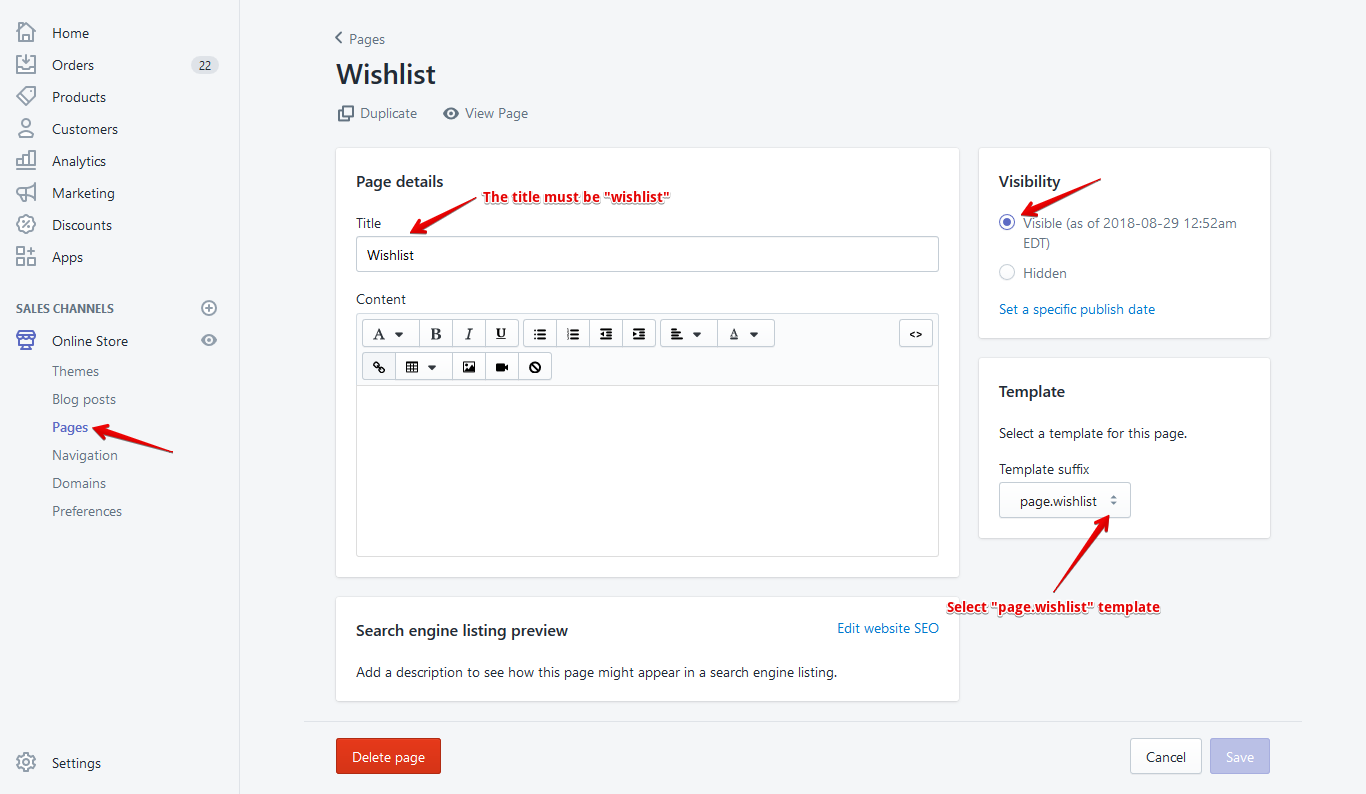
Wishlist Page
- In a Online Store / Pages, find and click button "Add page"
- Write in Title field page name
- Select Template: page.wishlist
- Select Visibility: Visible
- You could use code Editor or HTML write mode content
- Click save
Page Title:
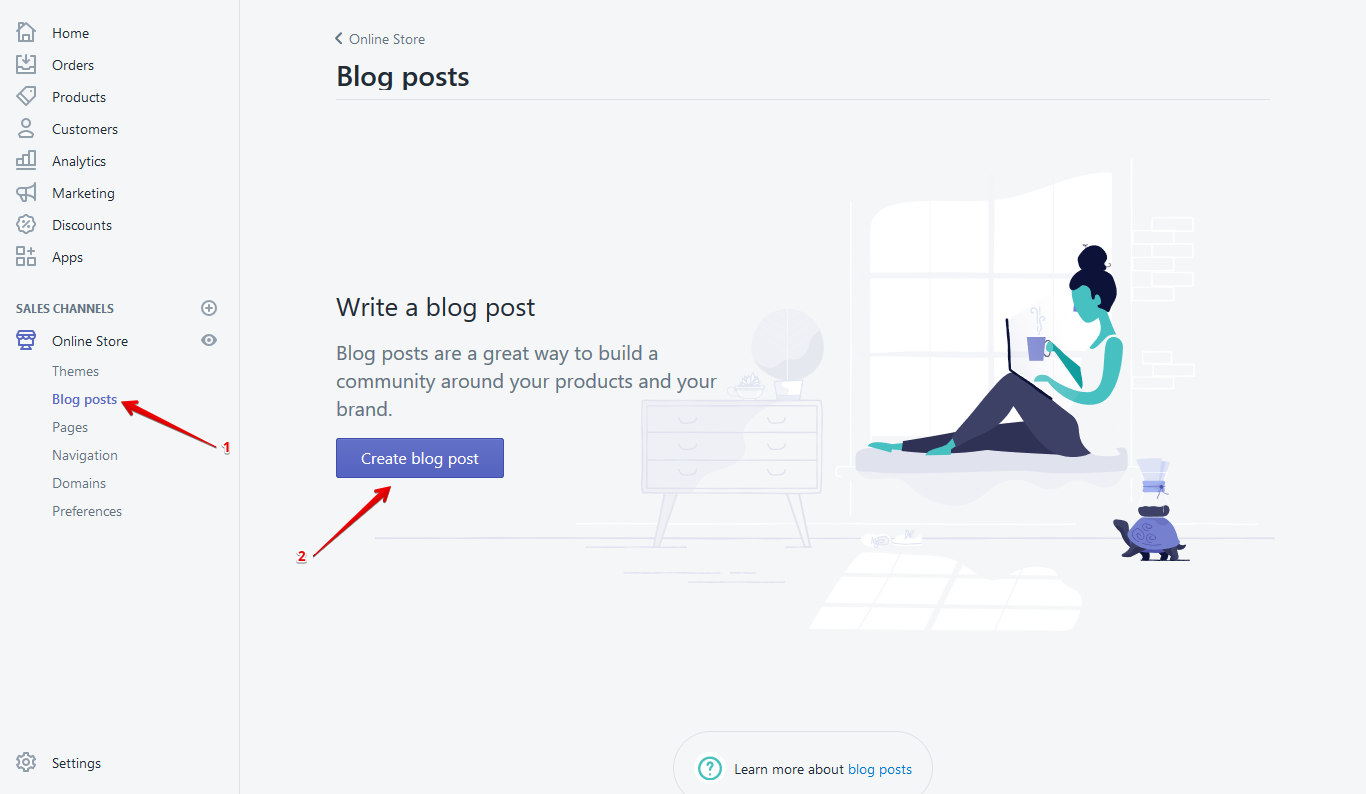
Add Blog post
- Go to the Blog post
- Click to "Create blog post"
- Then add post title, content, tag and etc.

Read More
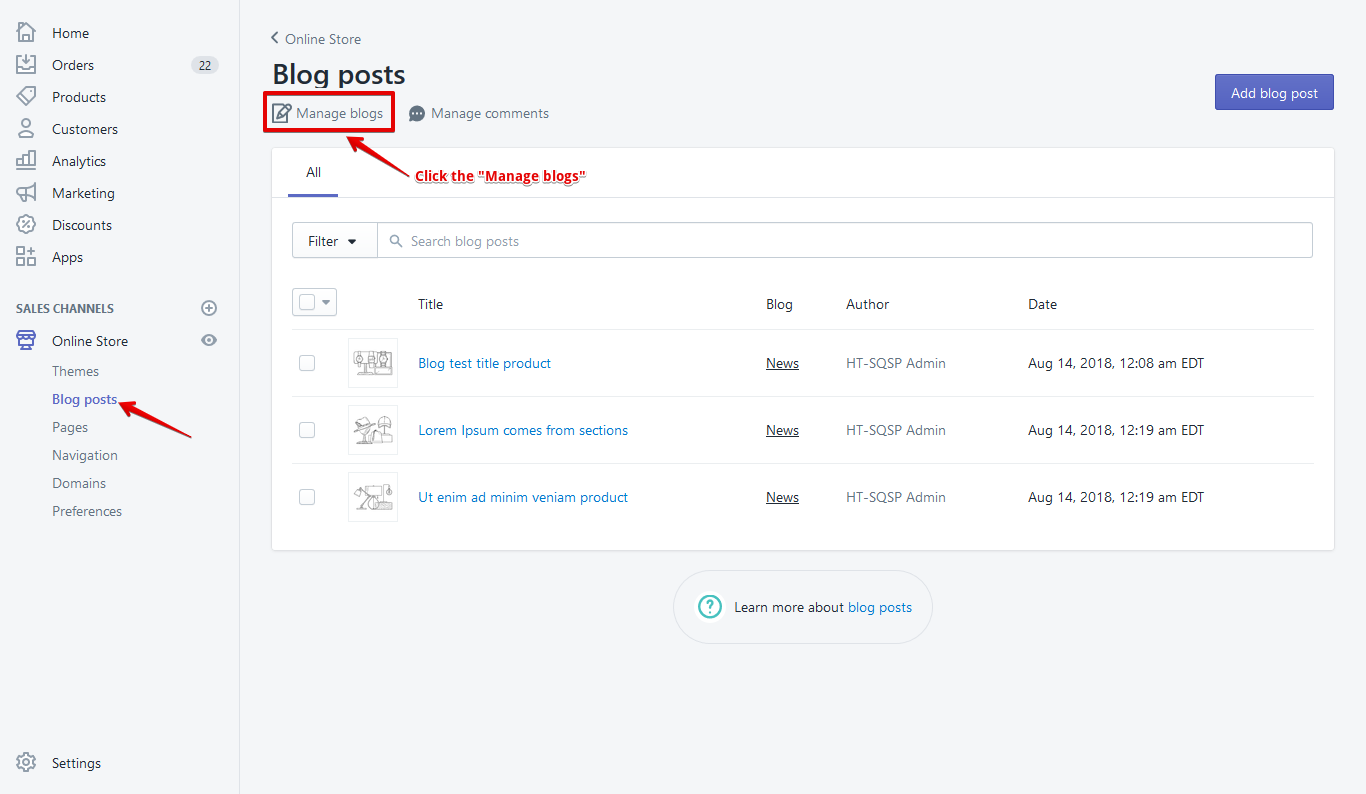
- Manage Blog post

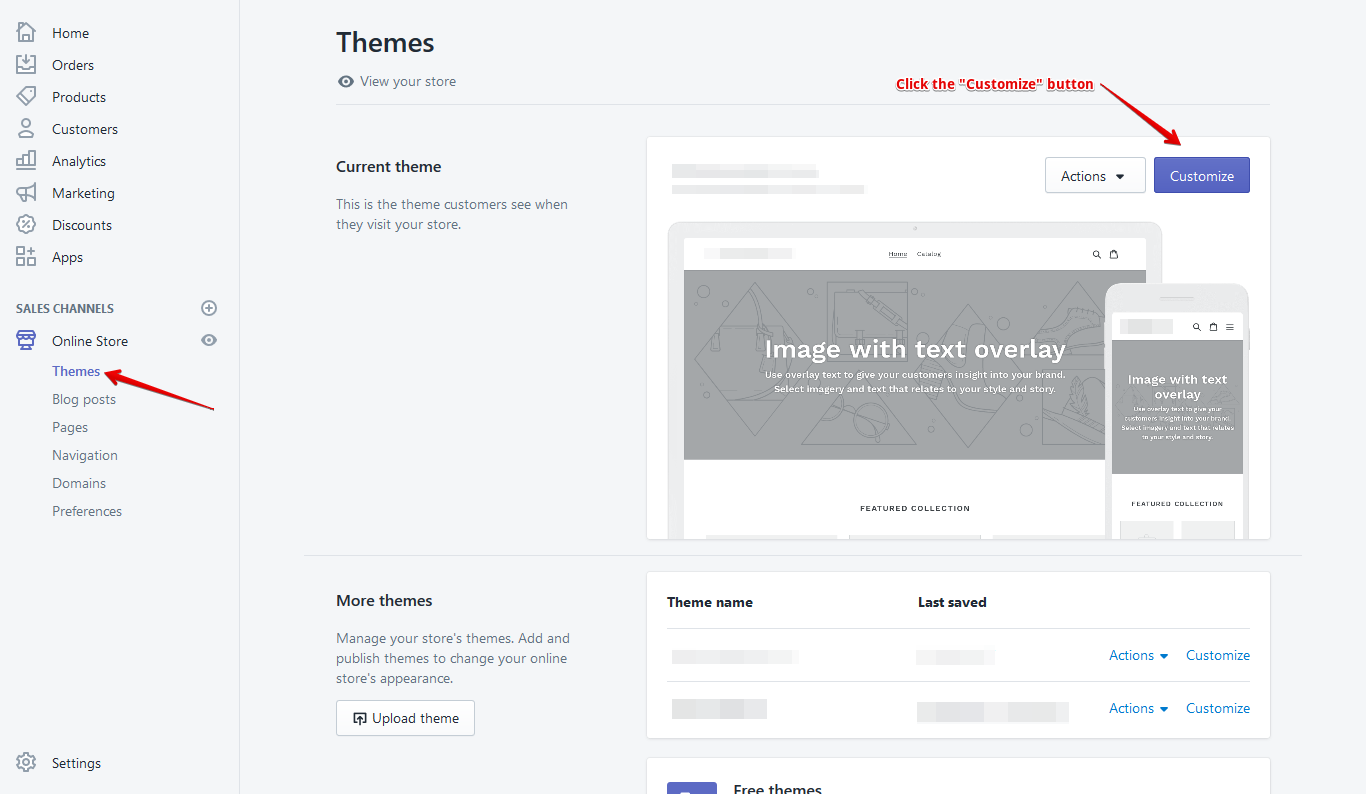
Customizer
- From your shop admin, go to the Online Store / Themes
- Click the Customize button
Read More
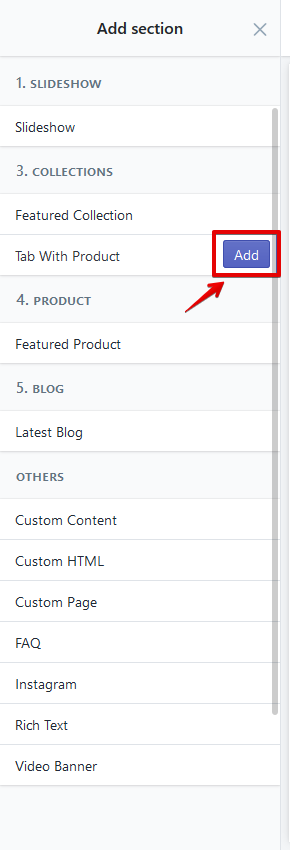
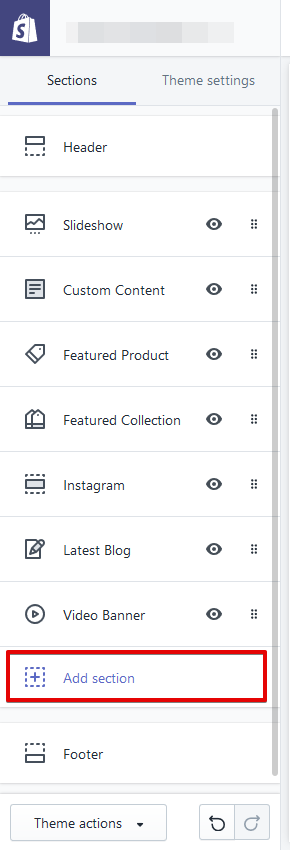
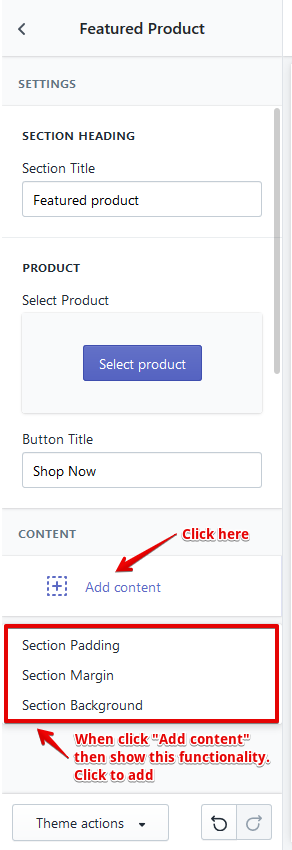
Section Content
- Every section has 3 common content - Section Padding, Section Margin, and Section Background.
- Click Add Content and add content which is need.
- Section Padding - You can set Section padding top and bottom for desktop and mobile device.
- Section Margin - You can set Section margin top and bottom for desktop and mobile device.
- Section Background - You can set Section background image and color.
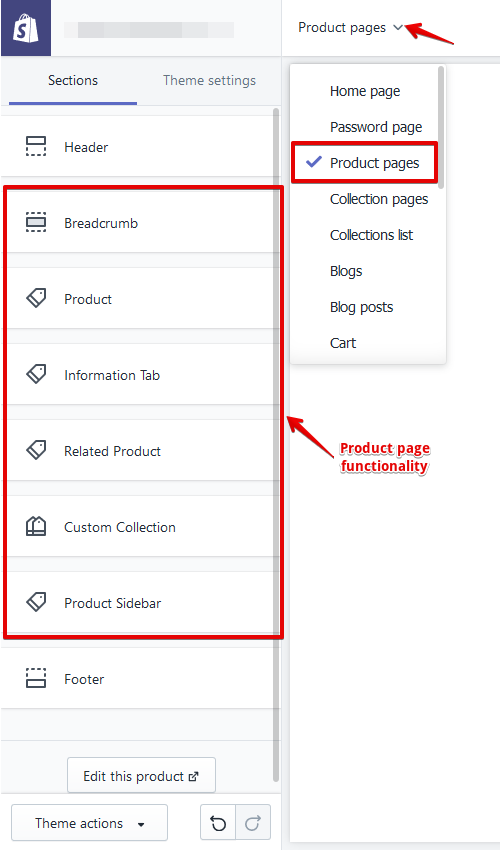
Product Pages
- Go to the "Products pages" page on the Customize page from Customizer. Display the functionality for this page.
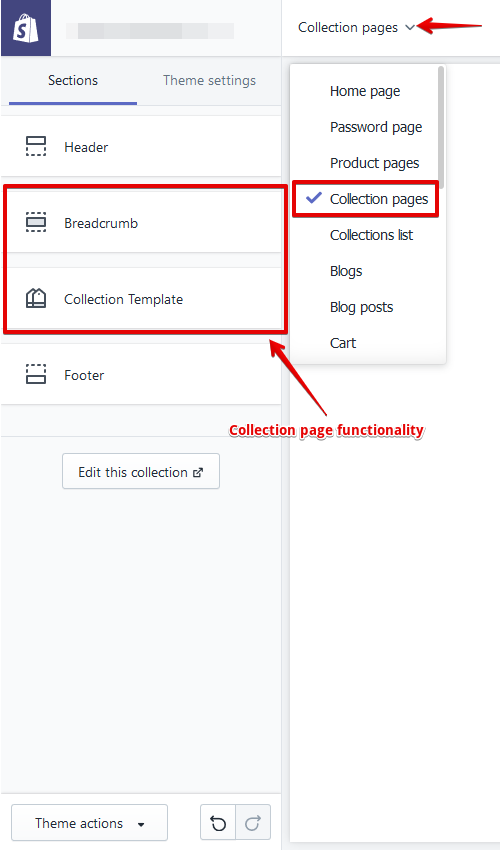
Collection Pages
- Go to the "Collection Pages" page on the Customize page from Customizer. Display the functionality for this page.
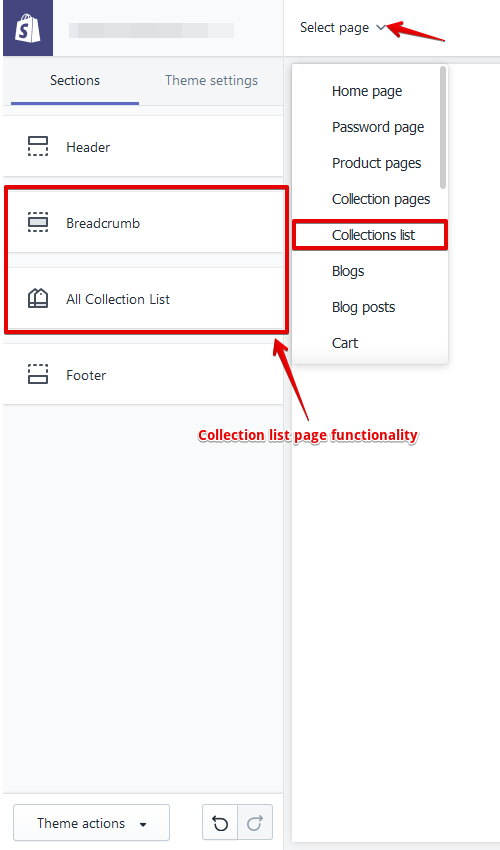
Collection List
- Go to the "Collection List" page on the Customize page from Customizer. Display the functionality for this page.
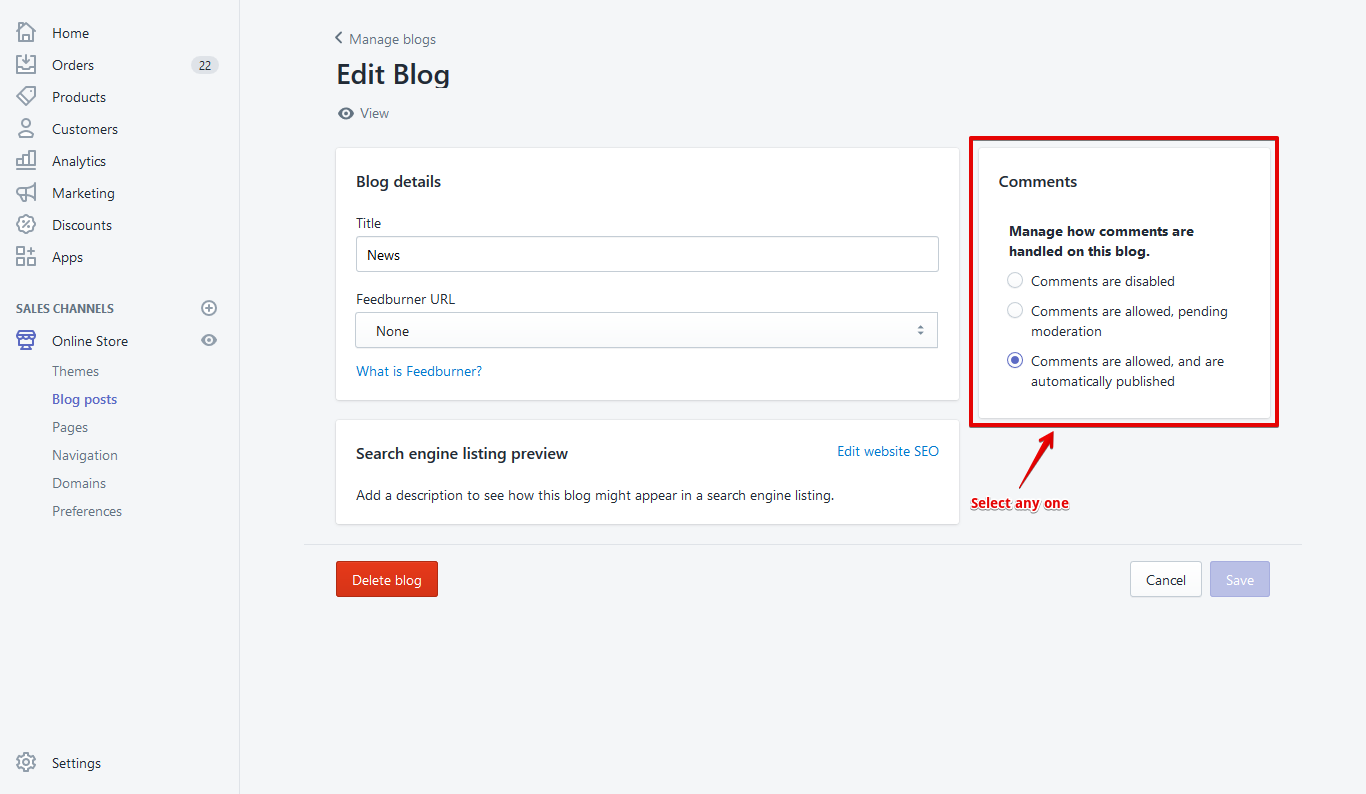
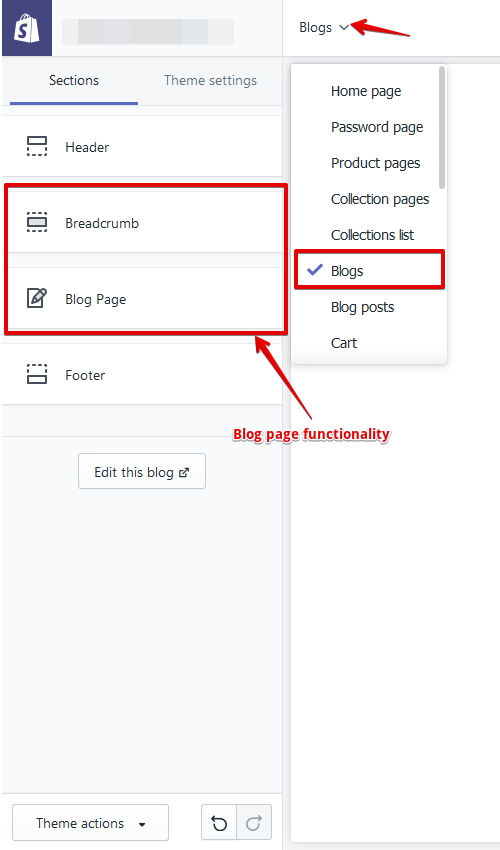
Blogs
- Go to the "Blogs" page on the Customize page from Customizer. Display the functionality for this page.
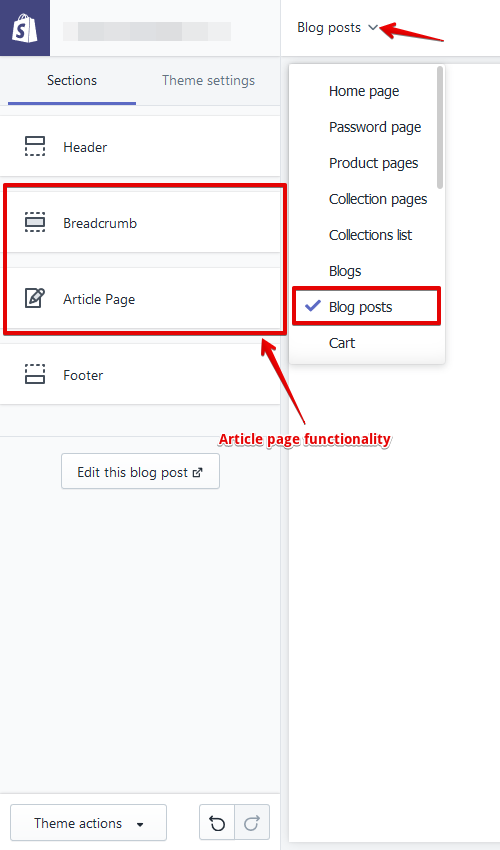
Blog Posts
- Go to the "Blog Posts" page on the Customize page from Customizer. Display the functionality for this page.
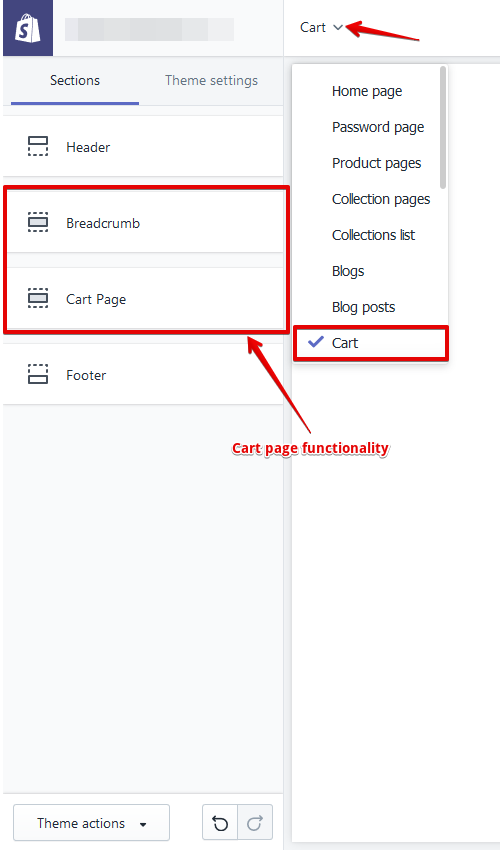
Cart
- Go to the "Cart" page on the Customize page from Customizer. Display the functionality for this page.
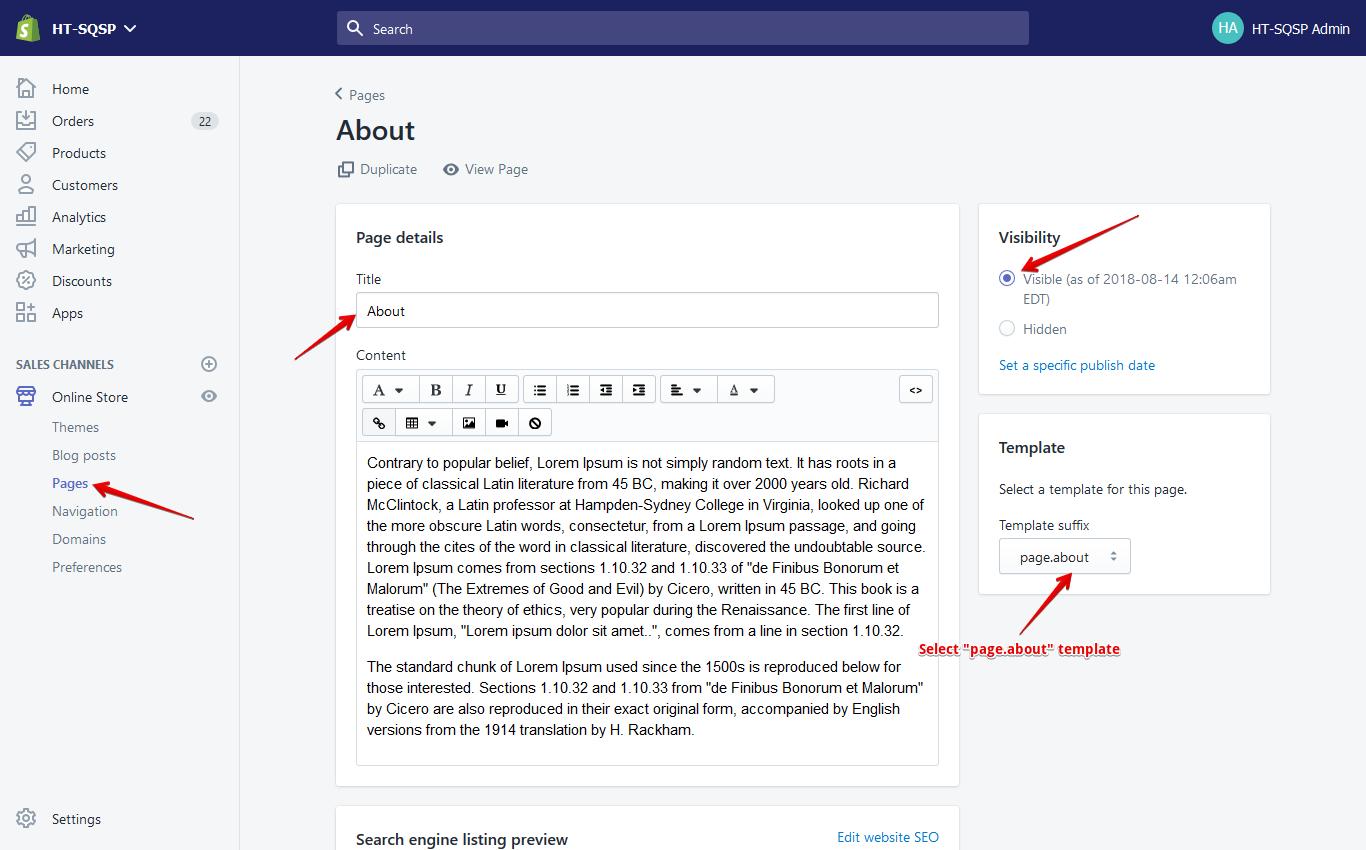
About
- Go to the "About" page on the Customize page from Customizer. Display the functionality for this page.

Contact
- Go to the "Contact" page on the Customize page from Customizer. Display the functionality for this page.

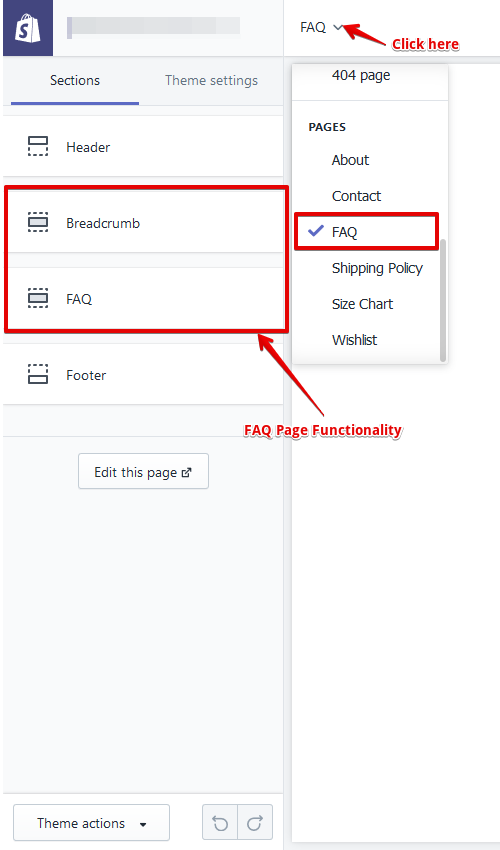
FAQ
- Go to the "FAQ" page on the Customize page from Customizer. Display the functionality for this page.
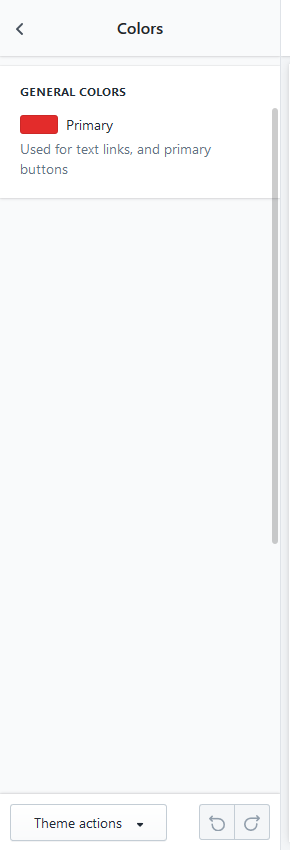
Theme Color
- Go to Customizer > Theme Settings > Colors
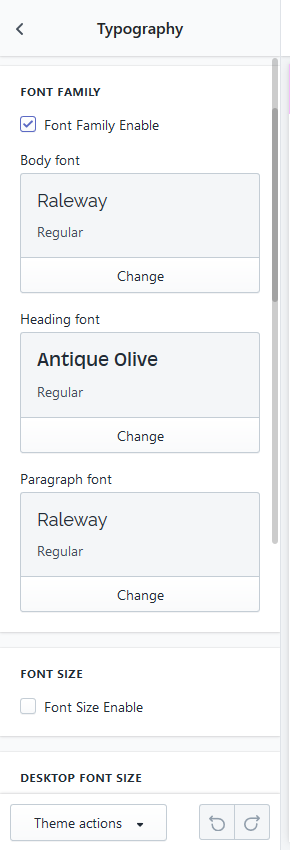
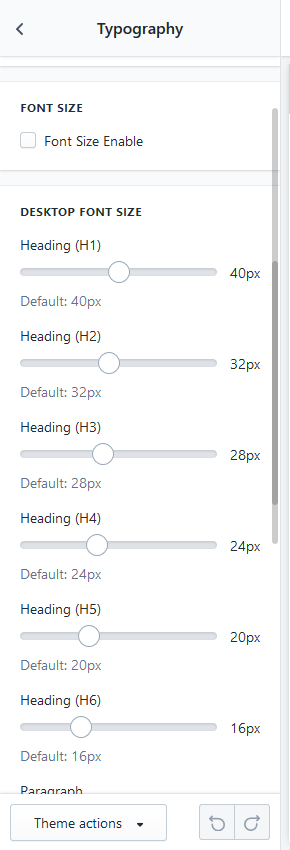
Typography
- Go to Customizer > Theme Settings > Typography
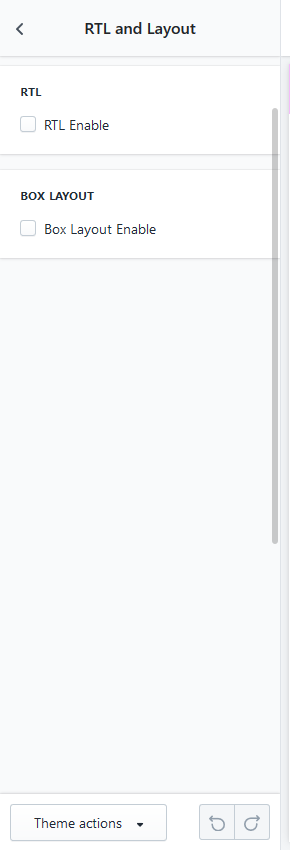
RTL
- Go to Customizer > Theme Settings > RTL
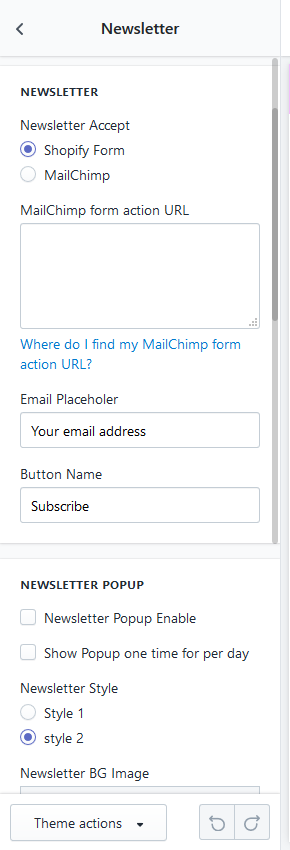
Newsletter
- Go to Customizer > Theme Settings > Newsletter
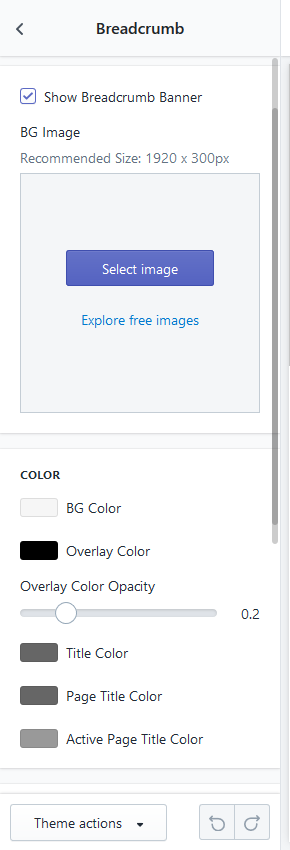
Breadcrumb
- Golobal settings - Go to Customizer > Theme Settings > Breadcrumb
- Individual settings - Go to Page > Sections > Breadcrumb

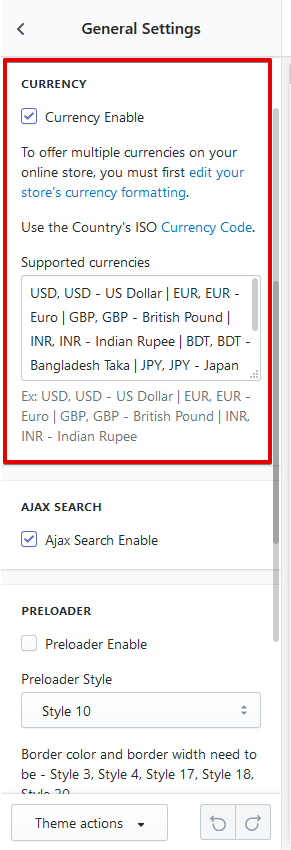
Currency
- Go to Customizer > Theme Settings > General Settings
Preloader
- Go to Customizer > Theme Settings > General Settings

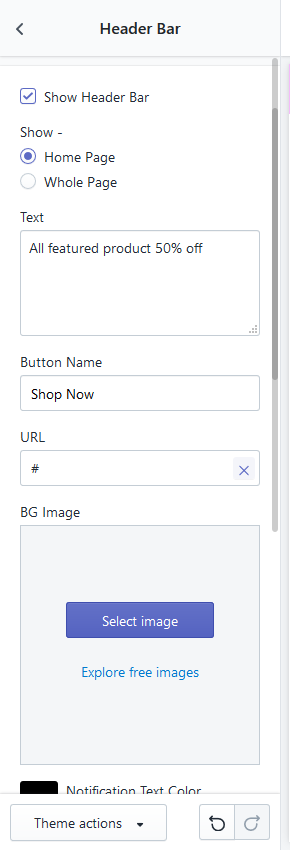
Header Bar
- Go to Customizer > Theme Settings > Header Bar
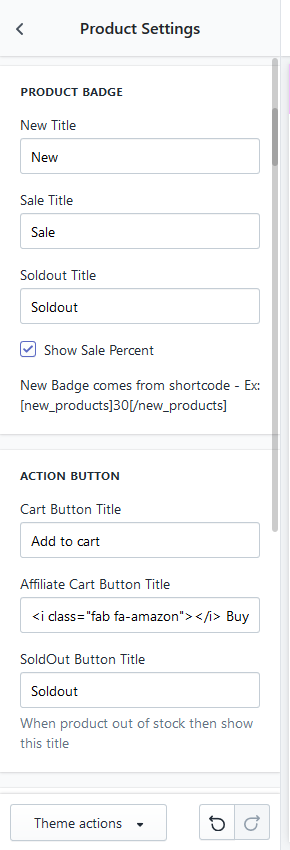
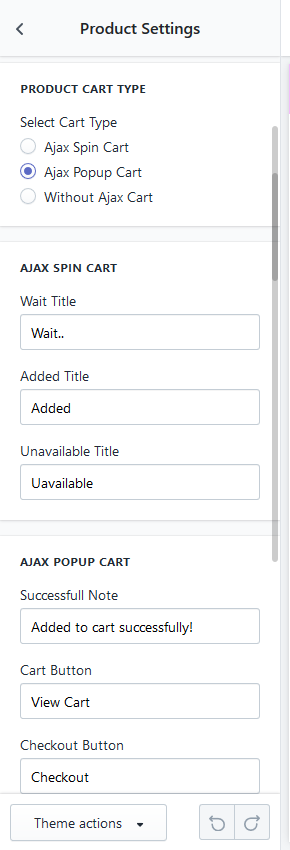
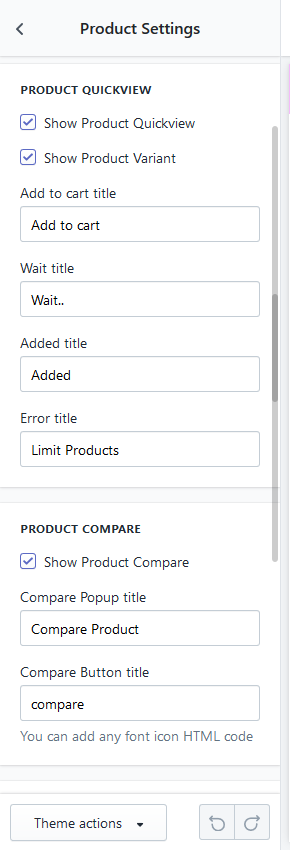
Product Settings
- Go to Customizer > Theme Settings > Product Settings
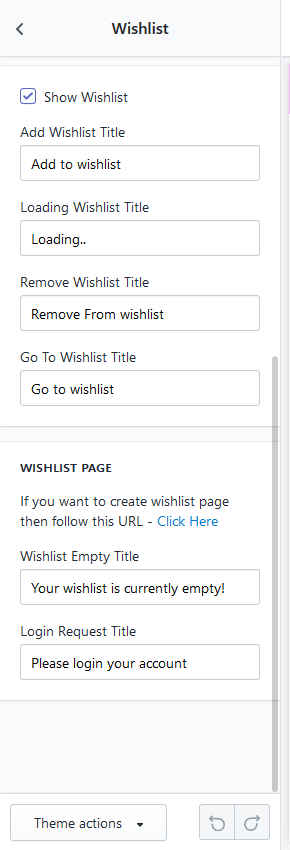
Wishlist
- Go to Customizer > Theme Settings > Wishlist
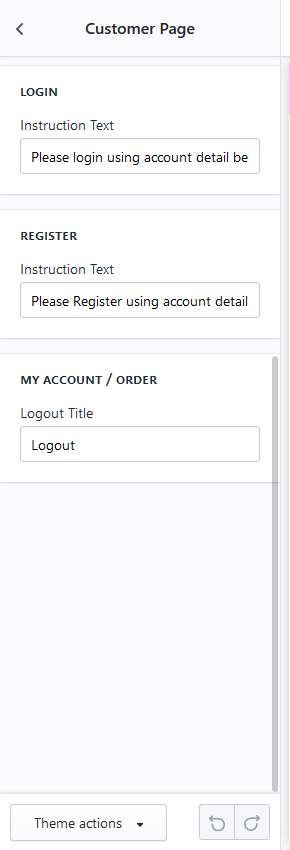
Customer Page
- Go to Customizer > Theme Settings > Customer Page
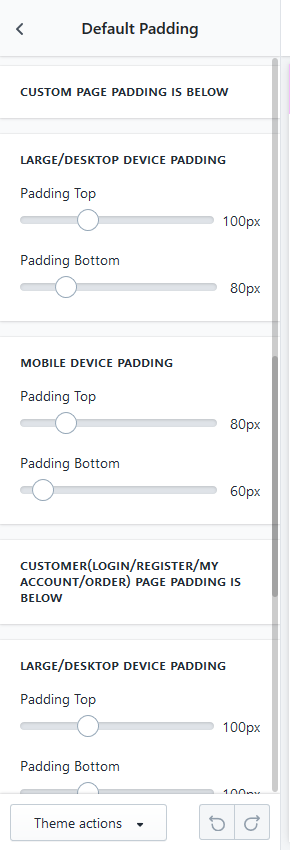
Default Padding
- Go to Customizer > Theme Settings > Default Padding
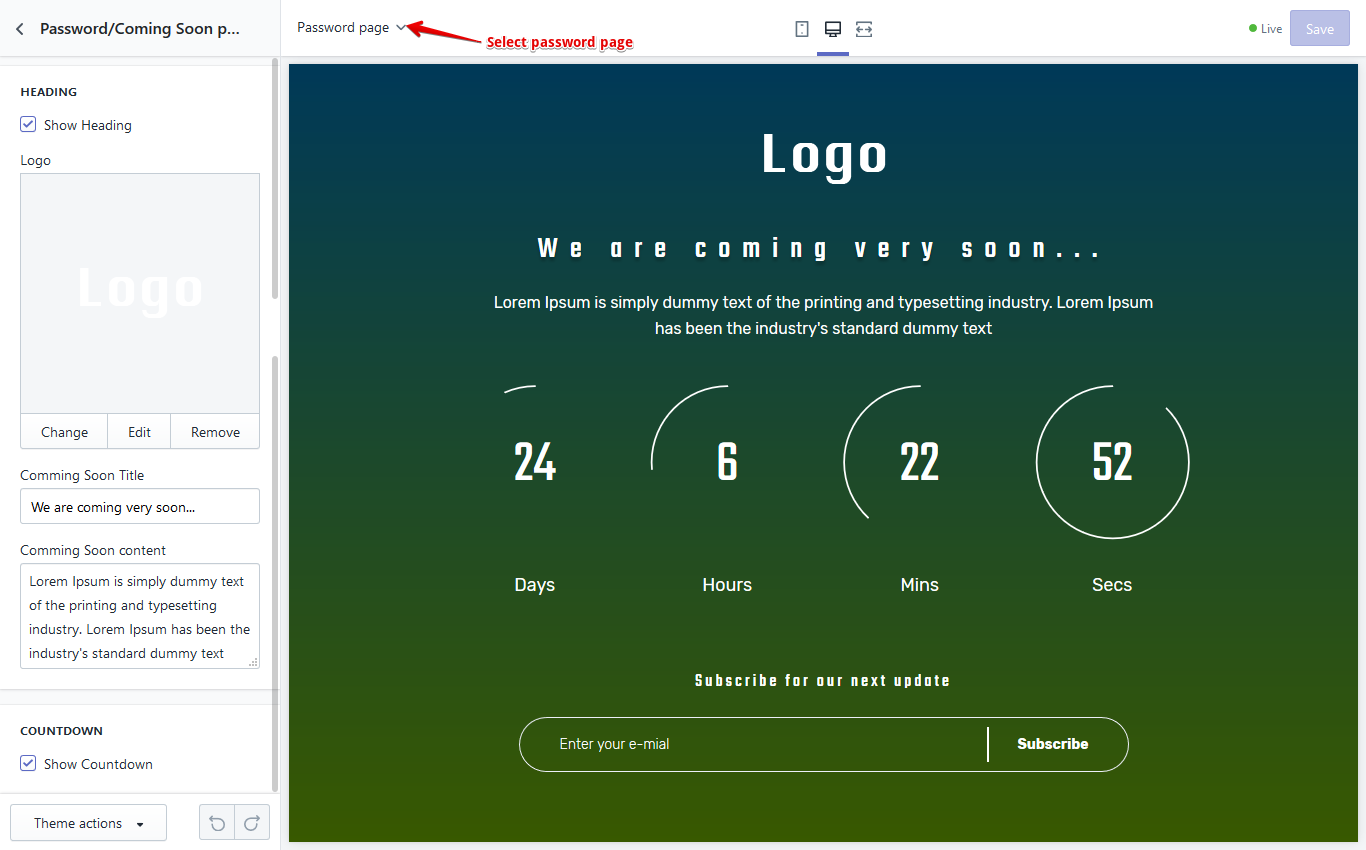
Password/Coming Soon Page
- Go to Customizer > Theme Settings > Password/Coming Soon Page
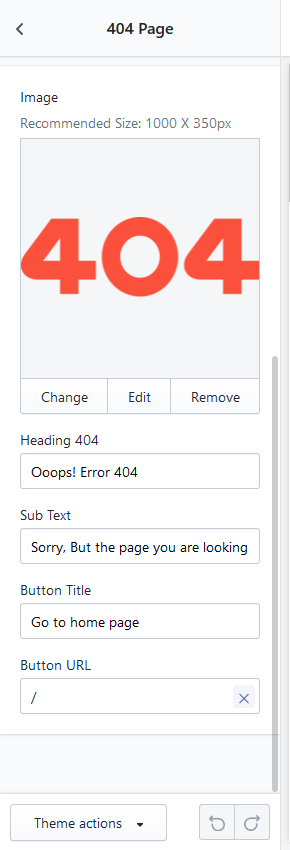
404 Page
- Go to Customizer > Theme Settings > 404 Page
- There are all settings for 404 page
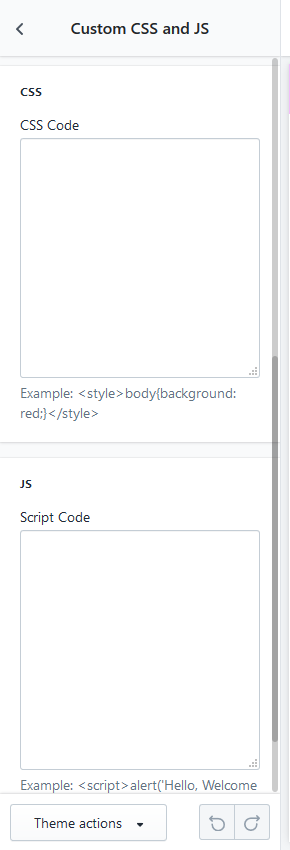
Custom CSS and JS
- Go to Customizer > Theme Settings > Custom CSS and JS
- Add CSS in CSS Code field and add JS in Script Code field
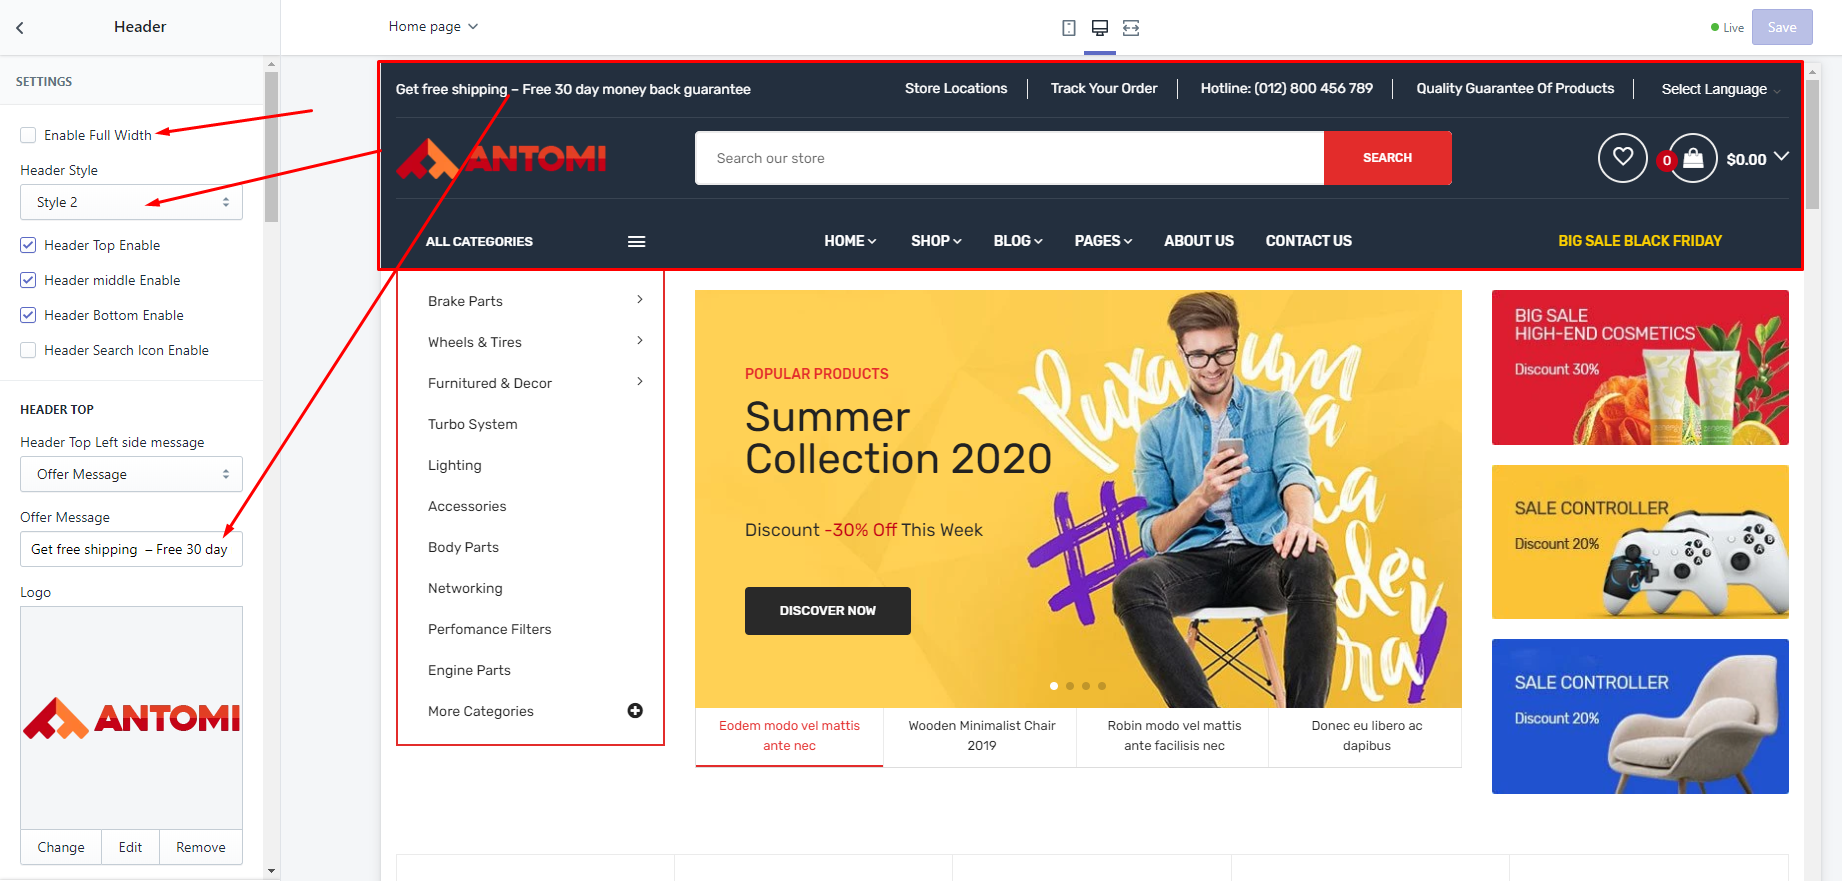
Header
- Go to Customizer > Sections > Header
- There is two header style, you can easily select any one. Follow bellow image
Header Style One
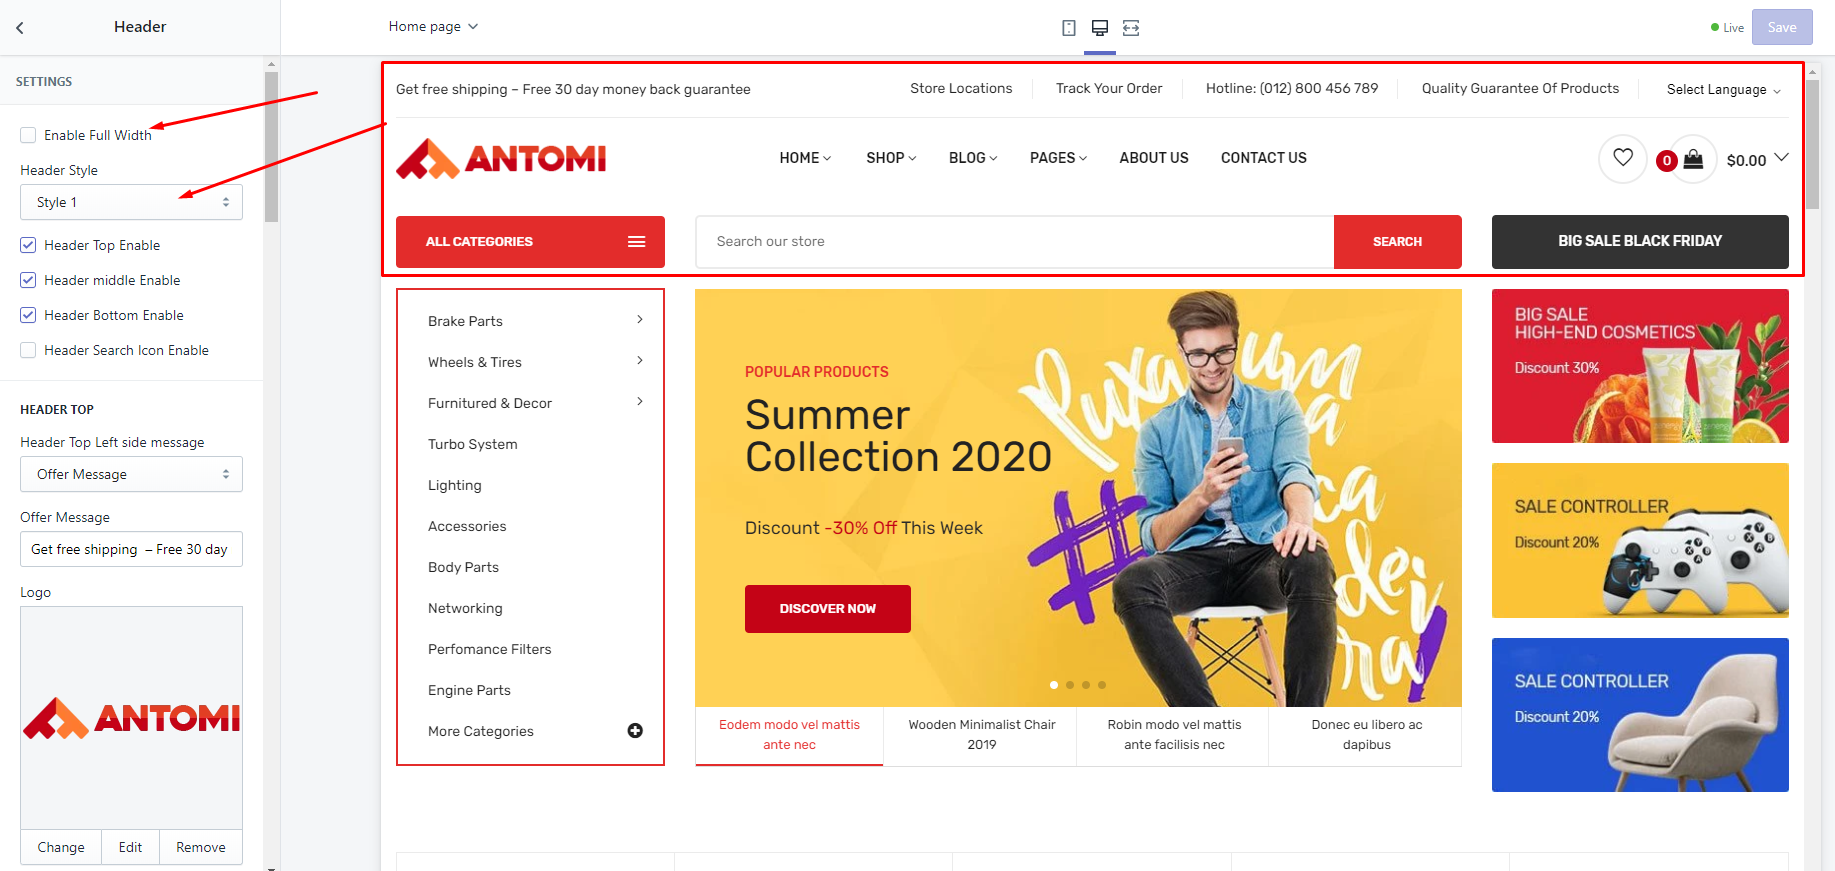
Header Style Two
Header
- Go to Customizer > Sections > Header
- Category Menu Follow bellow image
Category Menu
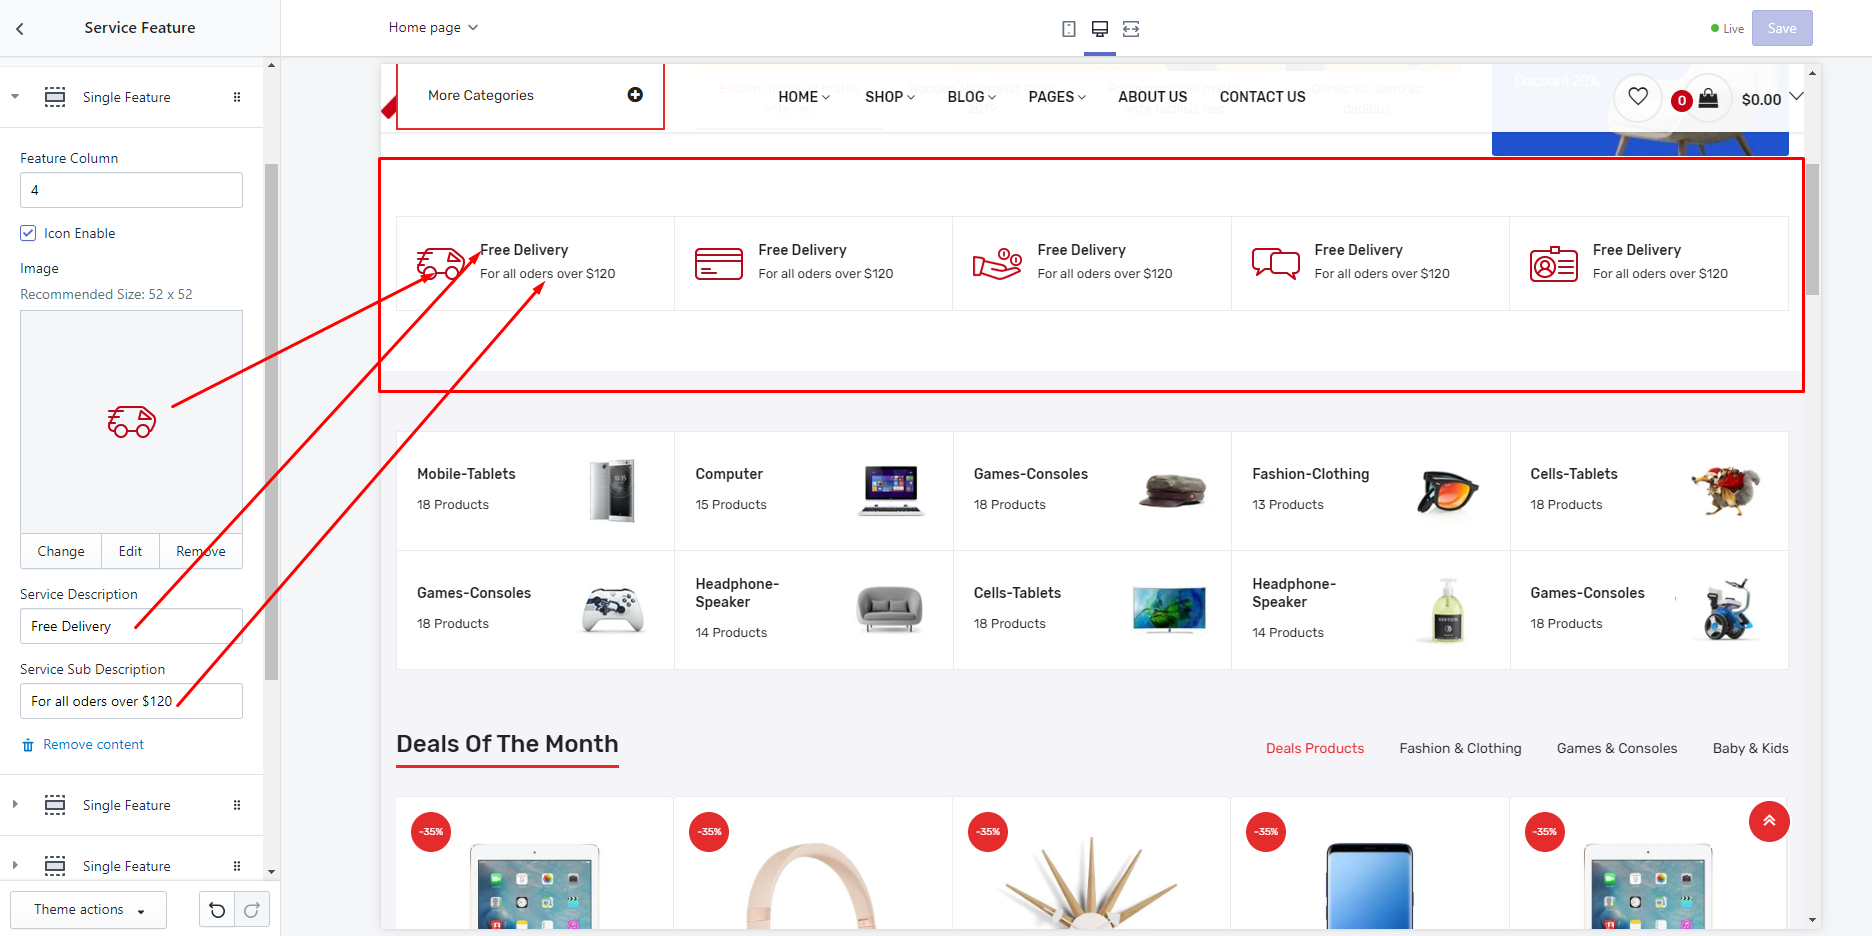
Service
- Go to Customizer > Sections > Service
- Service Follow bellow image
Featured Categories
- Go to Customizer > Sections > Featured Categories
- Featured Categories Follow bellow image
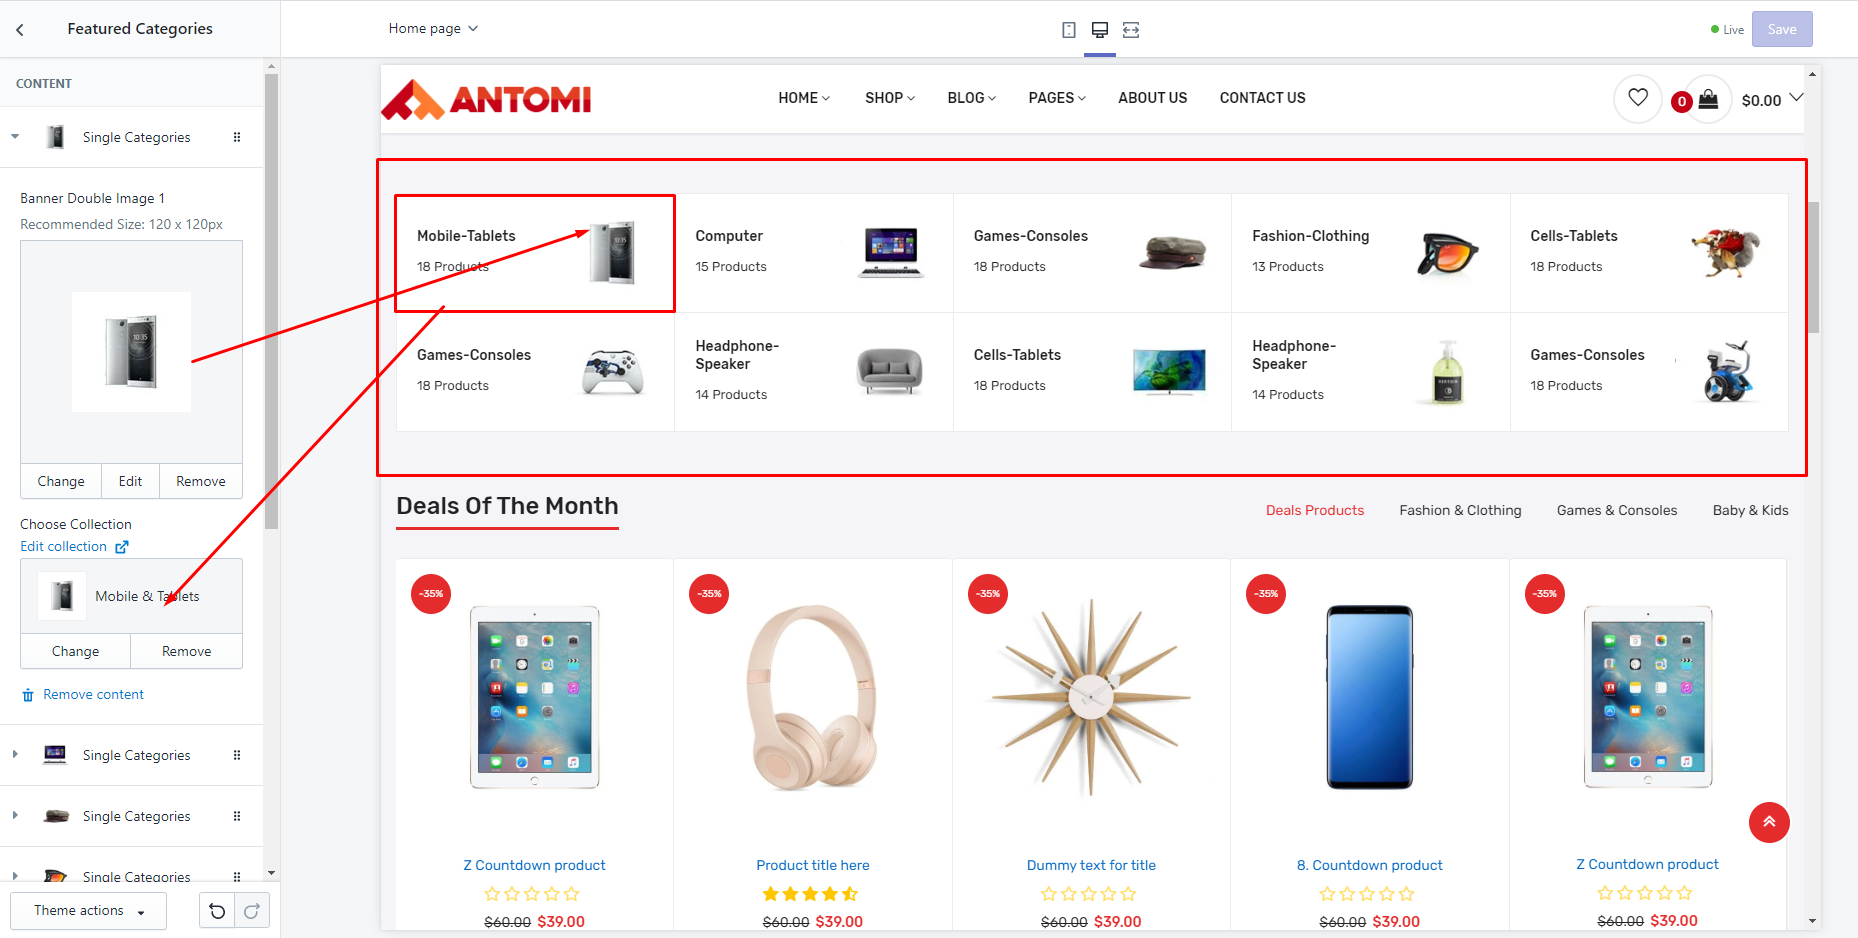
Featured Categories
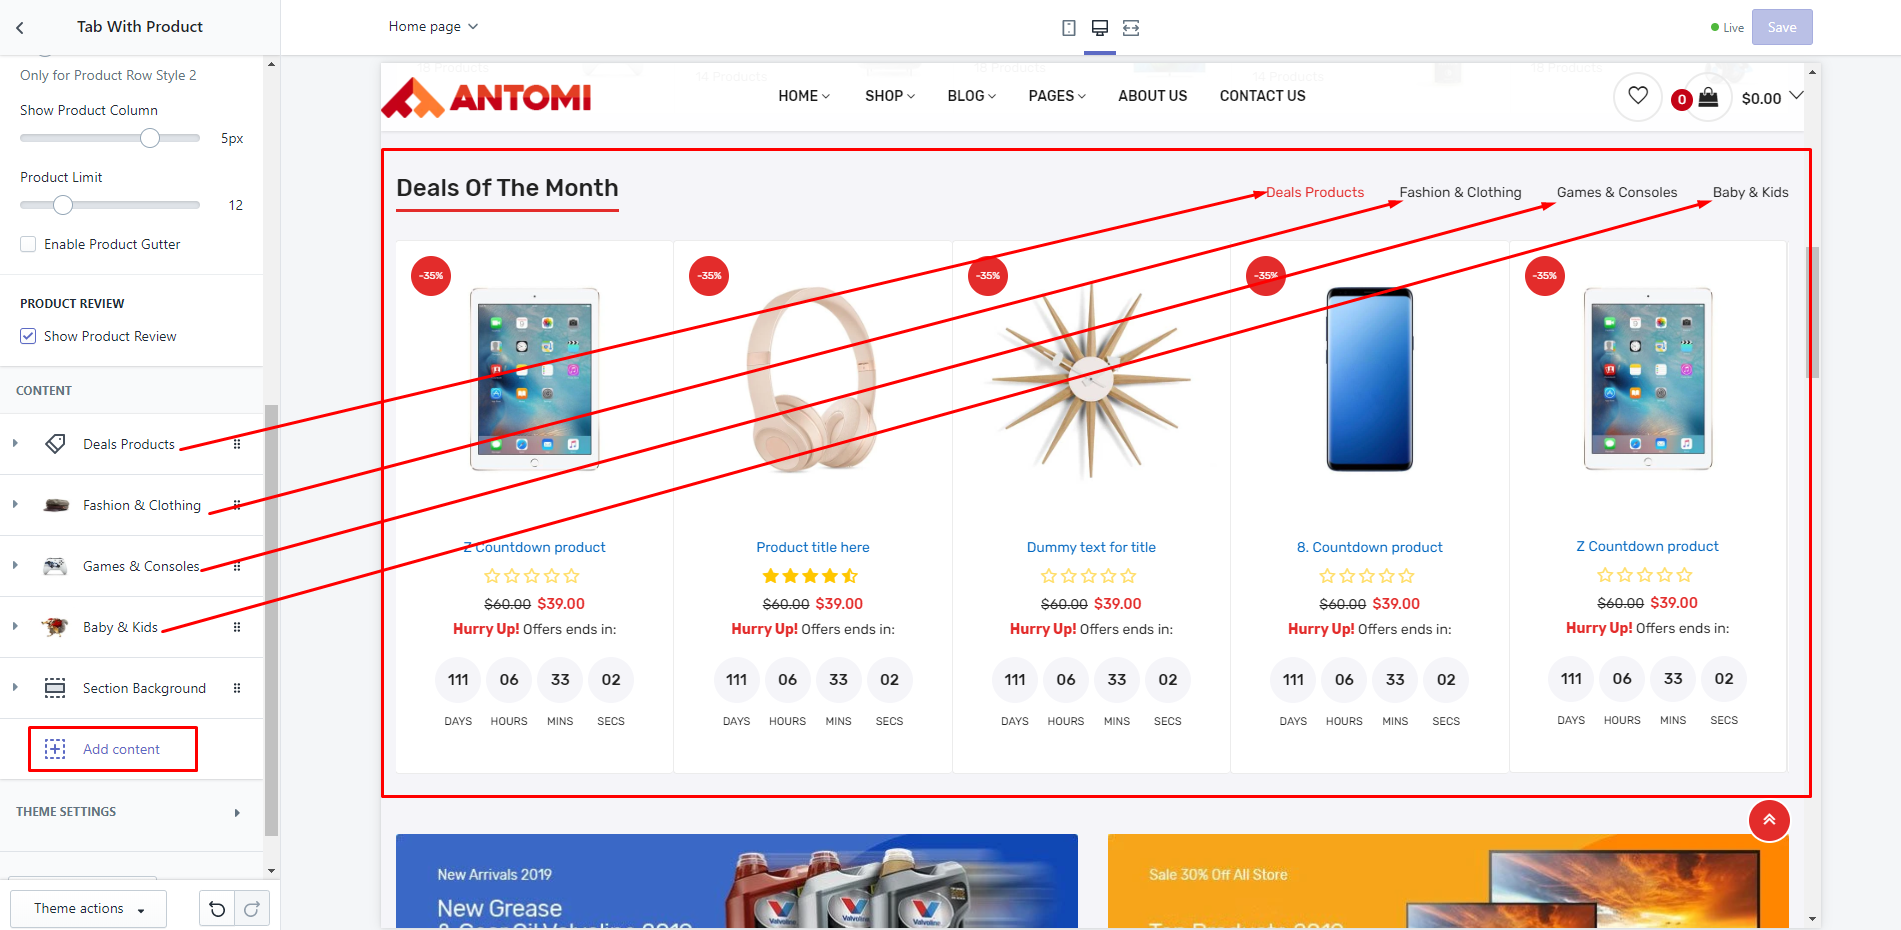
- Go to Customizer > Sections > Tab With Product
- Tab With Product Follow bellow image
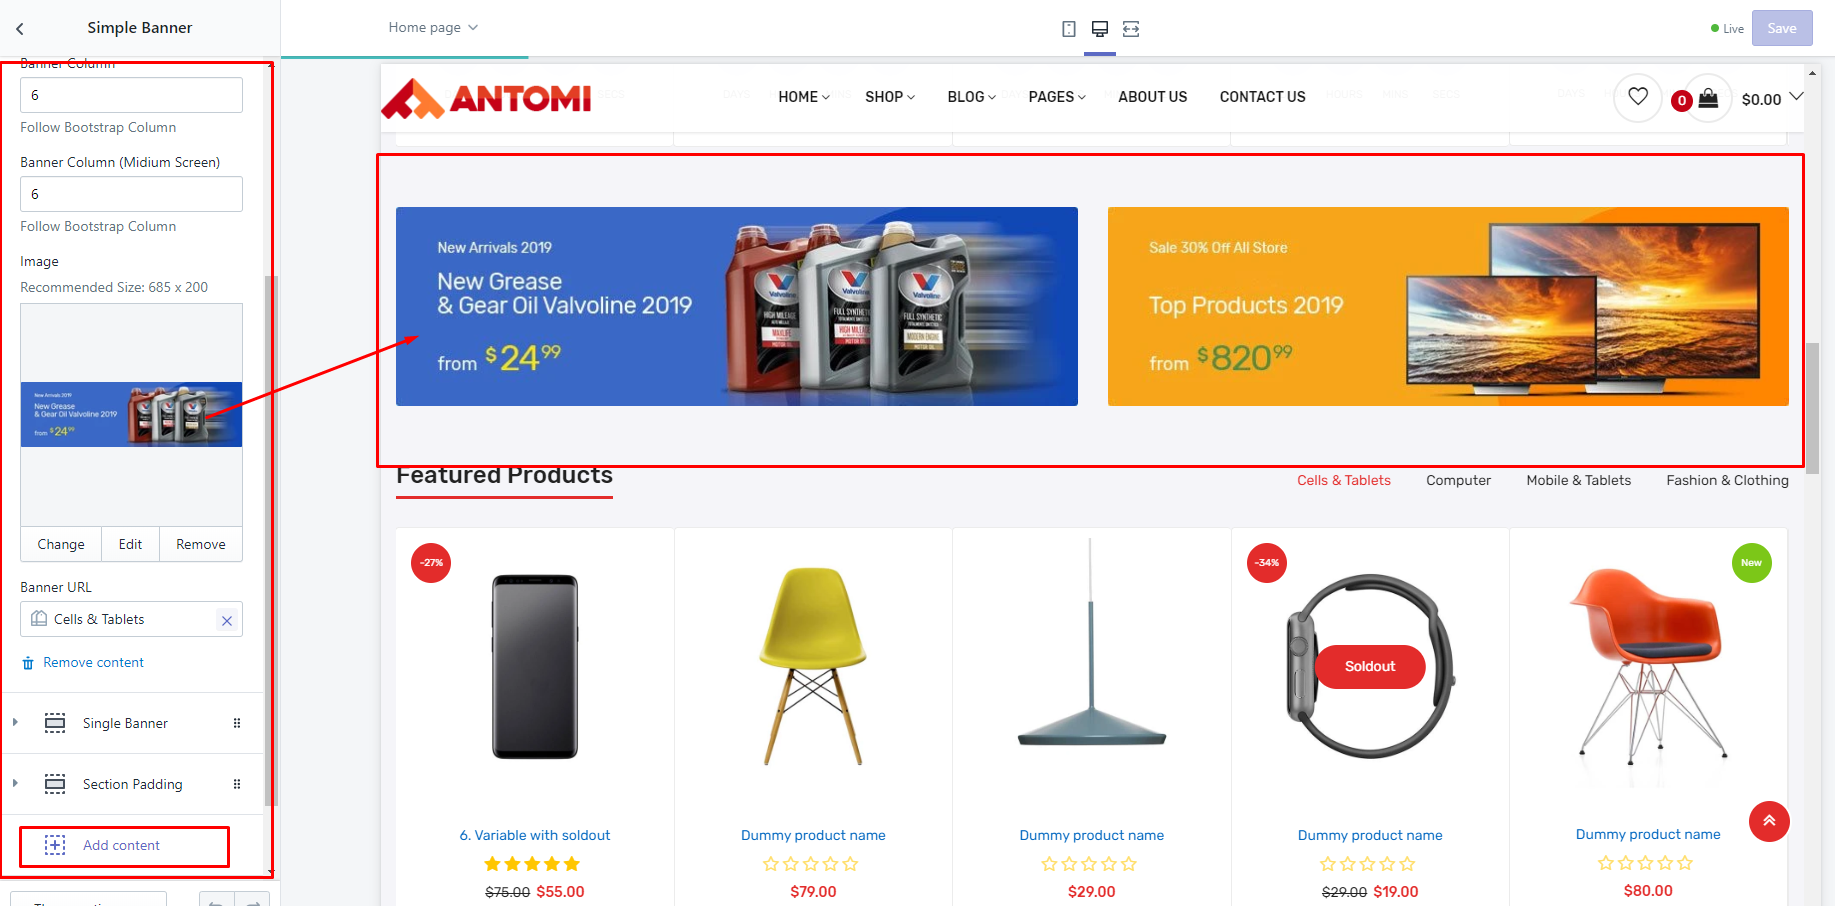
Simple Banner
- Go to Customizer > Sections > Simple Banner
- Follow bellow image
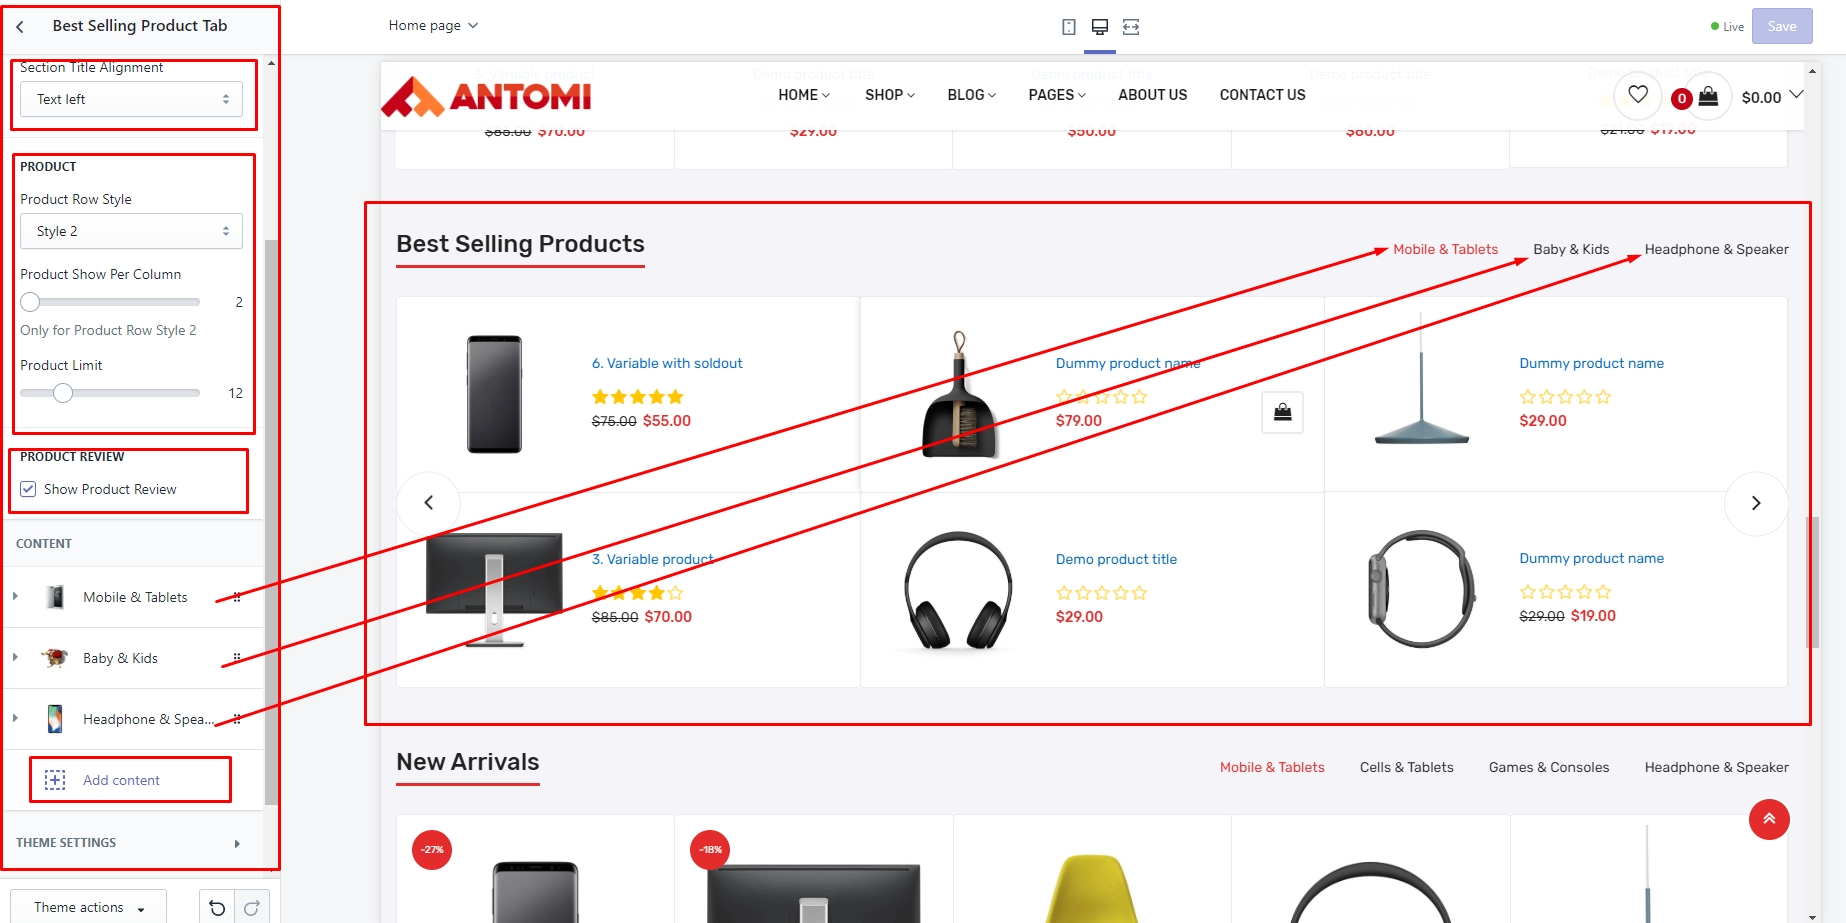
Best Selling Product Tab
- Go to Customizer > Sections > Best Selling Product Tab
- Follow bellow image
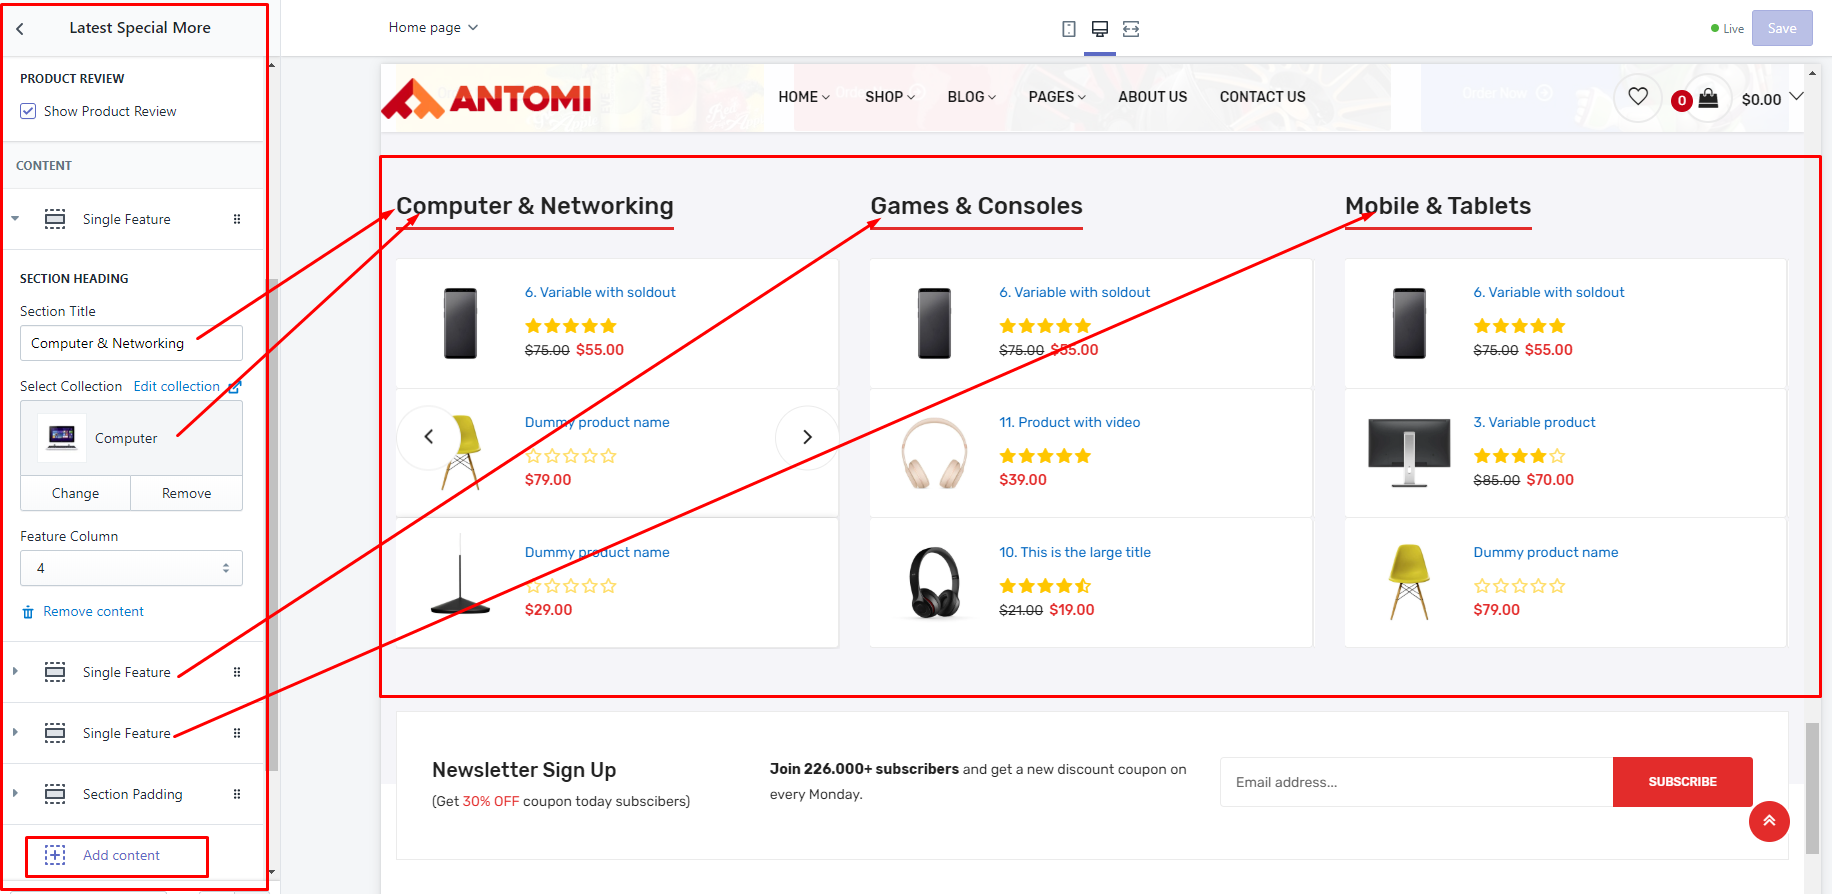
Latest Special More
- Go to Customizer > Sections > Latest Special More
- Follow bellow image
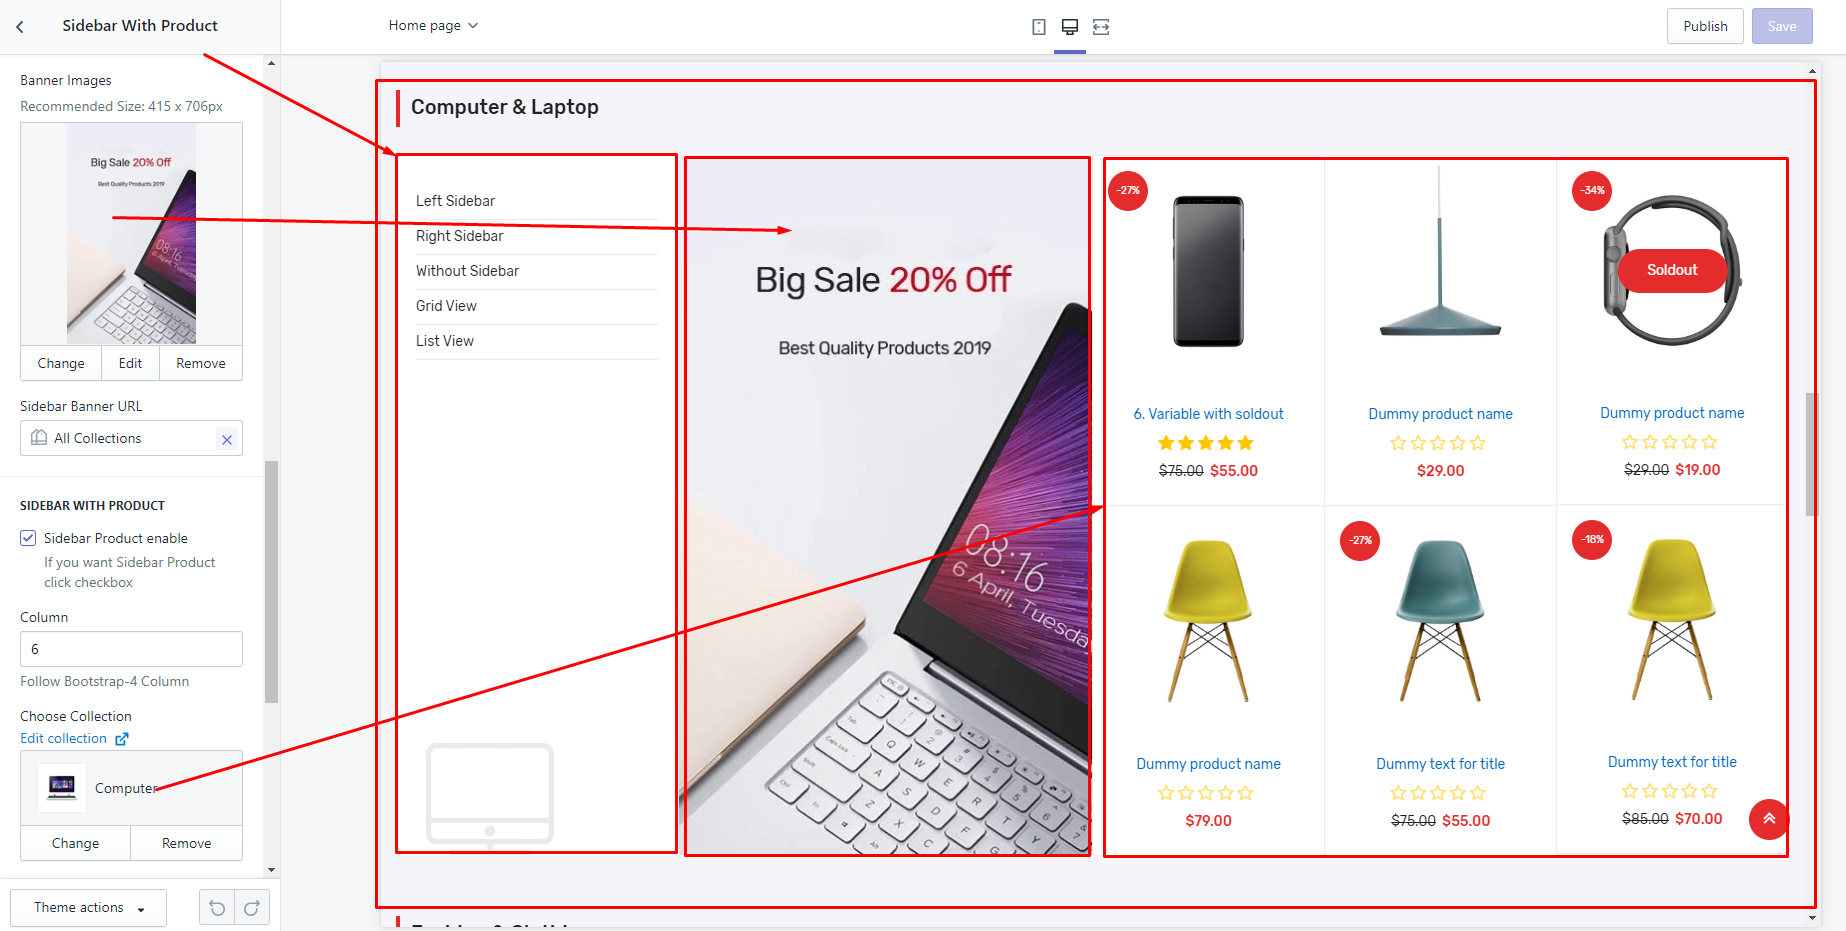
Sidebar With Product
- Go to Customizer > Sections > Sidebar With Product
- Follow bellow image
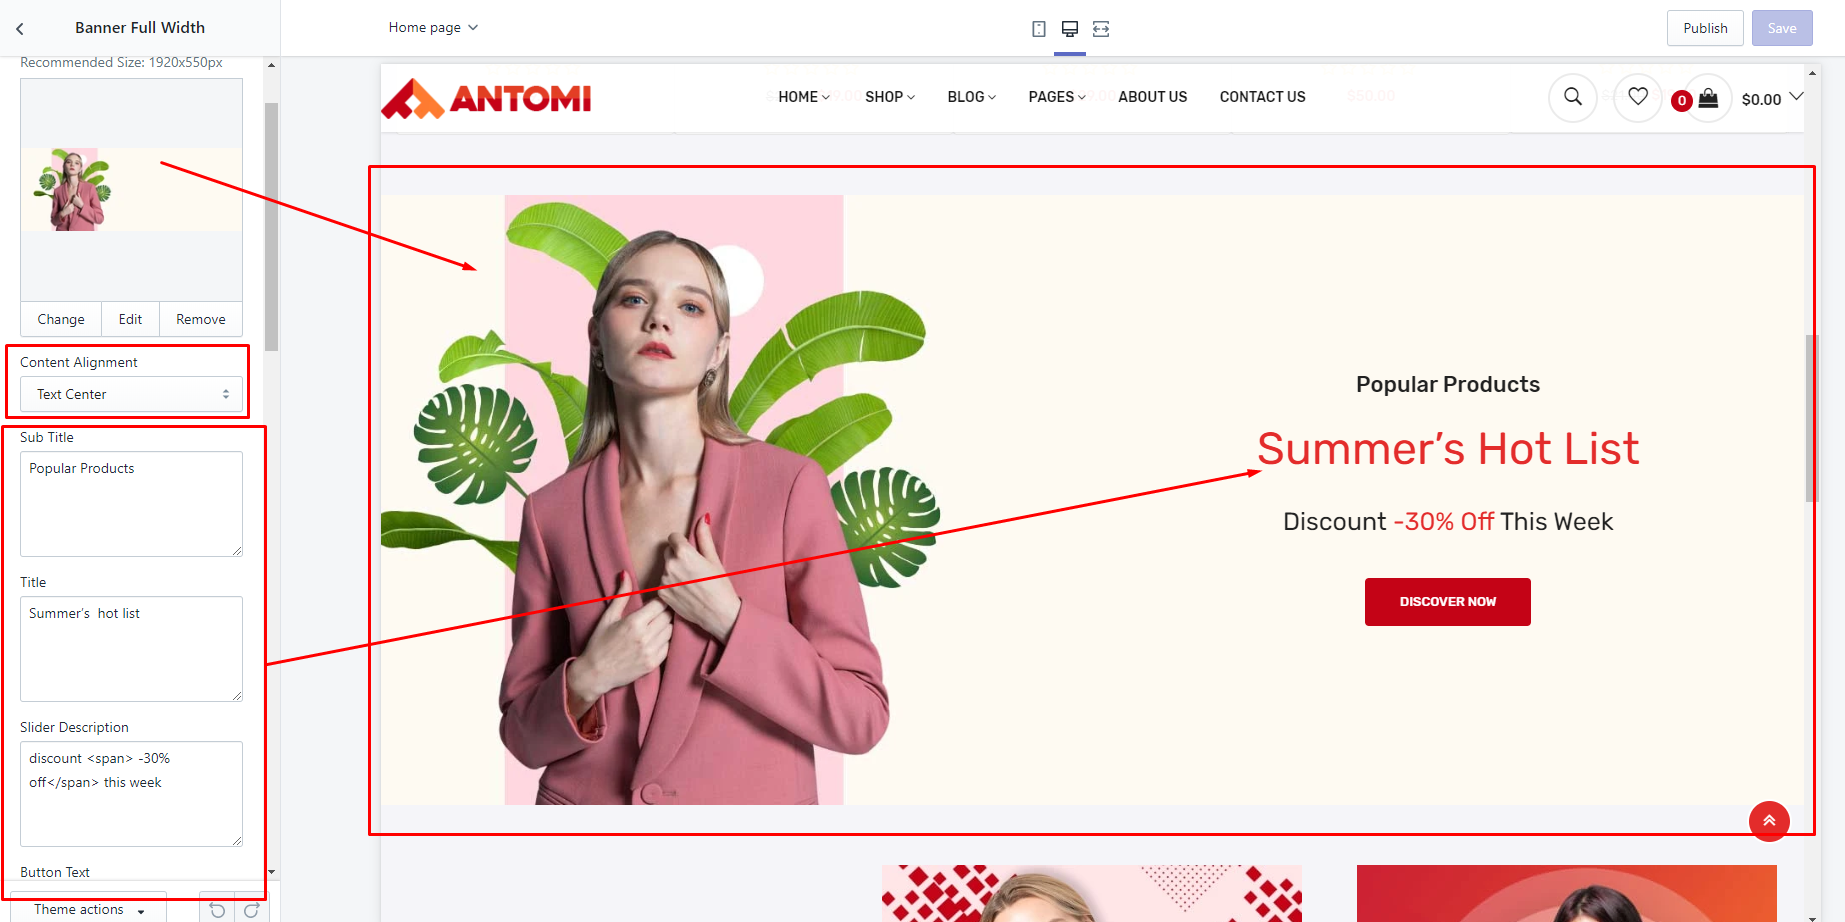
Banner Full Width
- Go to Customizer > Sections > Banner Full Width
- Follow bellow image
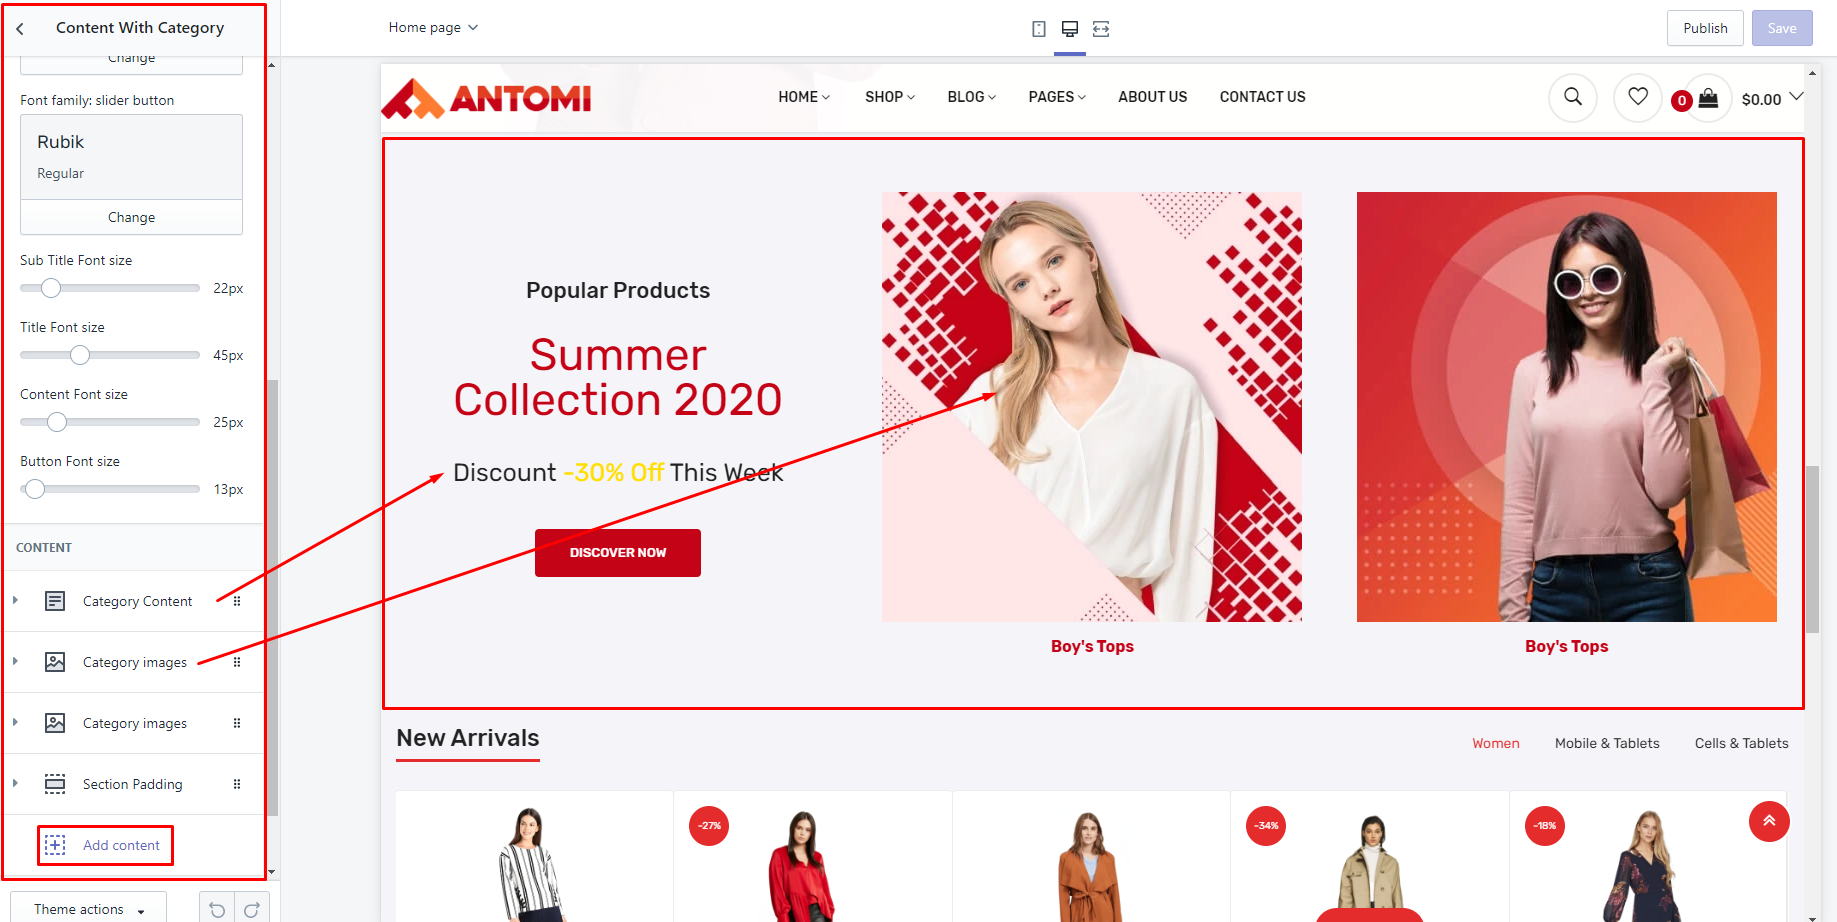
Content With Category
- Go to Customizer > Sections > Content With Category
- Follow bellow image
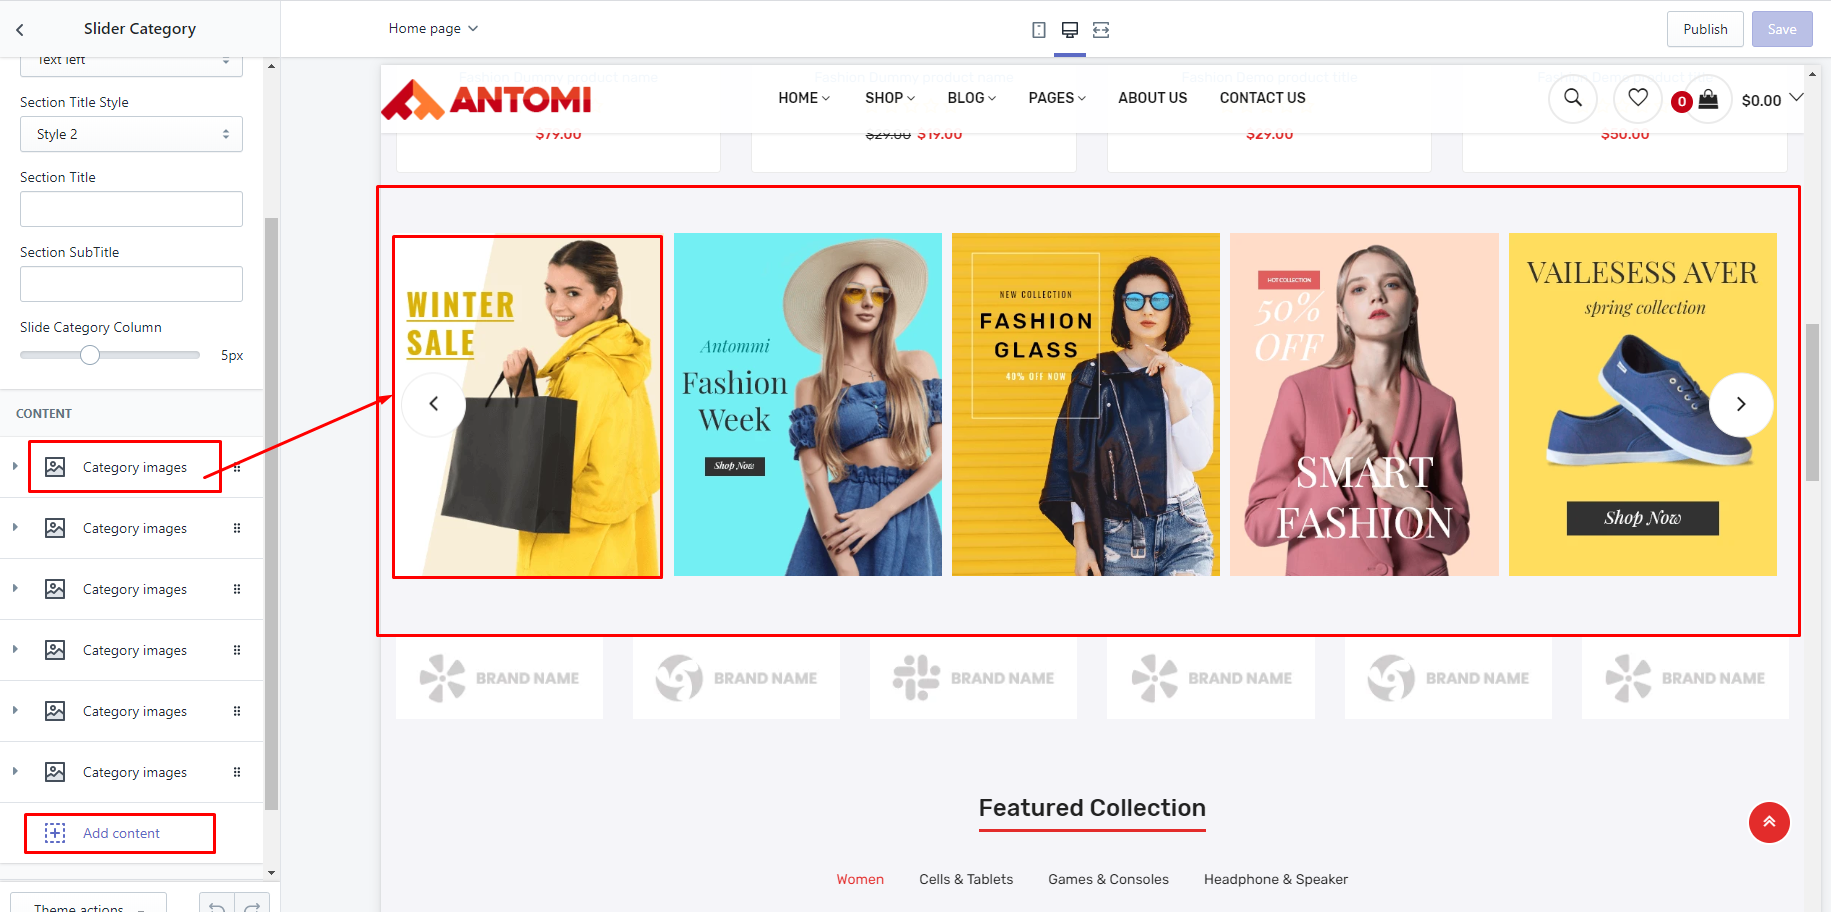
Slide Category
- Go to Customizer > Sections > Slide Category
- Follow bellow image
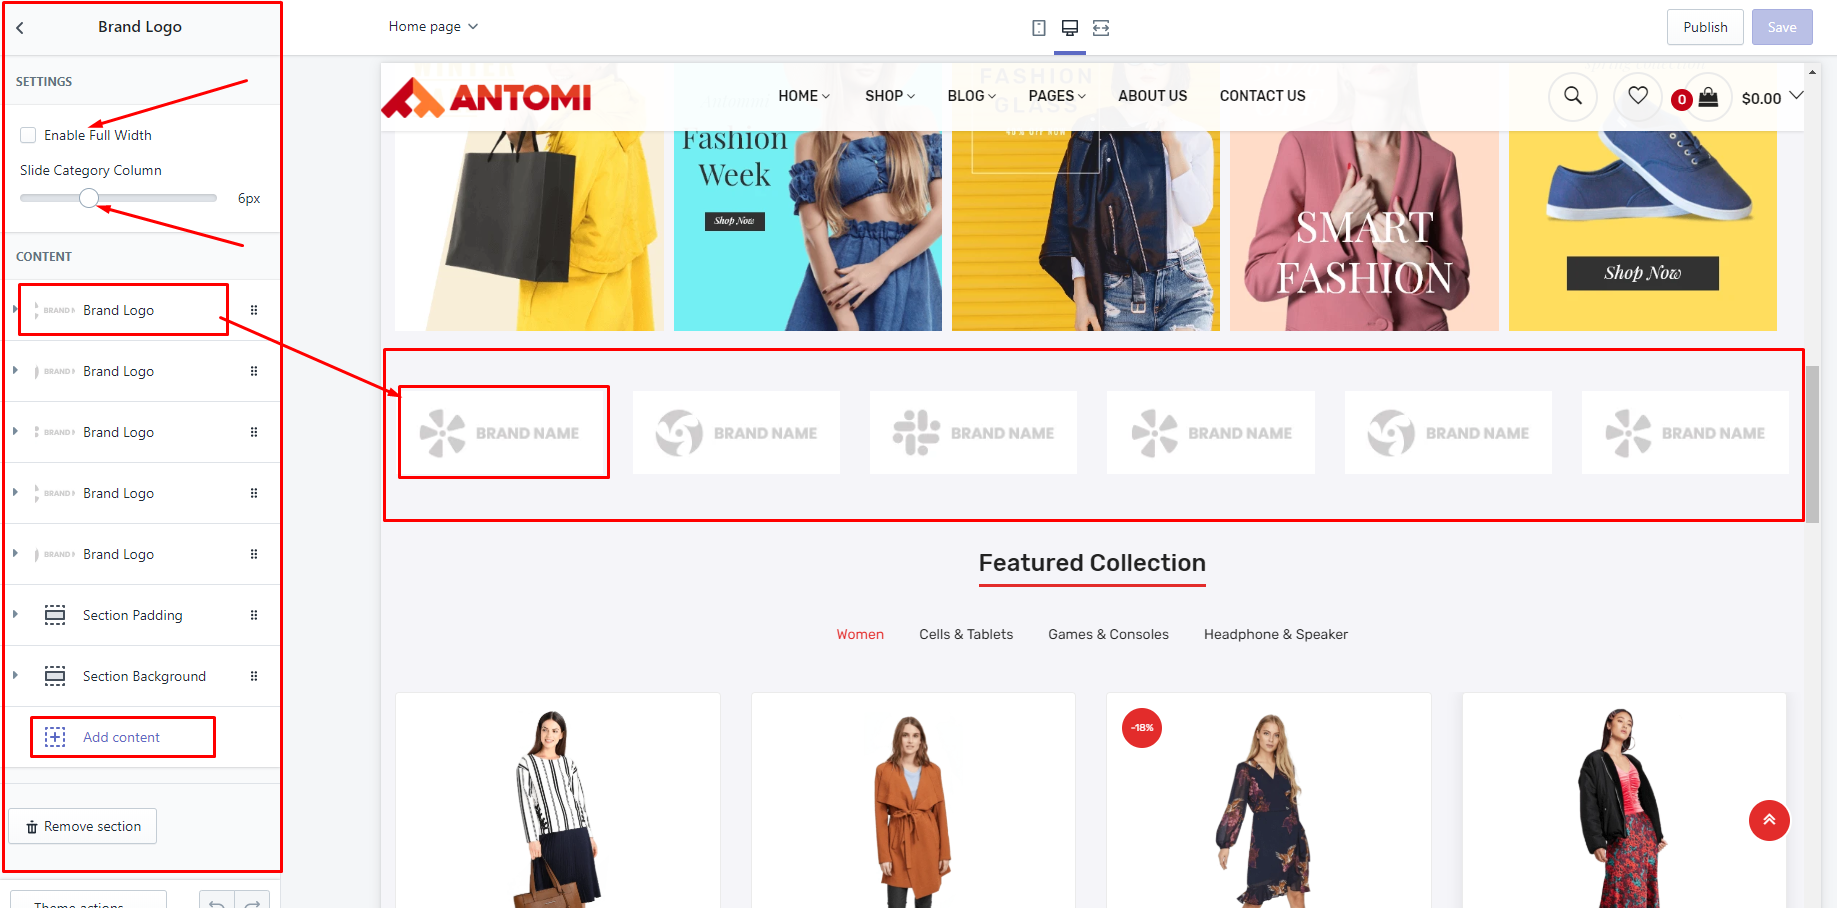
Brand Logo
- Go to Customizer > Sections > Brand Logo
- Follow bellow image
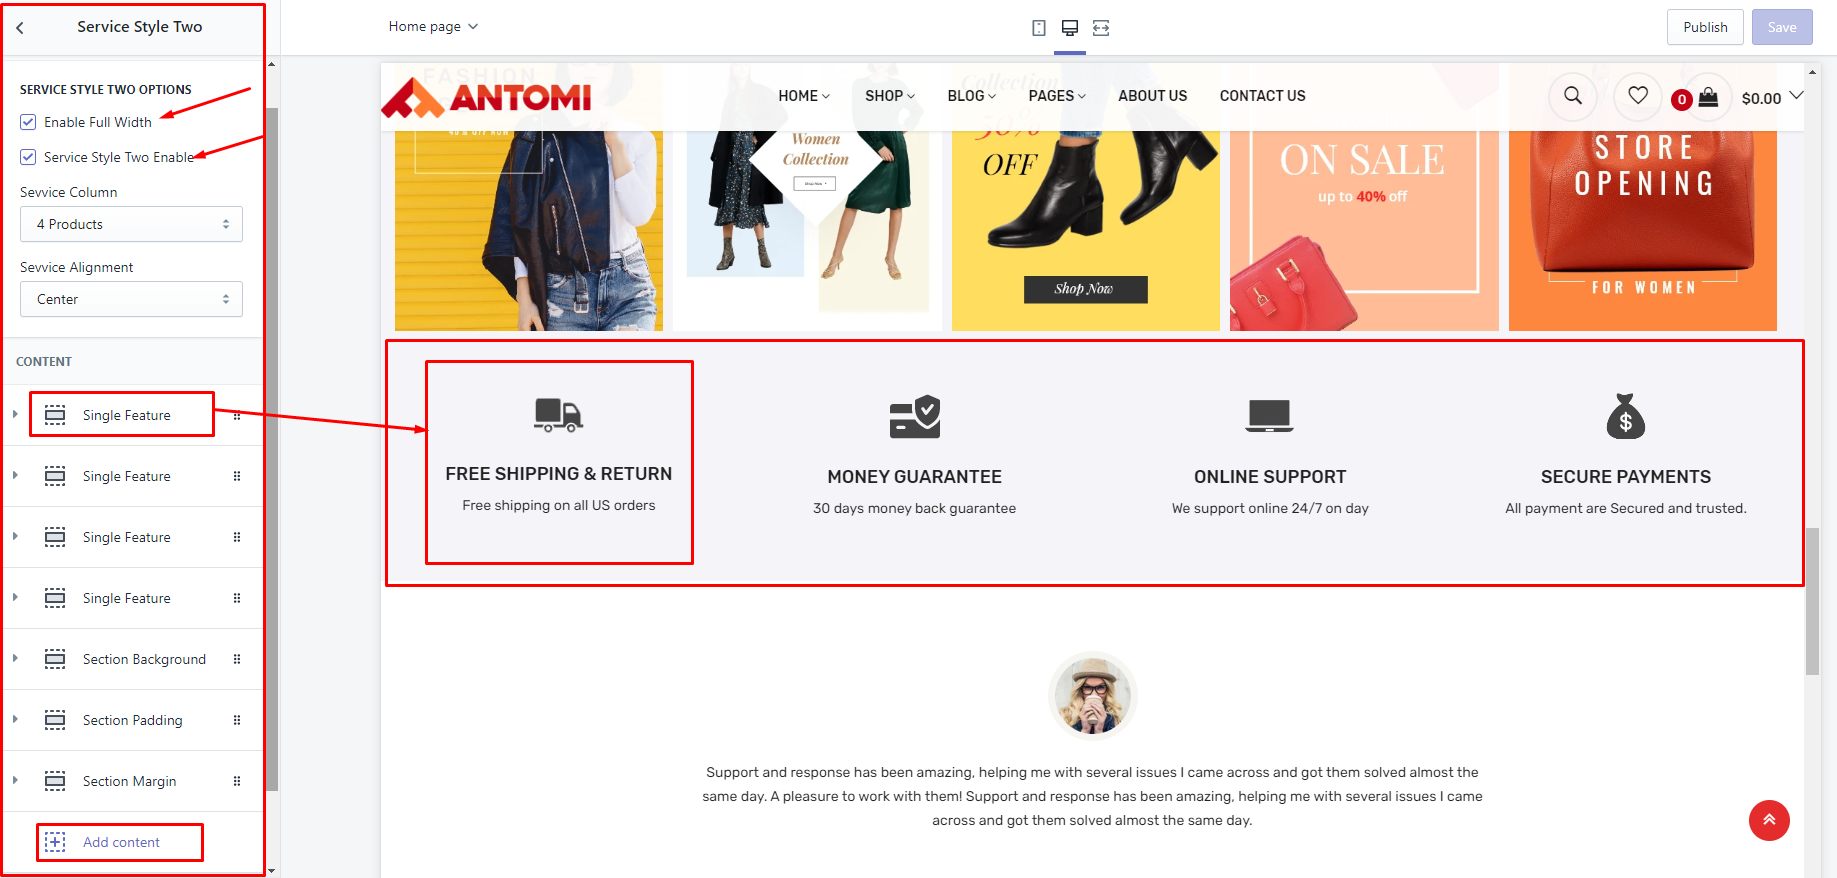
Service Style Two
- Go to Customizer > Sections > Service Style Two
- Follow bellow image
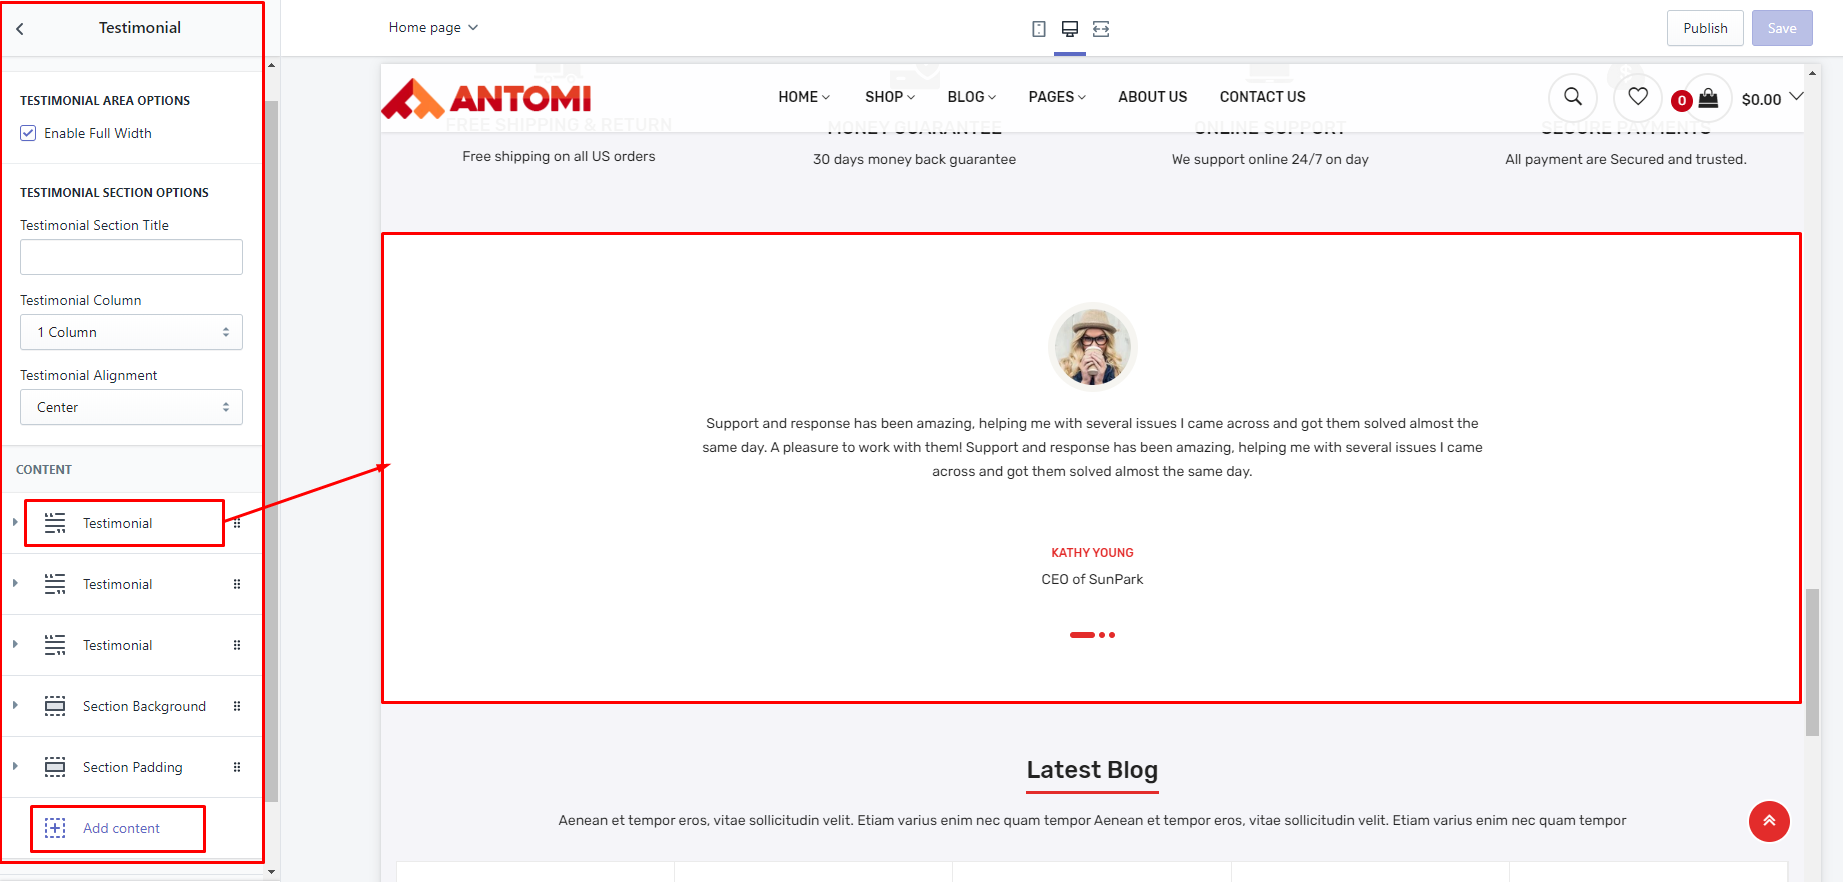
Testimonial
- Go to Customizer > Sections > Testimonial
- Follow bellow image
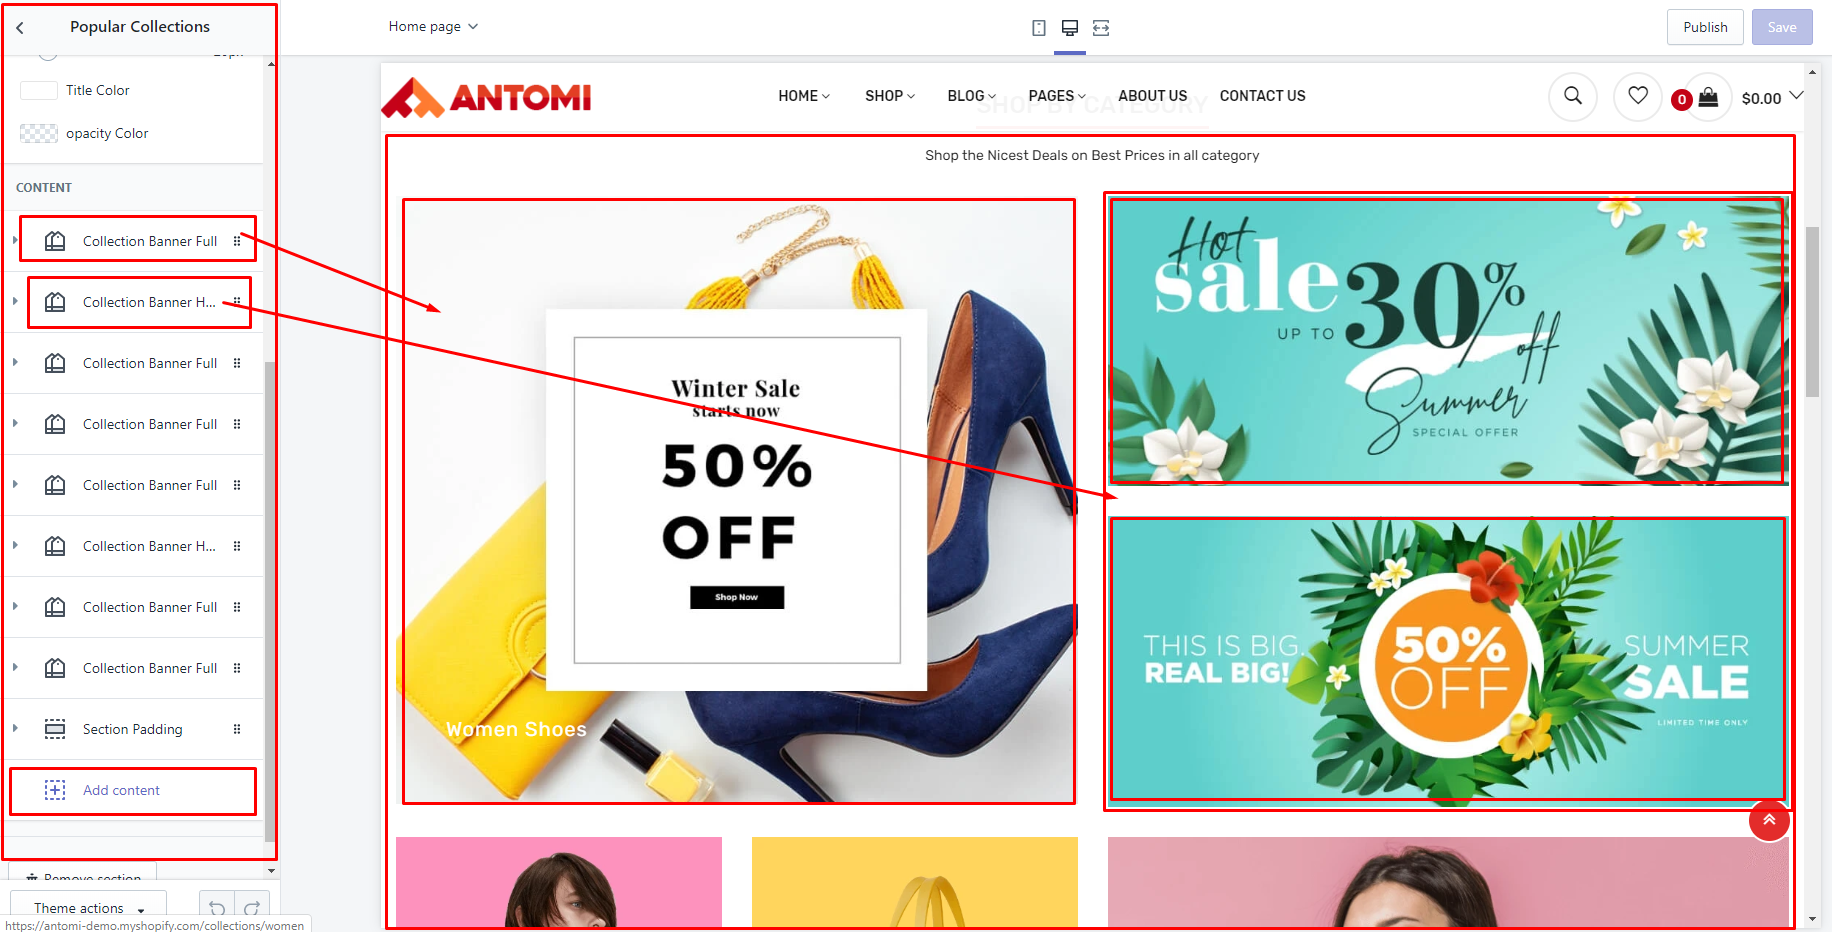
Popular Collections
- Go to Customizer > Sections > Popular Collections
- Follow bellow image
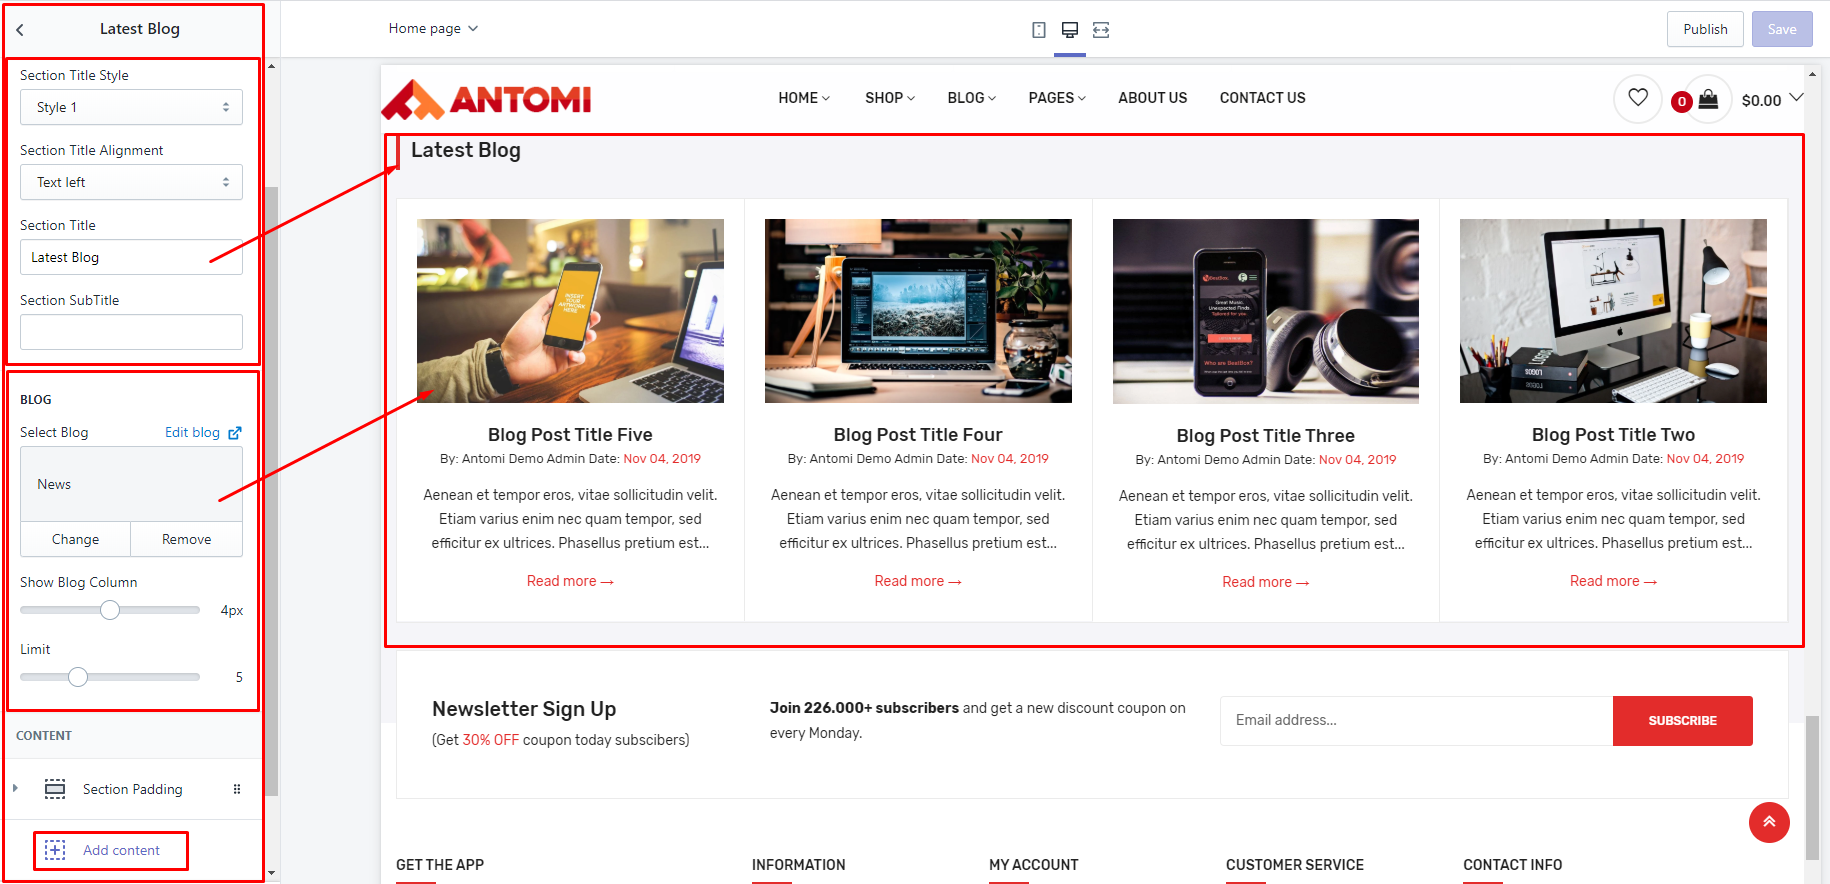
Latest Blog
- Go to Customizer > Sections > Latest Blog
- Follow bellow image
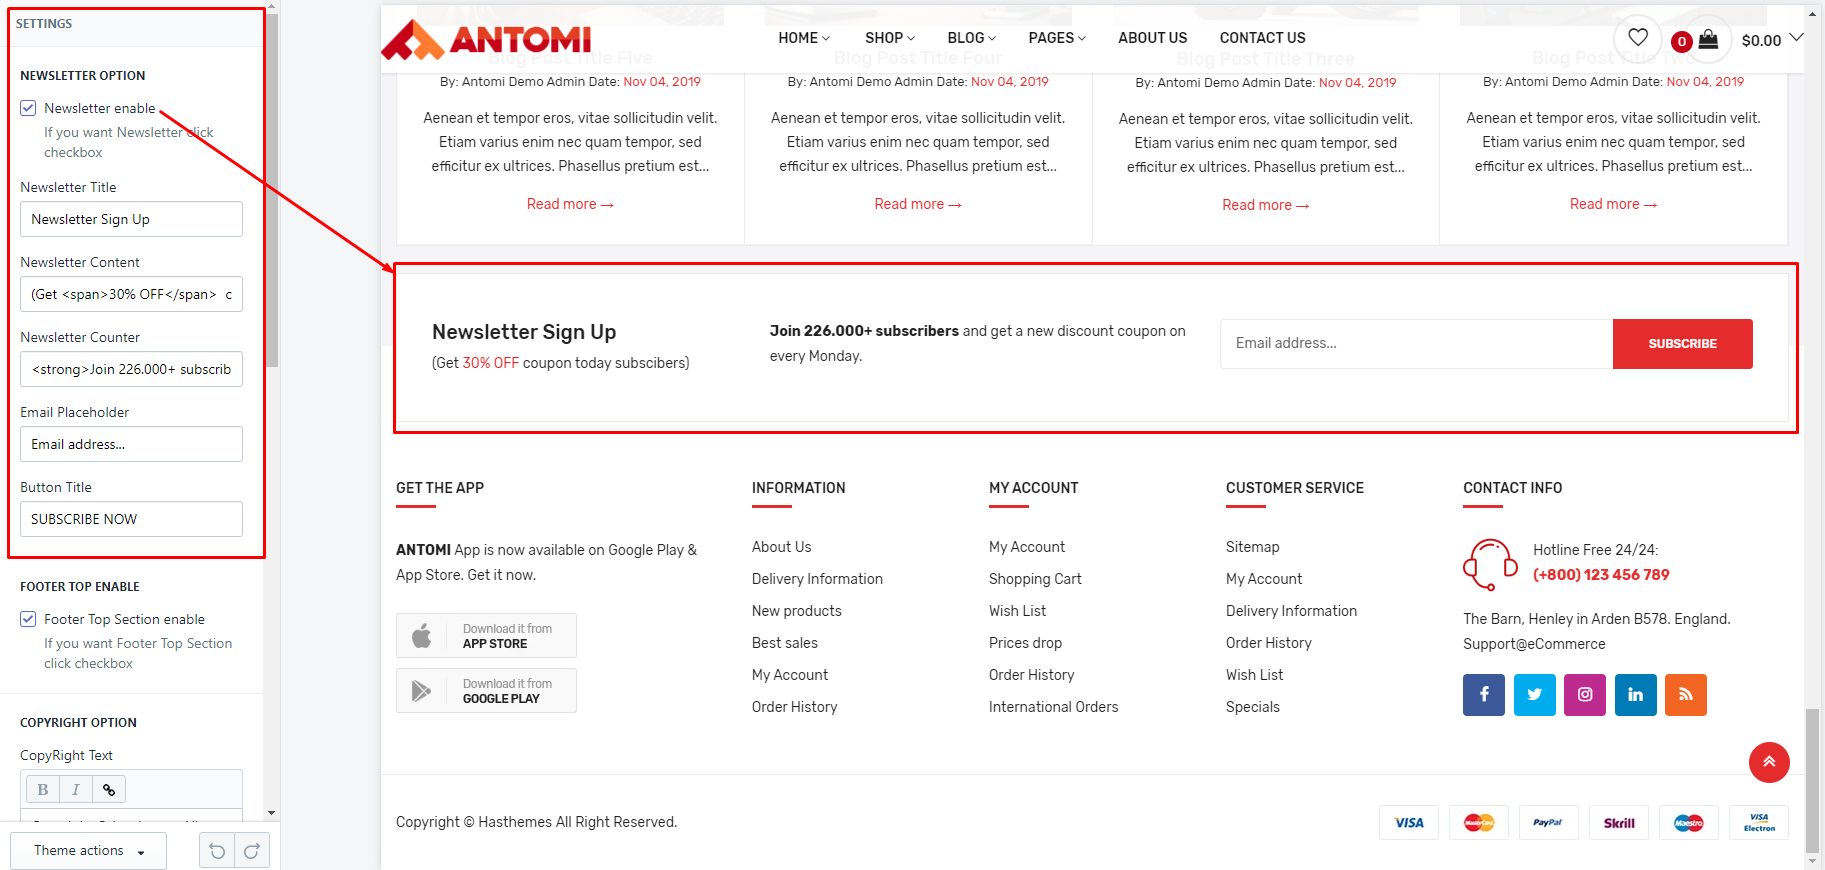
NEWSLETTER OPTION
- Go to Customizer > Sections > Footer
- NEWSLETTER OPTION : Follow bellow image
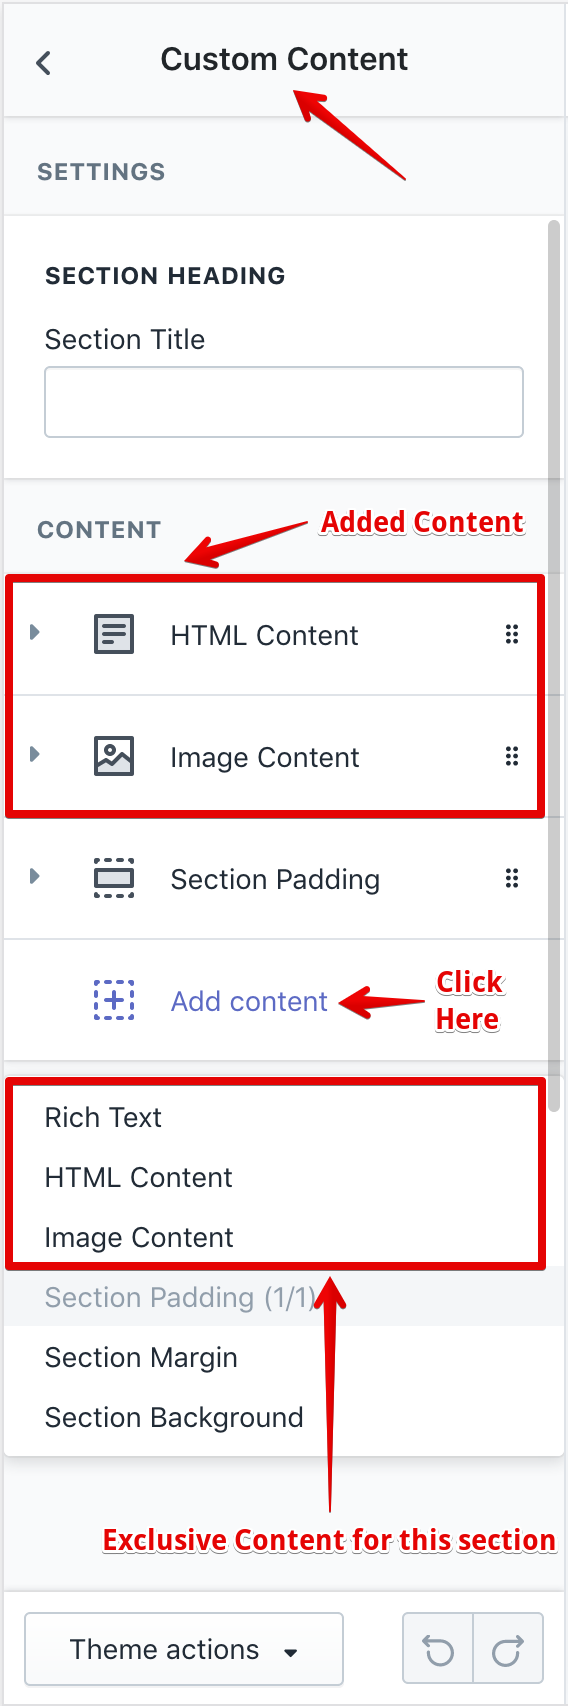
Custom Content
- Go to Customizer > Sections > Custom Content
- There is Two content - 1. HTML Content and 2. Image Content
- Click Add content then add content.
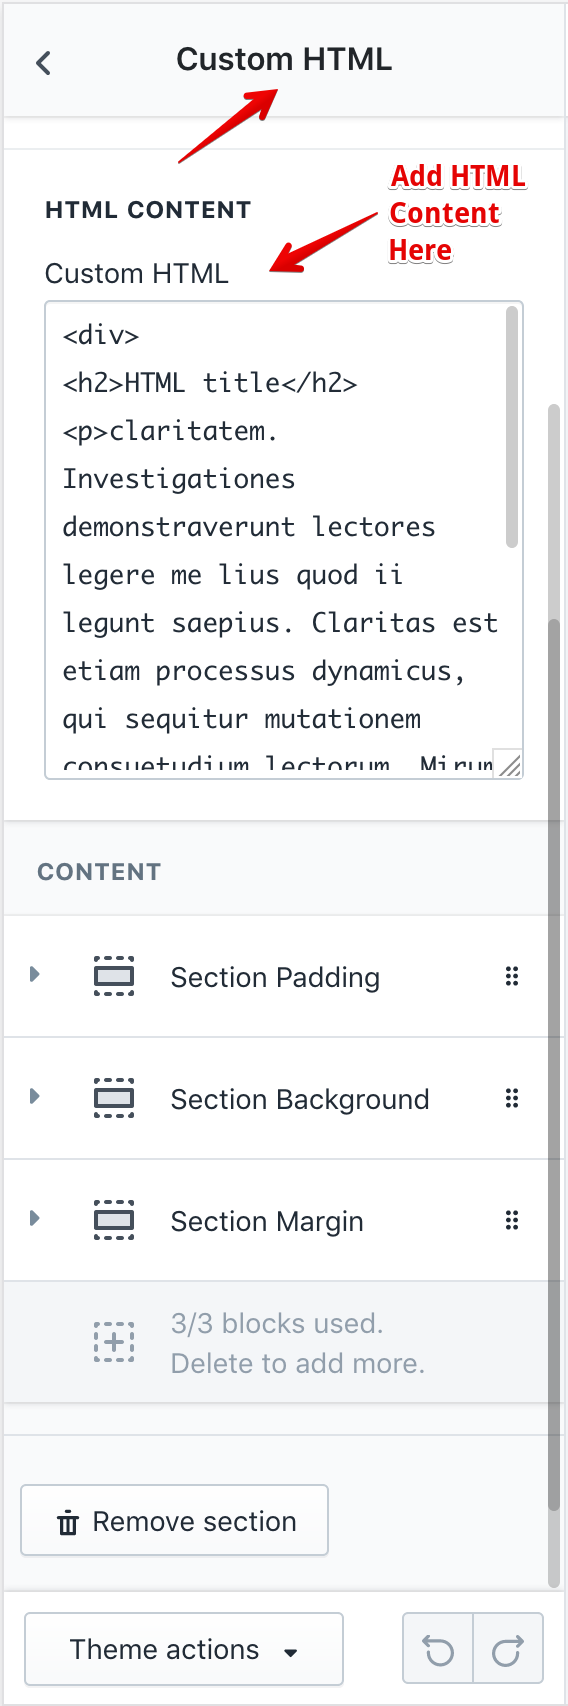
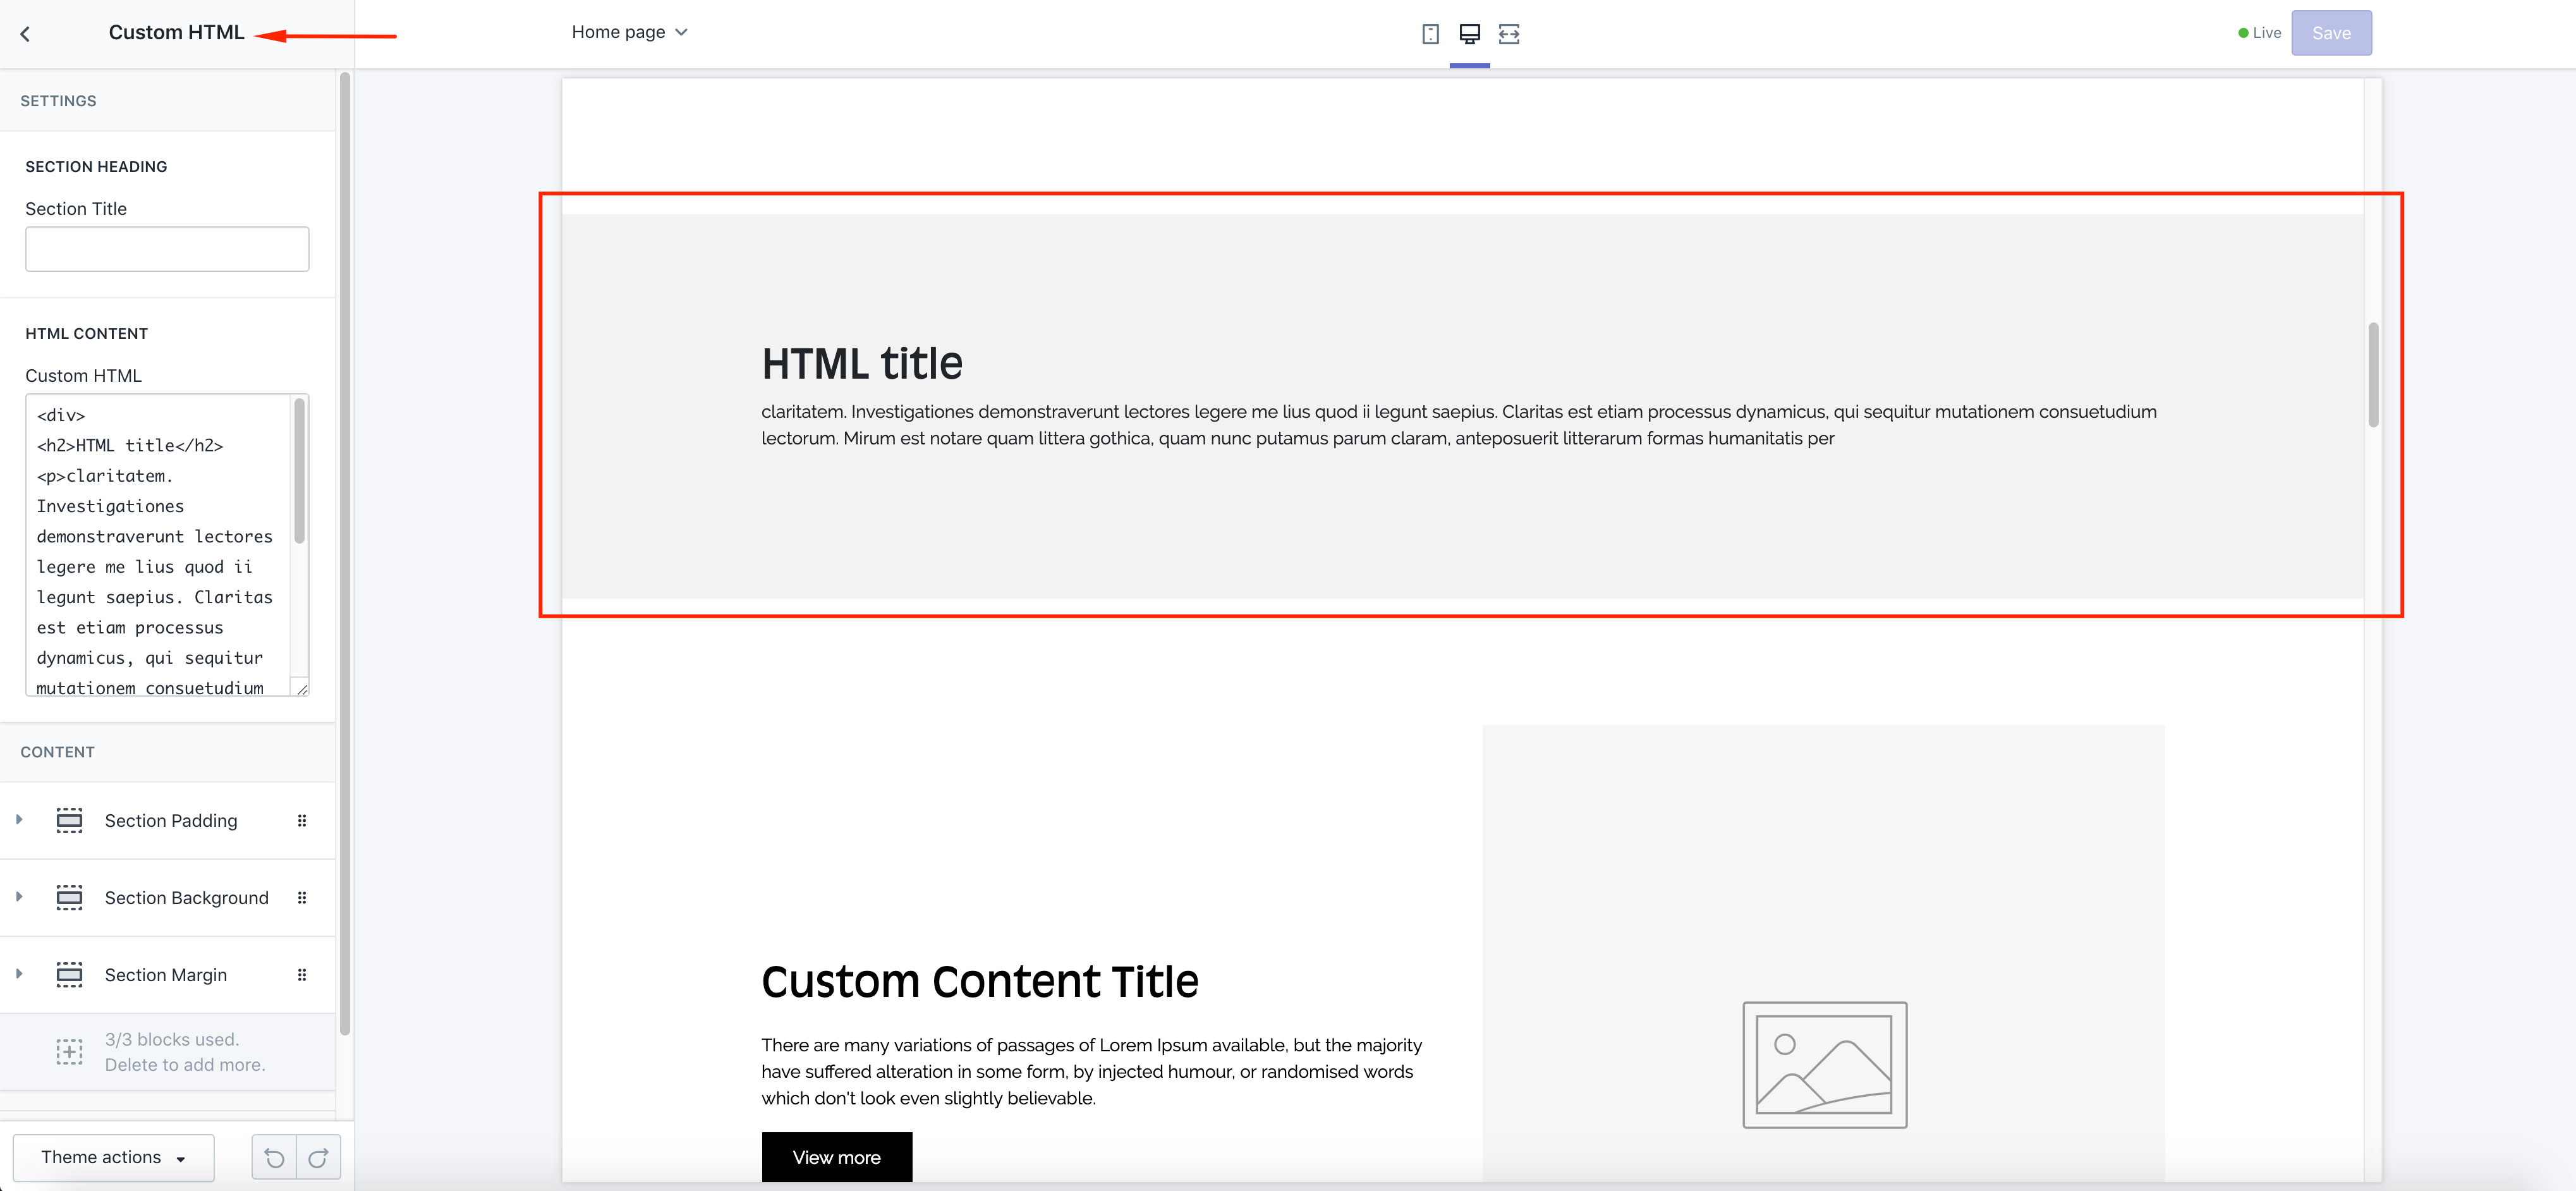
Custom HTML
- Go to Customizer > Sections > Custom HTML
- There is HTML content field. Add HTML content there.
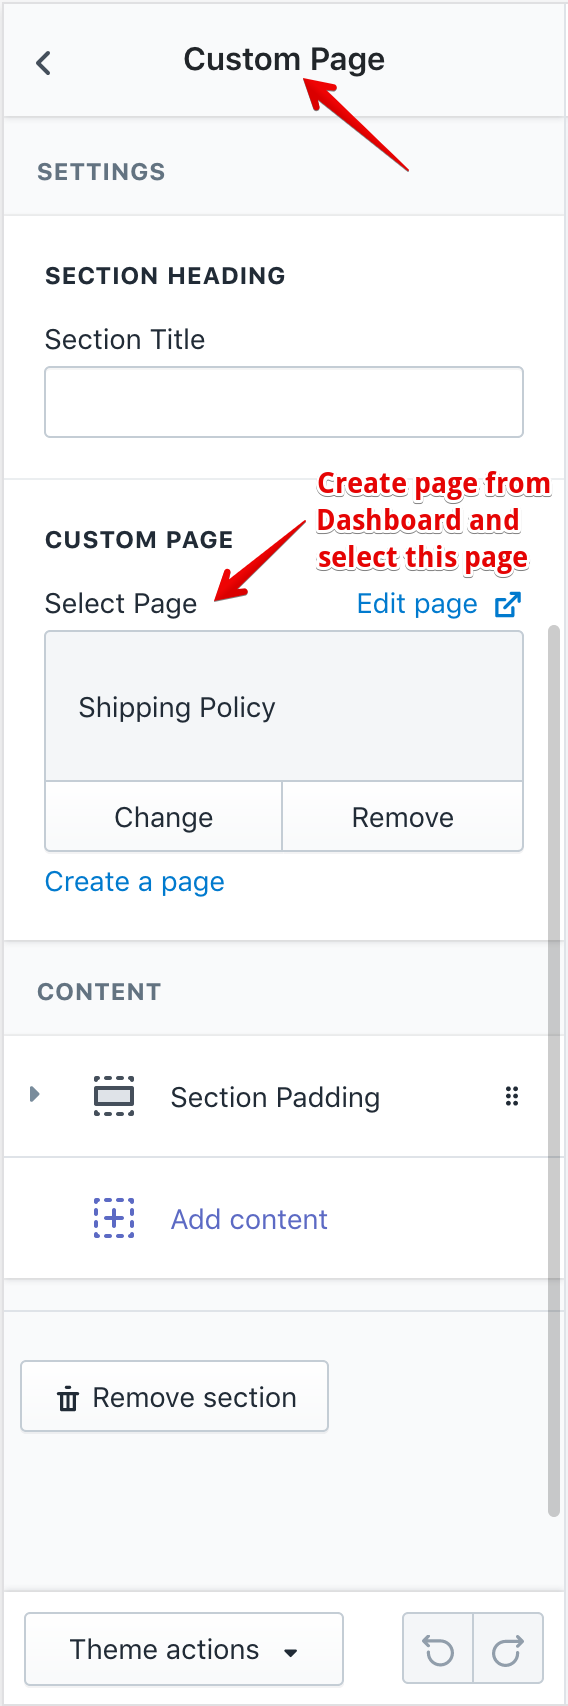
Custom Page
- Go to Customizer > Sections > Custom Page
- Click Add content then click FAQ as much as you like
FAQ
- Go to Customizer > Sections > FAQ
- Click Add content then click FAQ as much as you like
- FAQ have two field title and content
- Go to Customizer > Sections > Instagram
- Put your Instagram User ID and Access Token
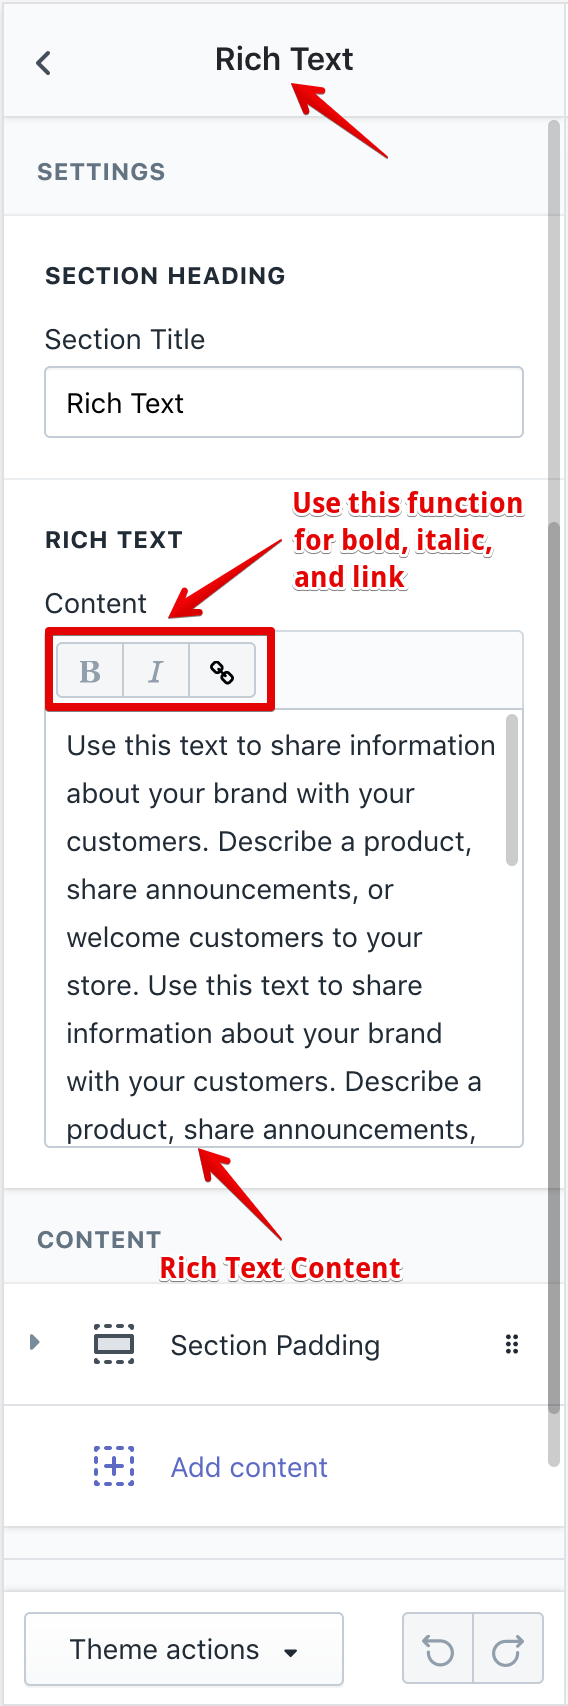
Rich Text
- Go to Customizer > Sections > Rich Text
- There is Rich Text content field.
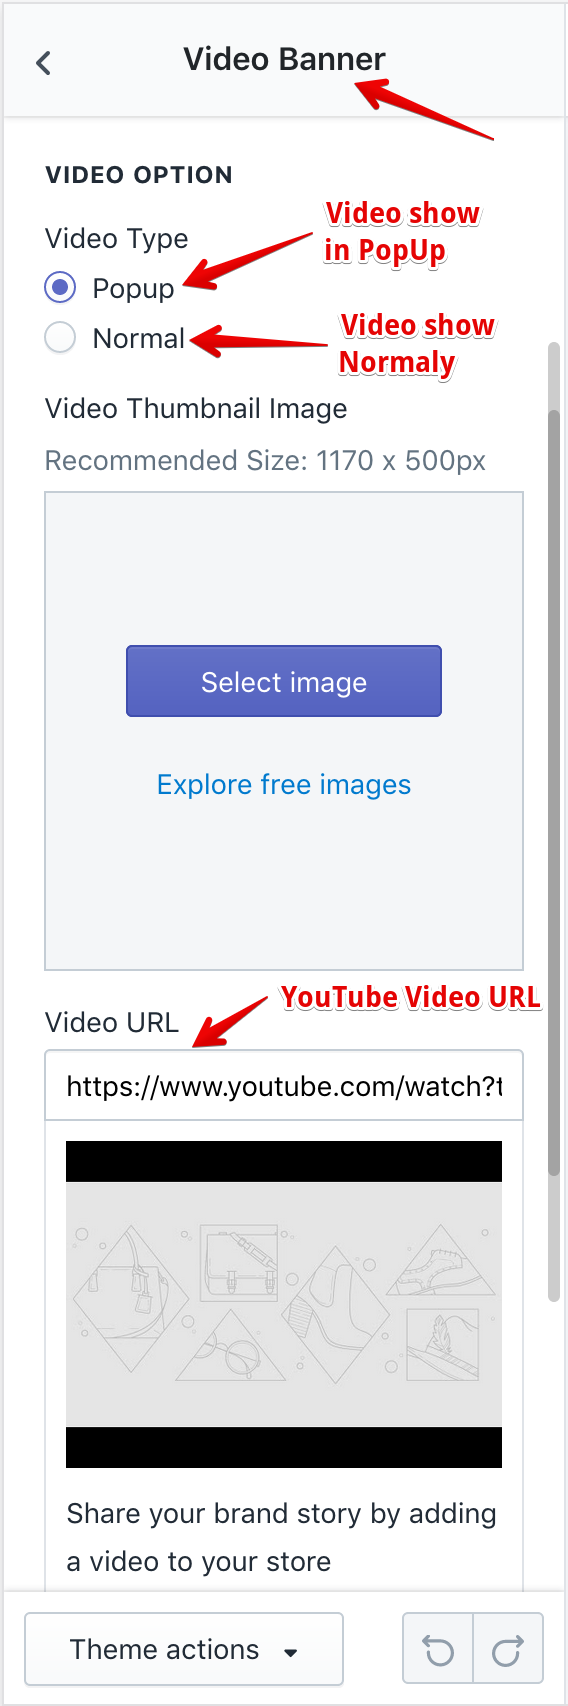
Video Banner
- Go to Customizer > Sections > Video Banner
- Put your Video URL in Video URL field.
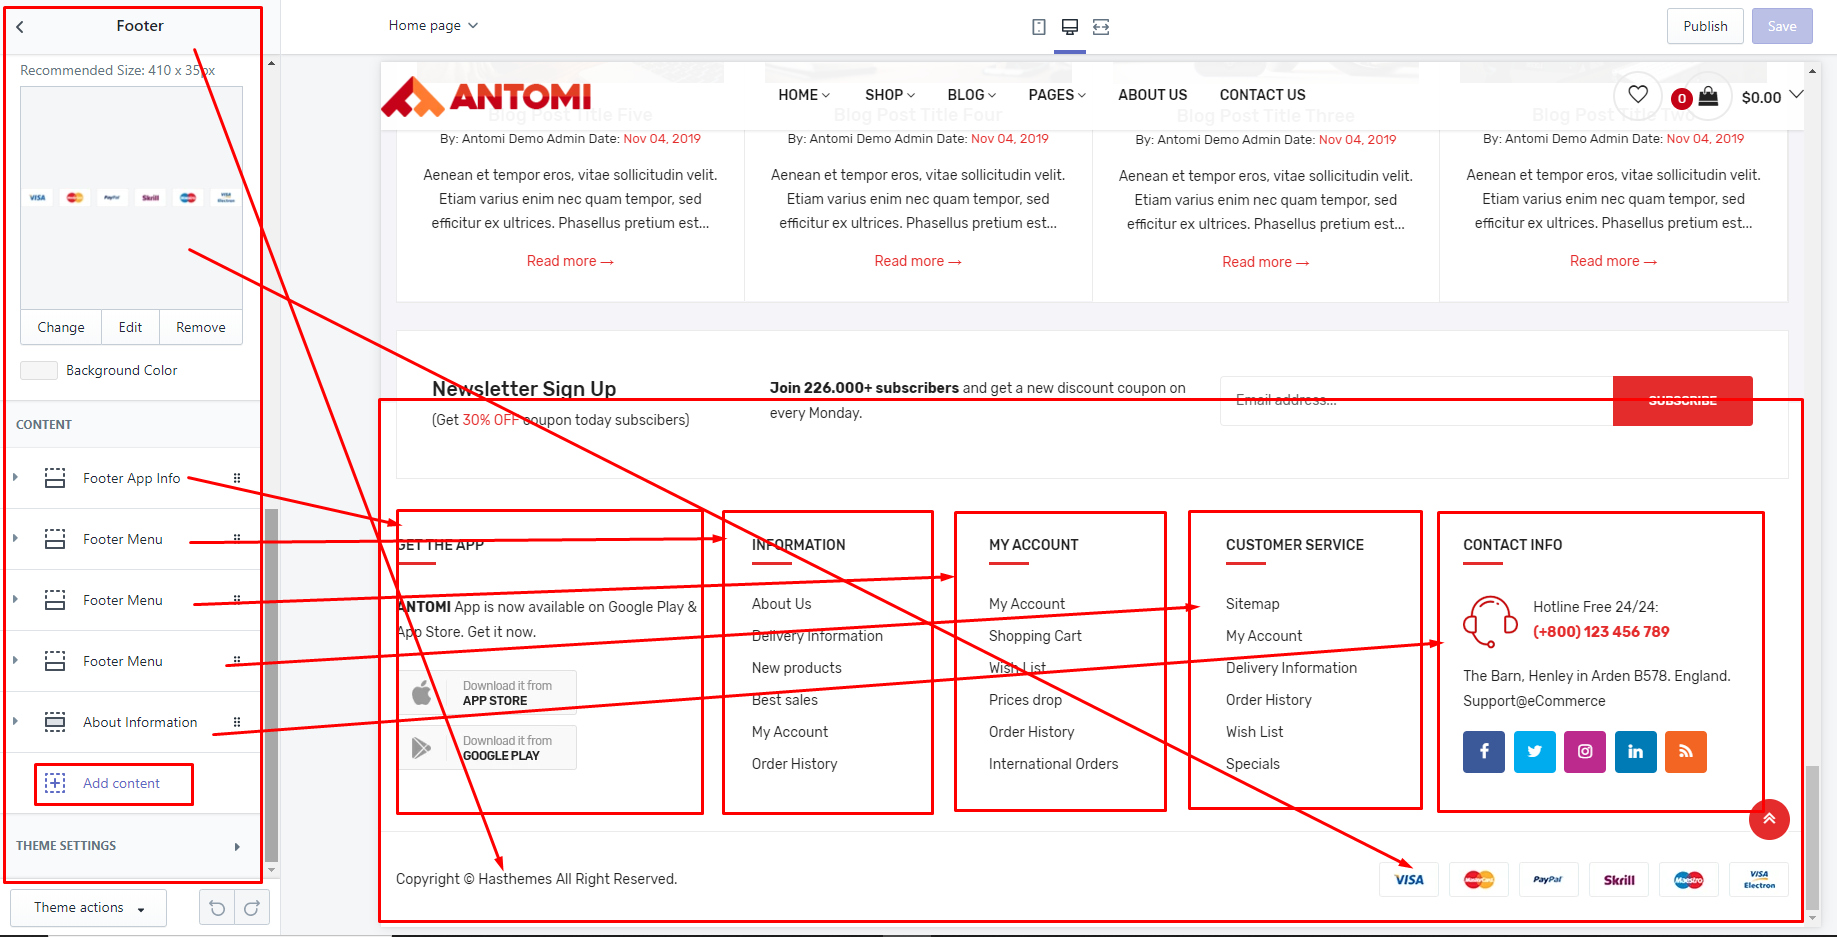
Footer
- Go to Customizer > Sections > Footer
- There is 6 footer content, you can easily add this. Follow bellow image